
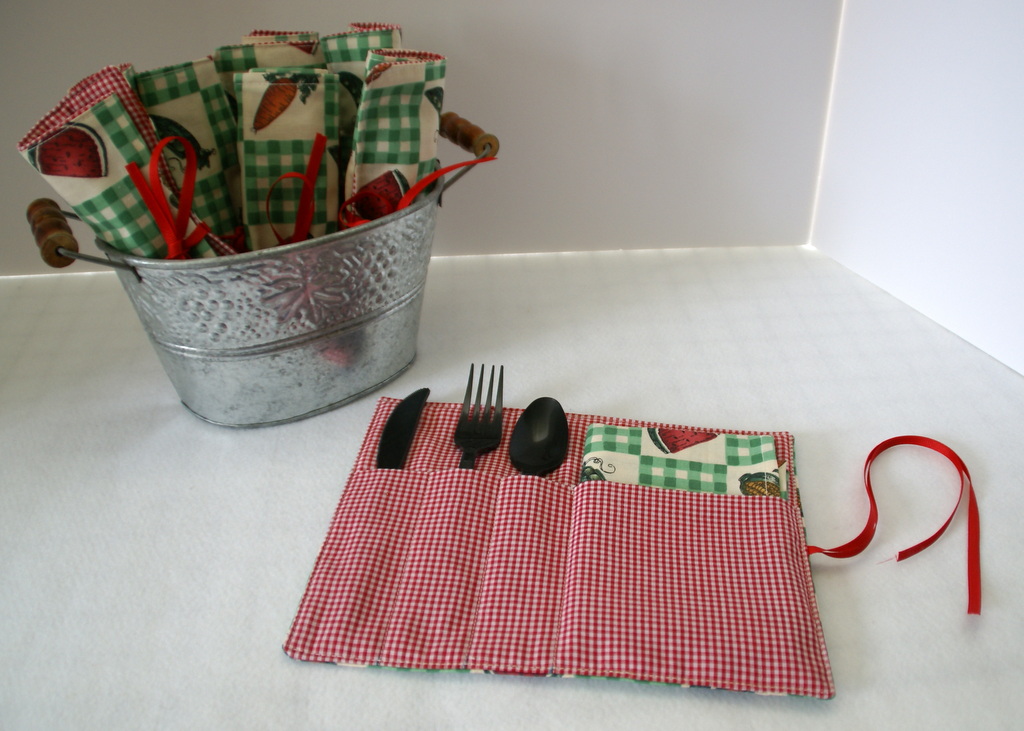
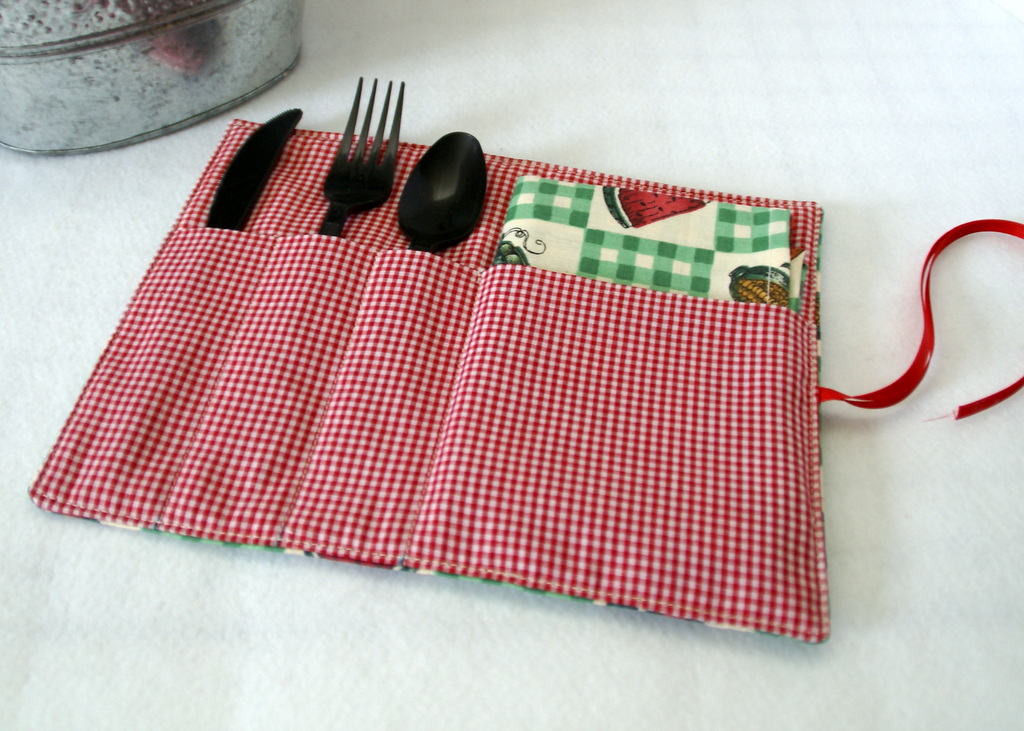
These sunny summer days are perfect for picnics and spending time outdoors. Here is a cute, washable silverware holder that you can make up to have stocked and ready to grab for an impromptu lunch in the park or a weekend outing with the family. These little picnic silverware rolls stitch up with sleeves to fit silverware and it even features a spot for a napkin. It is pretty easy sewing, so lets get started!
Materials Needed:
This will make 8 silverware rolls.
- 1 yd gingham fabric for lining and pocket
- 1/2 yd print fabric for outside
- 1/2 yd of batting
- 5 -6 yards of grosgrain ribbon
- Coordinating thread
Directions:

Cut
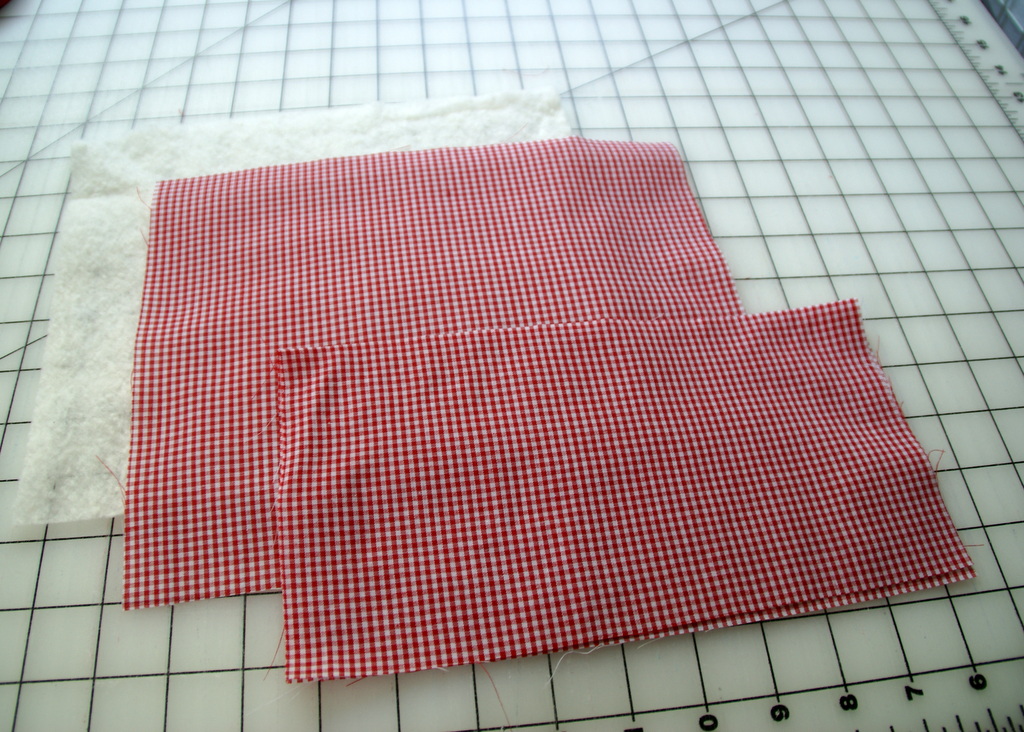
- 1 — 8″ x 10″ rectangle of print fabric
- 1 — 8″ x 10″ rectangle of batting
- 1 — 8″ x 10″ rectangle of gingham fabric for lining
- 1 — 10″ x 10″ rectangle of gingham fabric for pocket
- 22″ of grograin ribbon for the tie
Stitch

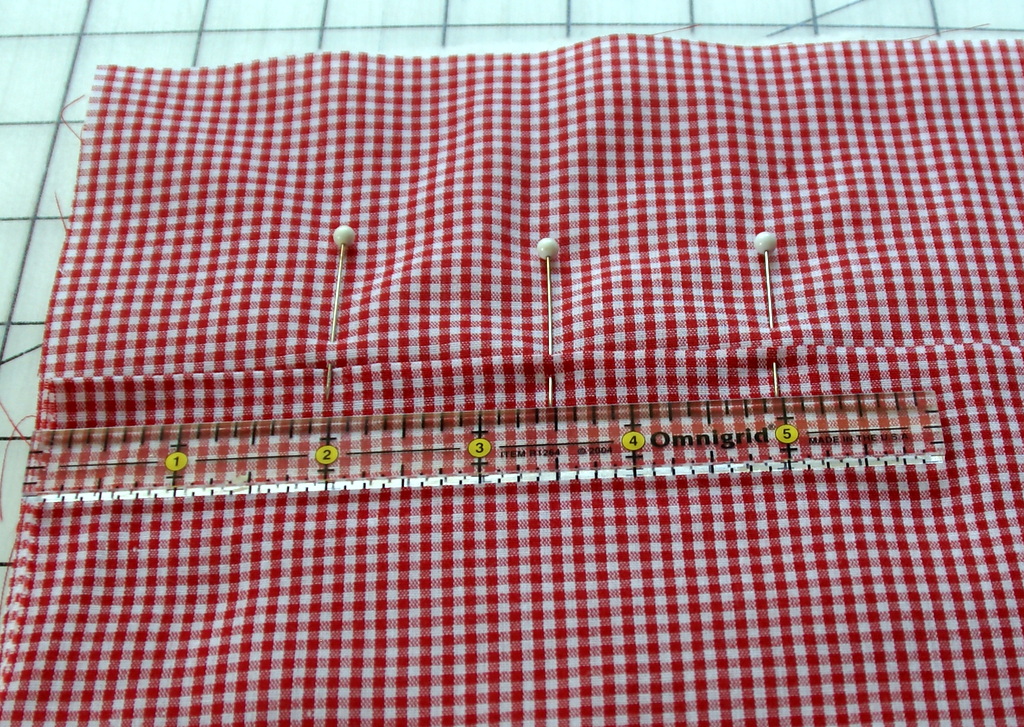
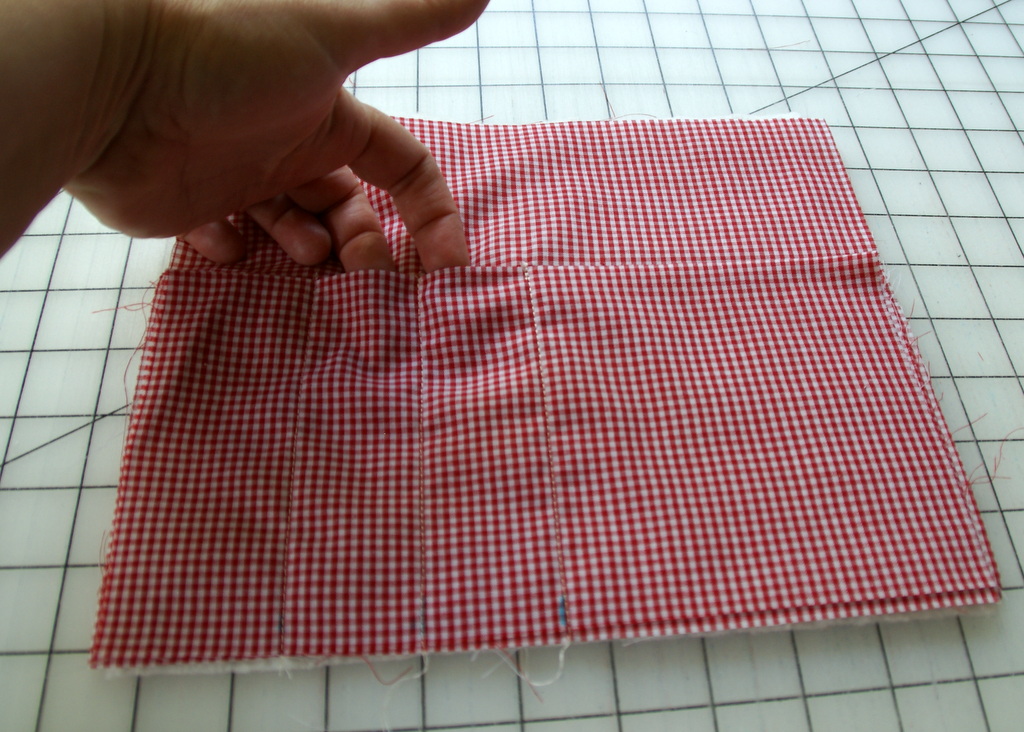
- Take the 10″ x 10″ pocket and fold in half and iron flat.

- Layer the batting, the lining and the pocket all facing up as shown.

- From the left side of the pocket, measure 2 inches, 3 1/2″ and 5″ at the top and bottom of the pocket. These will mark the stitch lines to make the channels for the silverware.

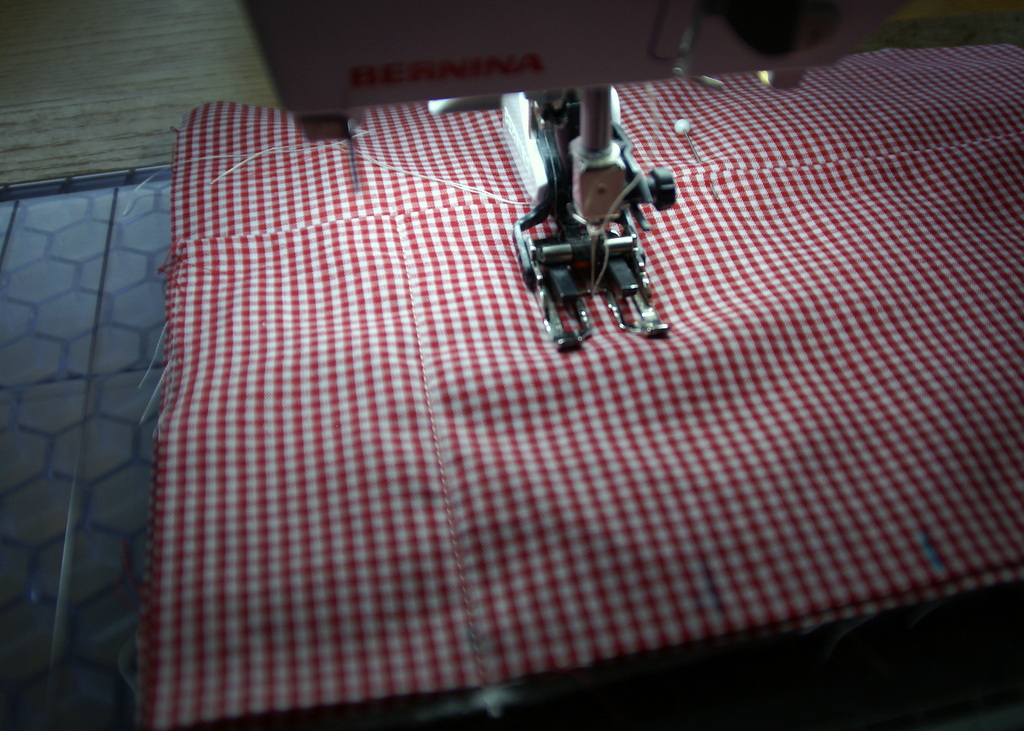
- Stitch down from the markings on the pocket to make the silverware channels. You will have three stitch lines. Do a couple of back stitches at the top to secure the channels.

- This is what the pocket channels will look like.

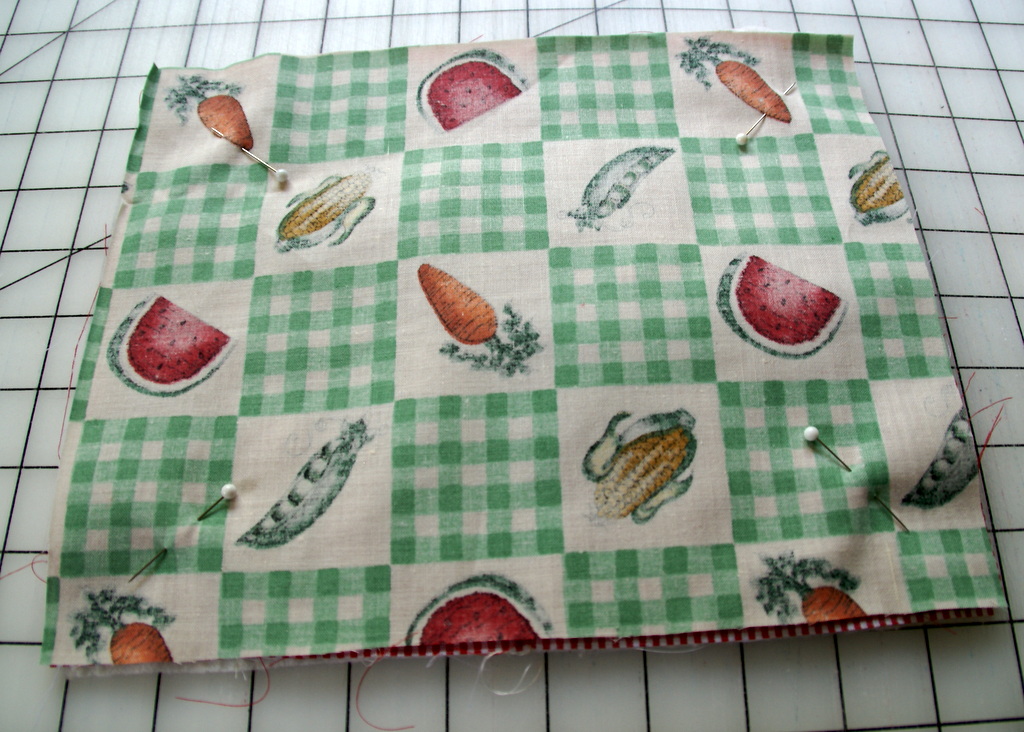
- Next, take your 22 inch grosgrain ribbon and fold almost in half leaving one end about one inch longer than the other. Pin the ribbon flat on the right side of the pocket about halfway down the side of the roll. Make sure that you will catch the ribbon when you stitch the side seam. Tuck the ends out of the way so that you do not catch them in the side seams.

- Layer the rectangle from the print fabric over the pocket, right sides together and pin in place.

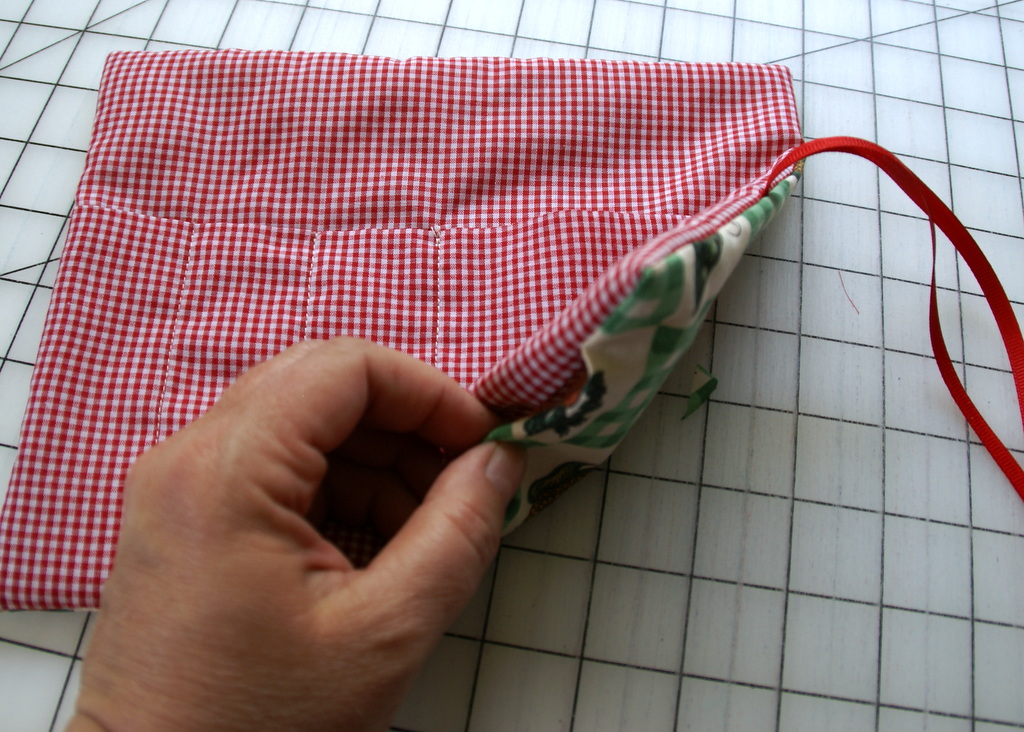
- With a 1/4″ seam, stitch all the way around the roll leaving an opening for turning on the bottom. Clip corners.

- Turn the roll right side out and tuck in the raw edges on the opening. Iron the silverware roll flat.

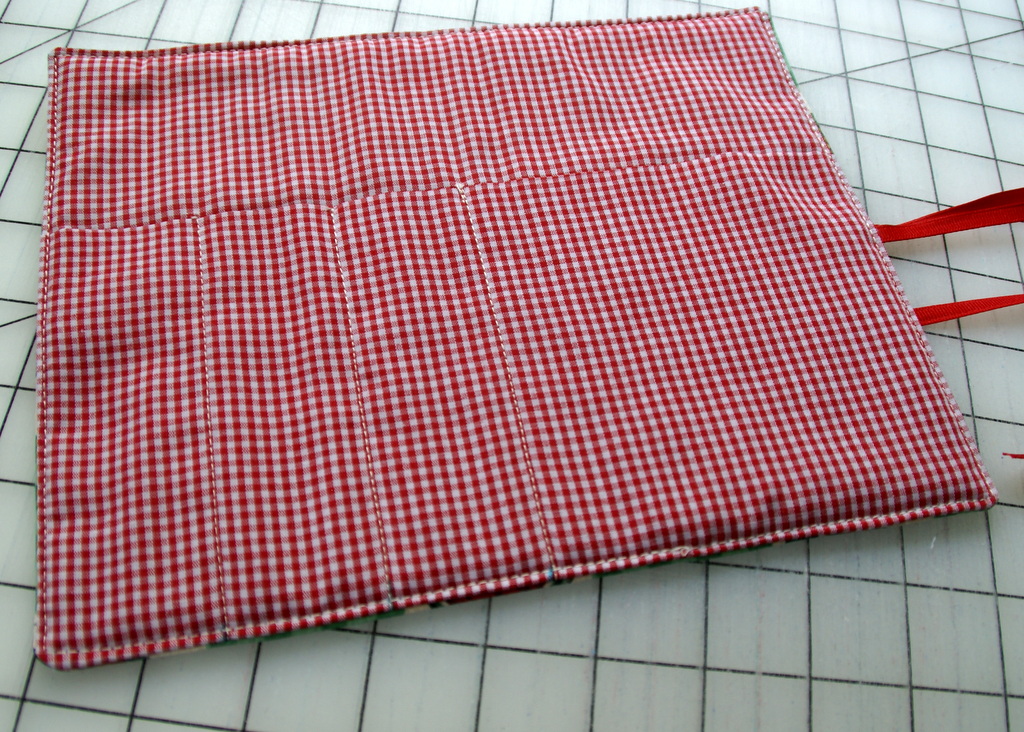
- Top stitch close to the edge of the roll all the way around being sure to catch the edges of the opening and sew them shut.

- Your first silverware roll is completed, now just make seven more! These really do stitch up fast, sew them assembly line style!


Variations!
A friend used this pattern but wanted to quilt the outside. Just Piece or quilt the outside fabric or block with the batting instead of including the batting with the lining. Then assemble according to the directions.
If you use regular silverware instead of plastic, the roll may be too short, add an inch and cut it 9″ x 10″ for the outside fabric, batting and lining and stitch up using the same directions.

