
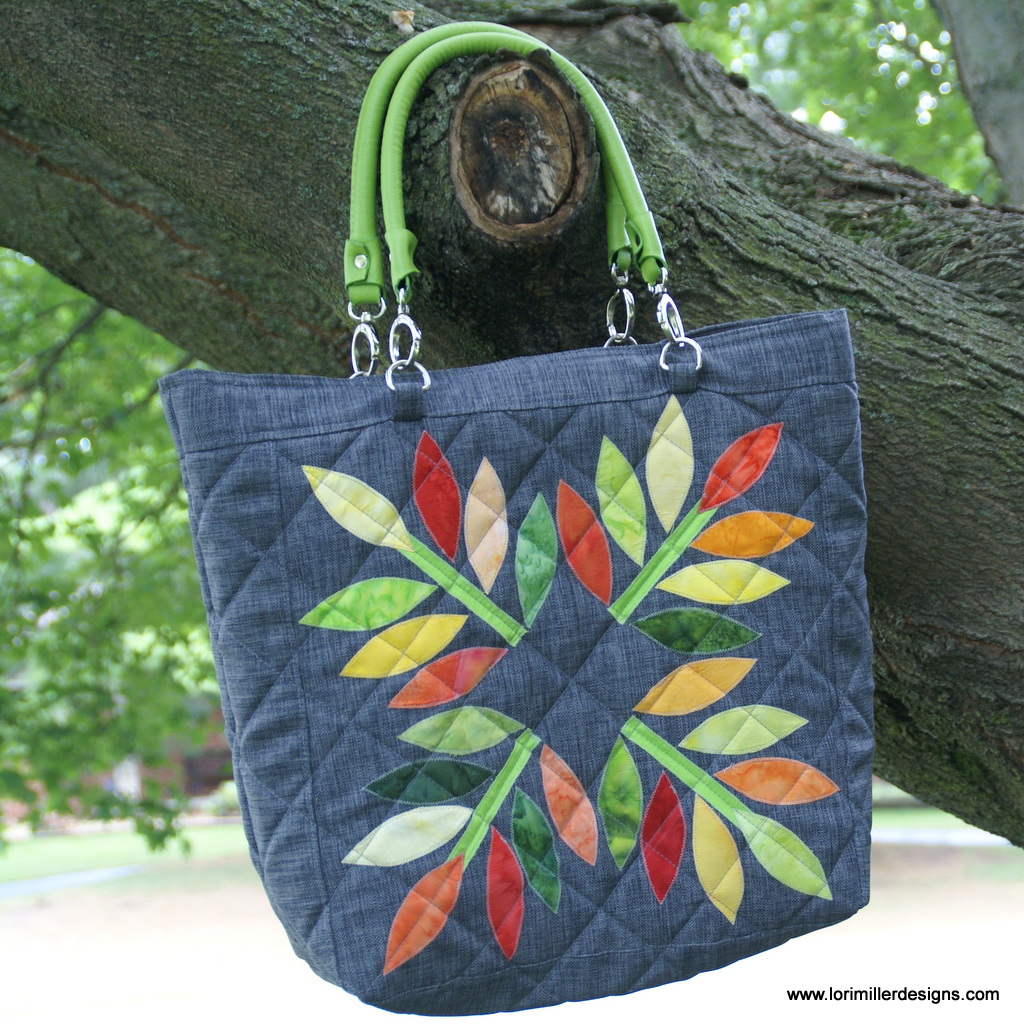
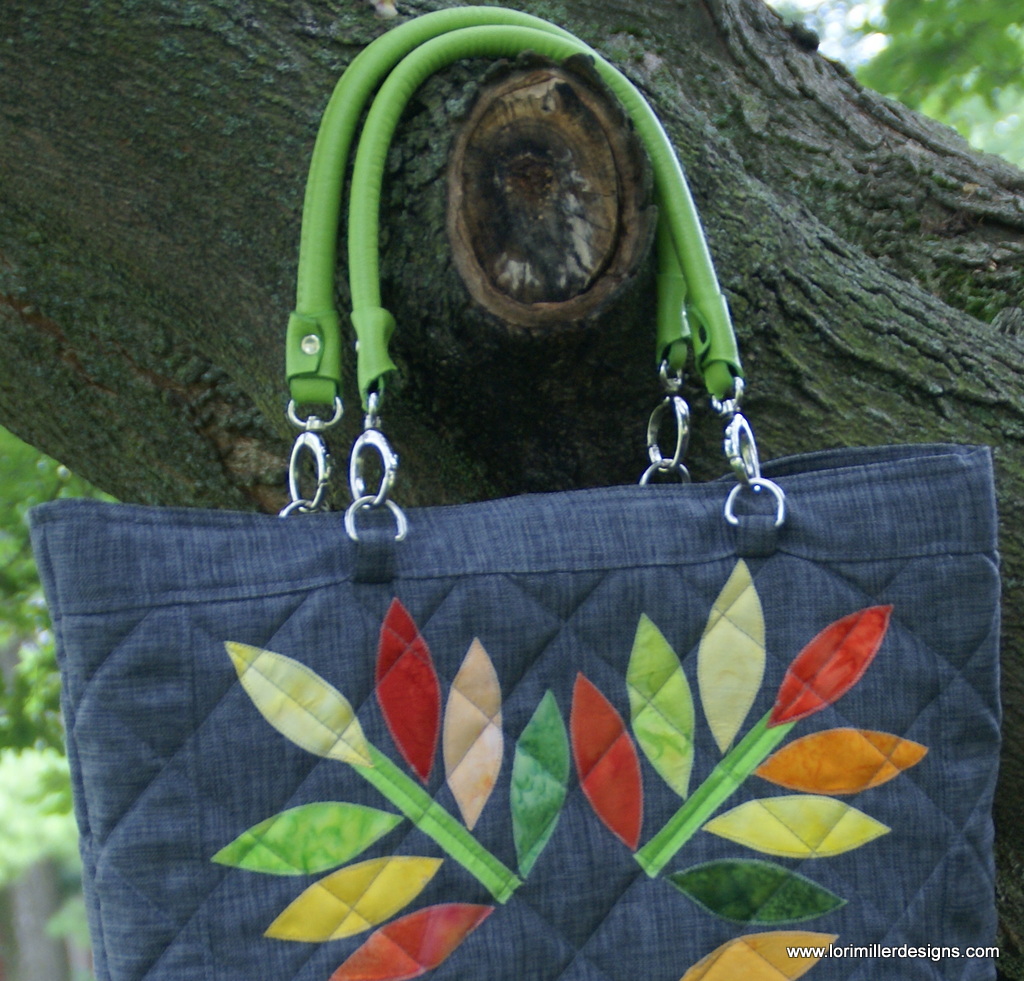
Its July and summer is in full swing. I couldn’t resist making this bright and cheery Summer Flora Tote. It’s perfect to take to the beach, fill up with a sewing project to work on or just tote all of your goodies in style. This Summer Flora Tote was designed with EQ Mini Software by The Electric Quilt Company . It uses a simple Horizontal strip layout with a couple of applique quilt block designs that will end up as the feature on each side of the tote. Stitched in lots of bright summer colors, it reminds me of all of the flowers blooming this time of year. Finish up this simple design with simple quilting and a fun handle.

EQ Mini is a scaled down, simpler version of EQ7 quilt design software. This program was created for quilters who are just getting started using software for quilt design. EQ Mini will help you create, edit, share, and print patterns and yardage for your quilt designs.

When I designed this little quilt, I used a simple horizontal strip layout with borders. I just added two quilt blocks that when assembled would become the sides of the tote.
Summer Flora Quilted Tote
Finished size is approximately 14″ W x 14 1/2″ T x 5″ D
Materials
- 1 pack of 5″ charm squares or at least 28 – 5″ squares (I used some Bali Snaps by Hoffman Fabrics)
- 1/8 yd of bright green solid
- 1 1/4 yd Grey Linen
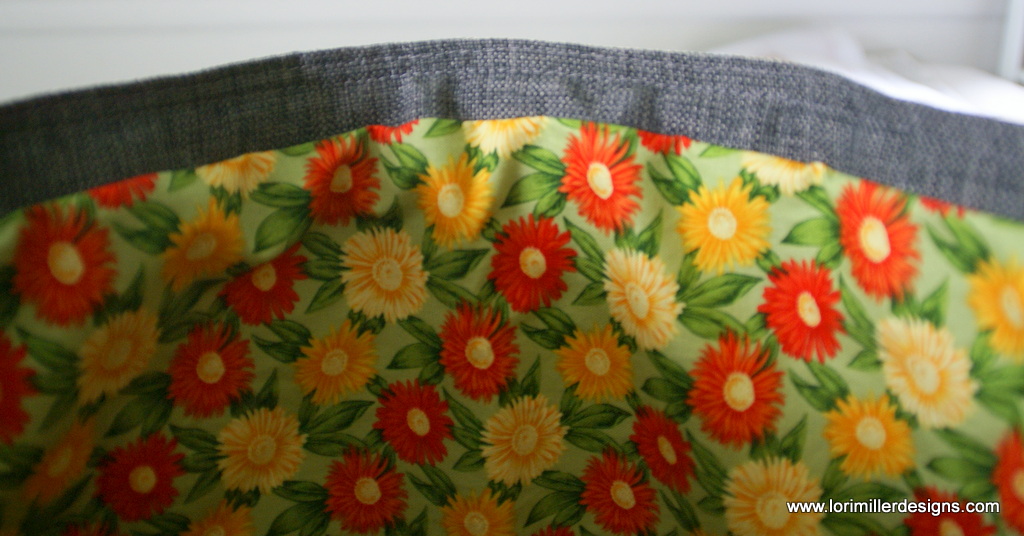
- 1 1/4 yd of coordinating print for lining
- 1 1/2 yd of muslin for backing
- 1 1/2 yd of Fusible Web (like Pellon 805 Wonder Under or Pellon Lite EZ Steam II)
- 20″ x 49″ piece of Pellon FF77 Flex Foam
- 4 – 1″ D rings
- 2 handles with lobster clips
- Summer Flora Tote Templates
Directions
Cut Fabric:
From bright green solid, cut a 6″ x 10″ rectangle
From Grey Linen, cut:
- 1 — 5 1/2″ x 14 1/2″ strip
- 2 — 3 1/2″ x 33 1/2″ strips
- 2 — 14 1/2″ x 14 1/2″ squares
- 2 — 3 1/2″ x 19 1/2″ strips
- 4 – 2″ x 4″ strips for handle tabs
From lining fabric
- 1 — 18 1/2″ x 36″ rectangle
From fusible web, cut:
- 28 — 4 1/2″ squares
- 1 — 5 1/2″ x 9 1/2″ rectangle

Make the Applique Blocks
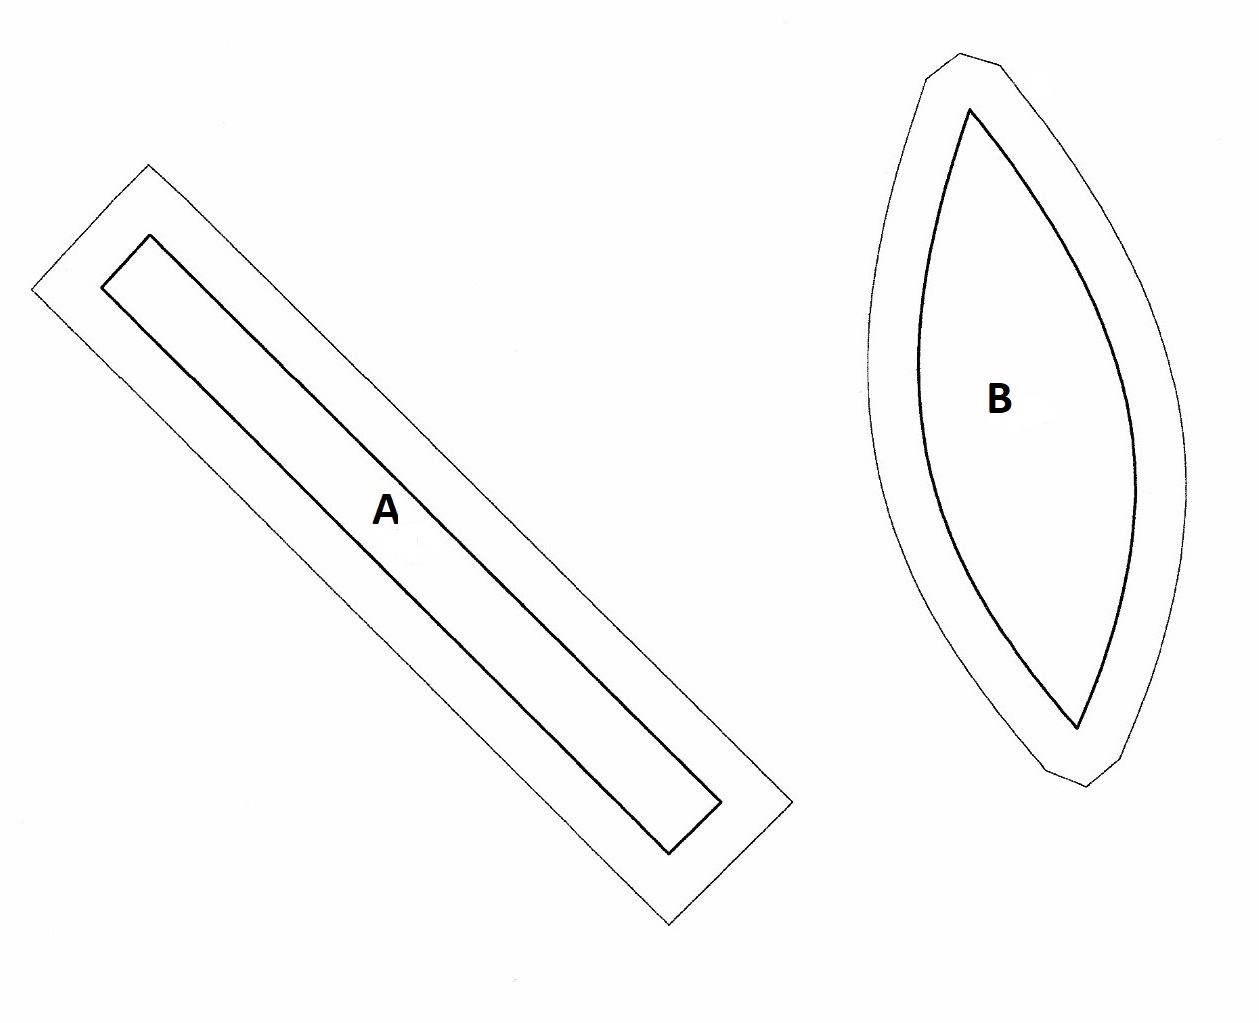
- Download and print out the Summer Flora Tote Templates. If you plan on machine appliqueing the stems and leaves, you can cut off the outside seam allowance before tracing the templates.
- Press the large piece of fusible web to the wrong side of the bright green stem rectangle.
- Using the stem template A, trace and cut out 8 stems.

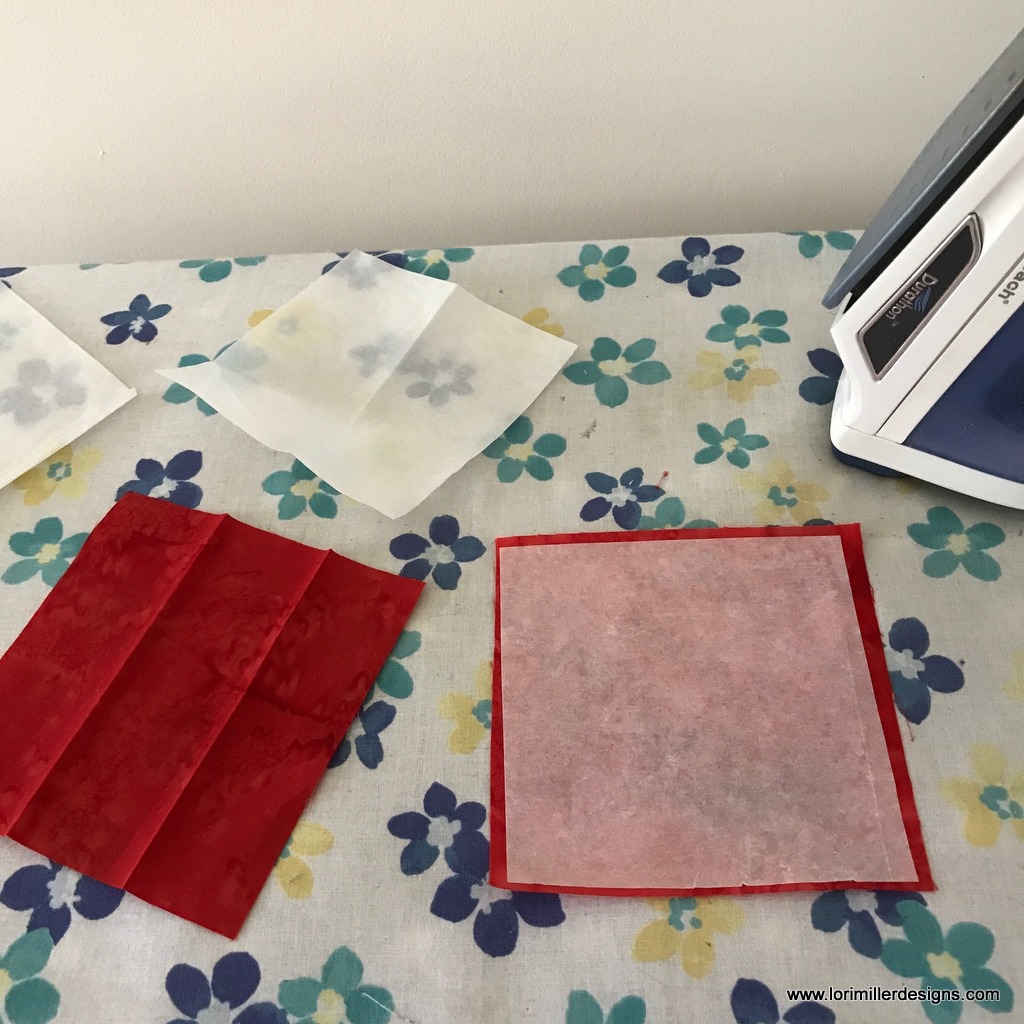
- Press the 4 1/2″ fusible web to the wrong side of 28 – 5″ charm squares.

- Using the leaf template B, trace 2 leaves onto each charm square and cut them out.

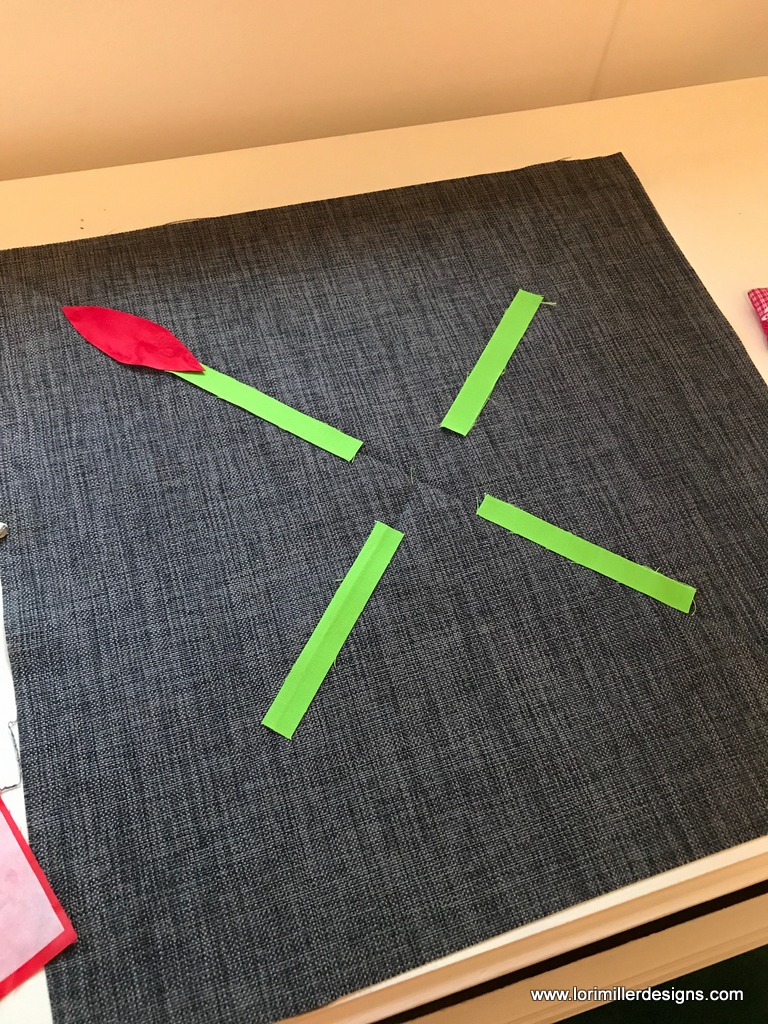
- Using the block diagram as a visual guide, arrange the stems and leaves on each of the 14 1/2″ linen squares.

- I folded and pressed the squares diagonally to get guidelines to use.

- Once you have the arranged the leaves and have the design how you like it, set aside the leaves at the top of the stems and press the remaining stems and leaves onto the linen square.

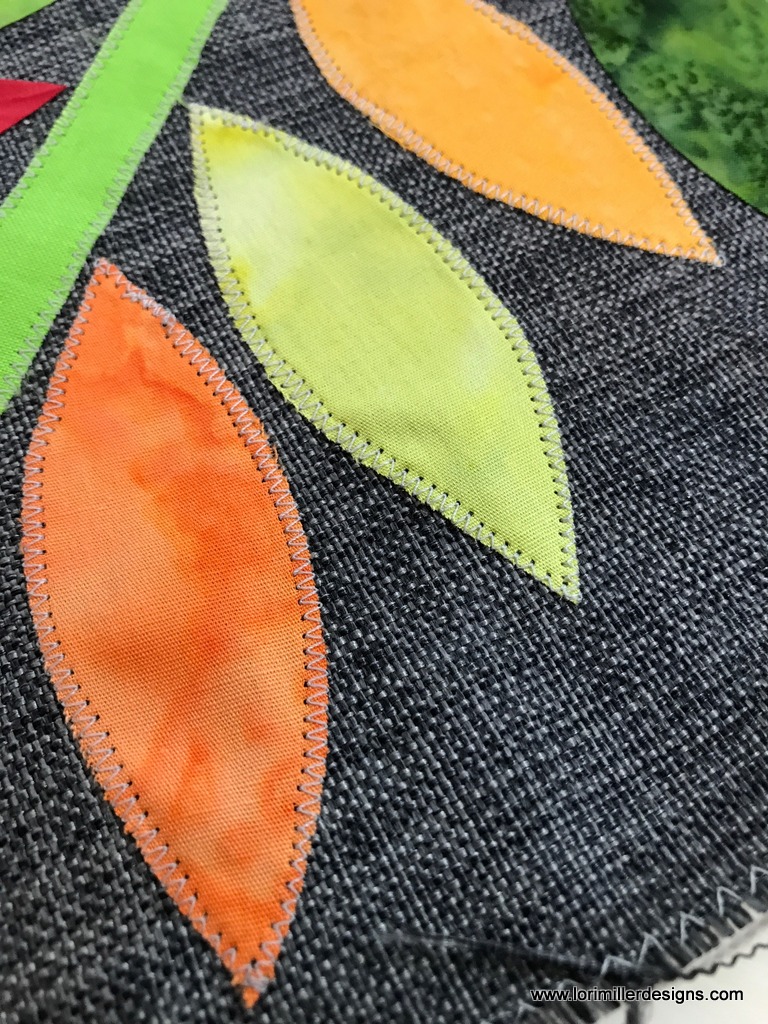
- Using a small zigzag stitch, applique around the stems and leaves. I used a length of .9 mm and a stitch width of 2.5 mm.

- Hint, when you are machine applique stitching the points of the leaves, narrow the stitch width to 2.0 mm just at the points.
- Once you have appliqued the stems and leaves, arrange the leaves on the top of the stems and press down.
- Machine applique the remaining leaves.


Assemble the Tote top


- Sew the 5 1/2″ x 14 1/2″ linen center strip between the two appliqued squares. Press to one side and top stitch if desired.
- Sew the 3 1/2″ x 33 1/2″ strips to each side of the applique unit. Press to one side and top stitch if desired.
- Prepare the loops for the handles. Fold in half the long way and press a crease. Open back up and fold each raw edge to the center. Topstitch close to the folded edges. Topstitch on the other side to match.

- Slide the d ring over the strip and fold in half. Position the d ring and strip 6″ from the edge of the tote and baste into the seam. Repeat for the 3 other loops.
- Sew the 3 1/2 ” x 20 1/2″ linen strips to the top and bottom of the applique unit. Press to one side. Topstitch close to the seam.
- Mark the quilt top if you want to quilt the 2 ” diamond pattern like I did. I used a washable white marking pen.
- Make a quilt sandwich with the muslin, flex foam and the top applique unit.
- Pin baste the quilt layers together.

- Quilt as desired.


Finish the tote
- Trim tote to 19 1/2″ x 39 1/2″. Only on the top ends of the tote, trim the flex foam to be 1 inch shorter than the outside of the tote. You will be folding the top of the tote down into the inside over the flex foam.
- Fold the tote in half, right sides together (RST) and pin aligning seams.
- Stitch the sides and bottom of the tote.
- Box each corner and measure up 2 1/2″ from the point and stitch across the tote a 5″ long seam. Trim seam.
- Fold the lining in half, RST and stitch the sides and bottom of the lining leaving an opening for turning on the side of the tote.
- Box each corner of the lining by measuring up 2 1/2 inches from the point and stitching across the lining corner with a 5 ” seam. Turn the lining right side out.
- Tuck the lining into the tote with RST. Pin aligning the seams. Stitch around the top of the tote.
- Pull the tote right side out through the opening in the lining.

- Push the lining down into the tote. The lining is shorter, so the top of the tote should fold down to the inside of the tote about an inch or so. Pin in place. Top stitch along the edge of the top of the tote and again 1/4″ away.
- Tack the lining to the bottom sides of the tote from the inside.

- Attach your handles.
Use a favorite charm pack or cut up some colorful scraps for this tote. Choose another favorite applique block or pieced block for the tote sides. I would love to see your Summer Flora Tote, tag me on instagram @lorimillerdesigns.
Looking for the EQ Mini Design Instructions? You can find them HERE.
For more projects and tips and techniques on using EQ Mini, visit my Electric Quilt blog series EQ Mini Friday Fun.
For more information on EQ Mini software, go to EQ Mini.

