Grandma Town BOM #3 – Nine Patch and Color Row

Nine Patch - Grandma Town BOM Lori Miller Designs

Is it Spring yet??  I laugh because it is snowing right outside my window right now.  Lets think happy thoughts like more quilting.  It is time for the next block of the month (BOM) for my Grandma Town Series.  This month is a couple of quick blocks, a Nine Patch and two Color Block rows.  Both of these are simple and will give you time to catch up with the two blocks already released.  I hope you are sewing your Grandma Town memories along with me row by row.

P1100164

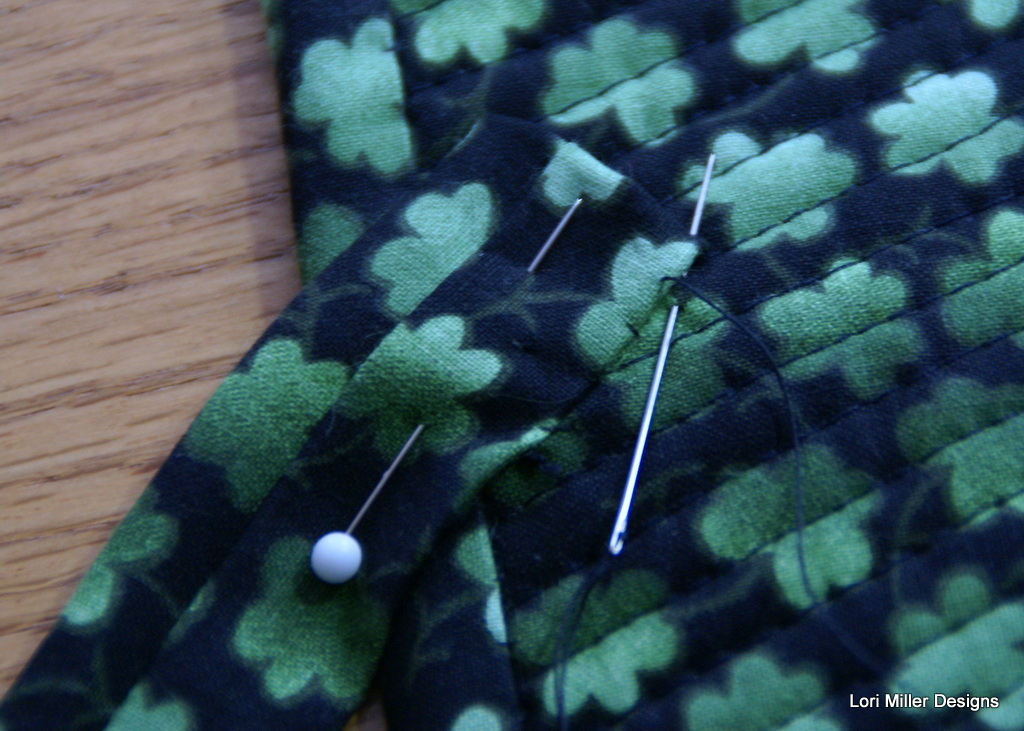
  My Grandma made very utilitarian quilts and the Nine Patch quilt square was simple to cut and stitch by hand.  I have found some churn dash squares that Grandma made on a quilt top I found in her attic, but most of her quilt tops certainly were made from a lot of Nine patches in very interesting color combinations.  They were made from scraps after all, and nothing went to waste.

P1100158

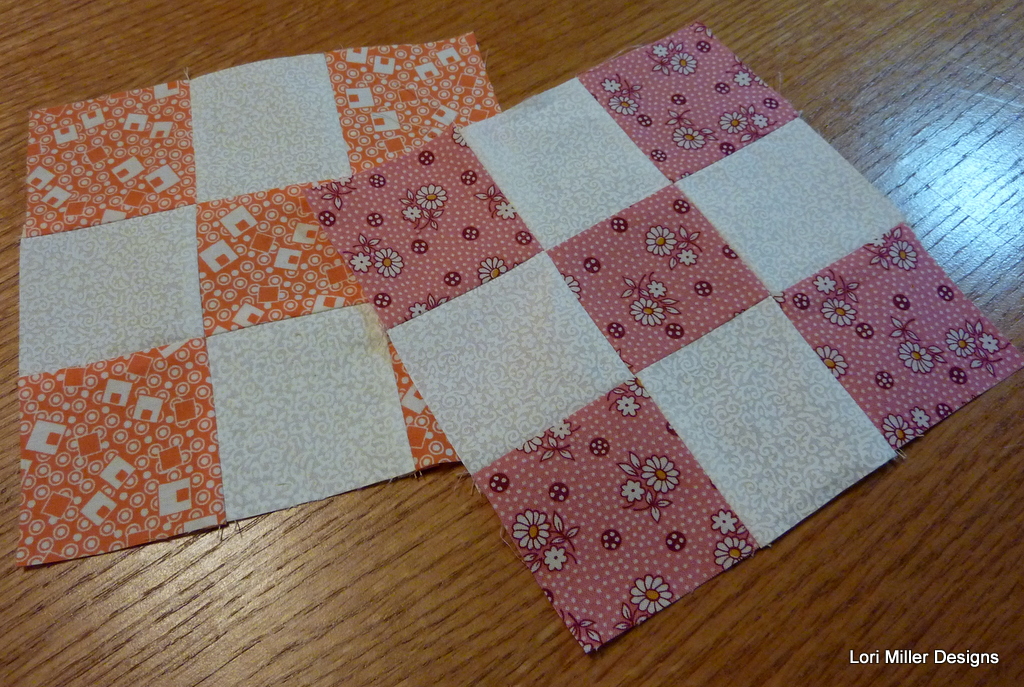
  Since Grandma lived through the great depression and because I had been saving vintage and reproduction 30’s fabrics, I am pulling them out to make a 30’s version of this quilt too.  You may see some of these muted, tiny prints in my upcoming blog posts.  It will be an interesting look compared to my bright and bold colored Grandma Town Quilt.

SONY DSC

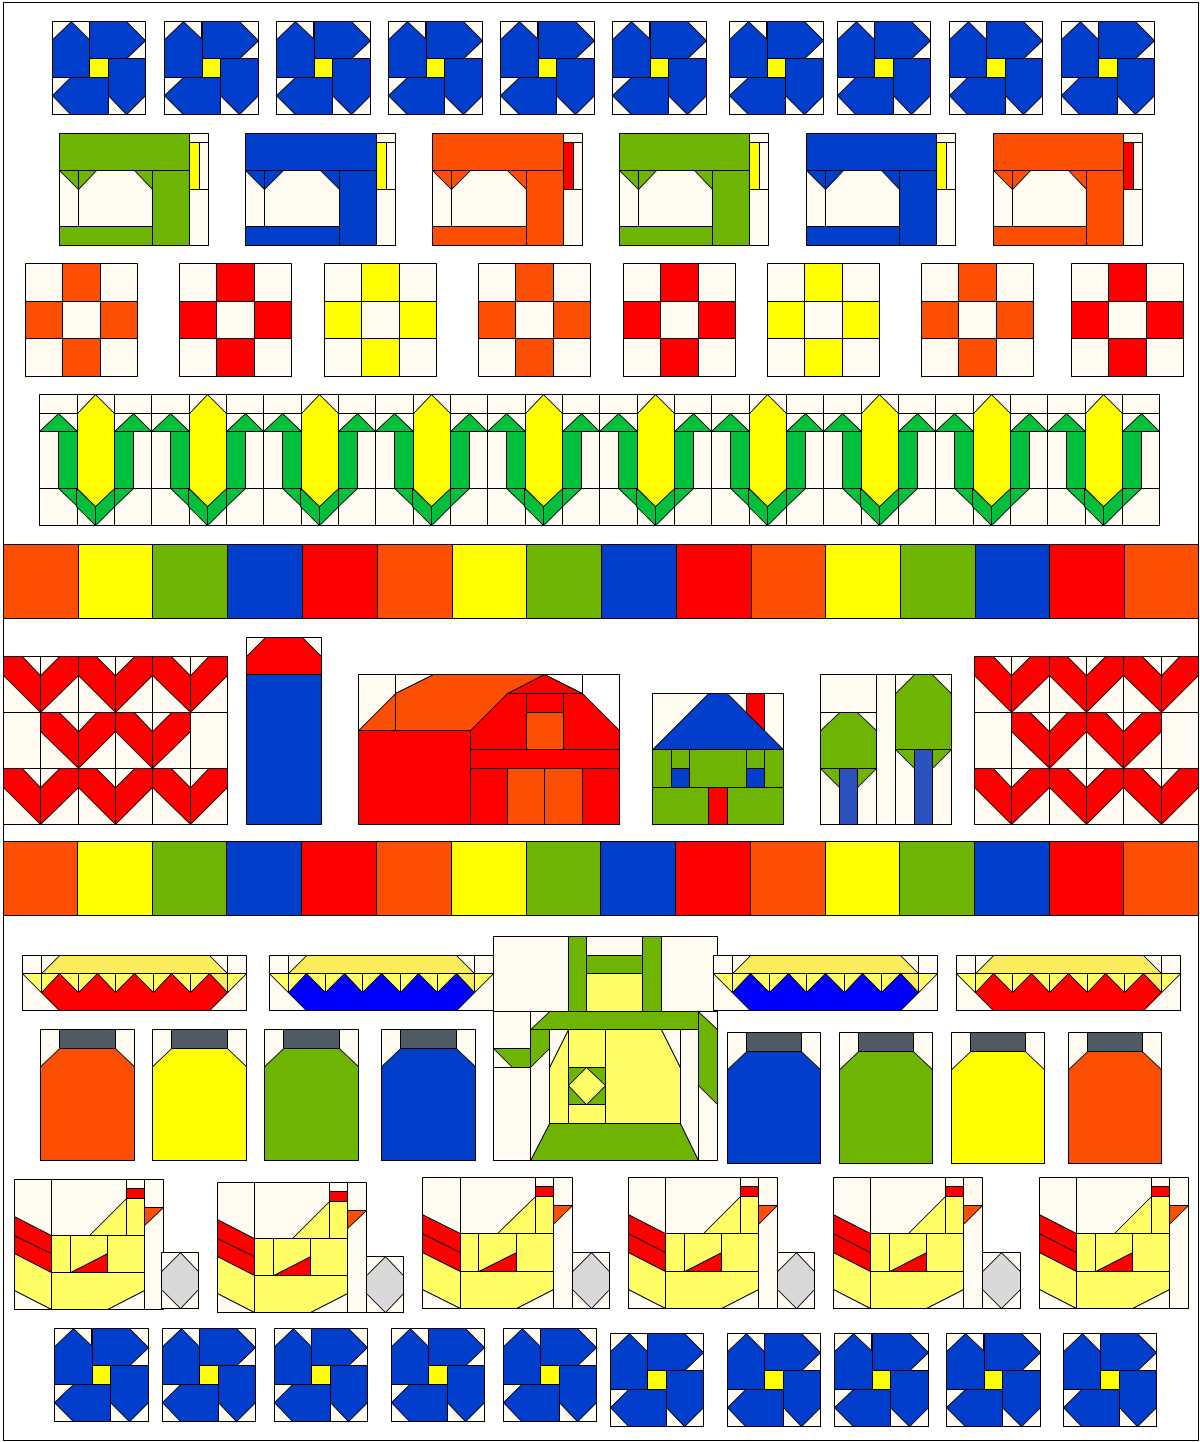
You will need to make one row of  eight, nine-patch blocks.

P1100159-001
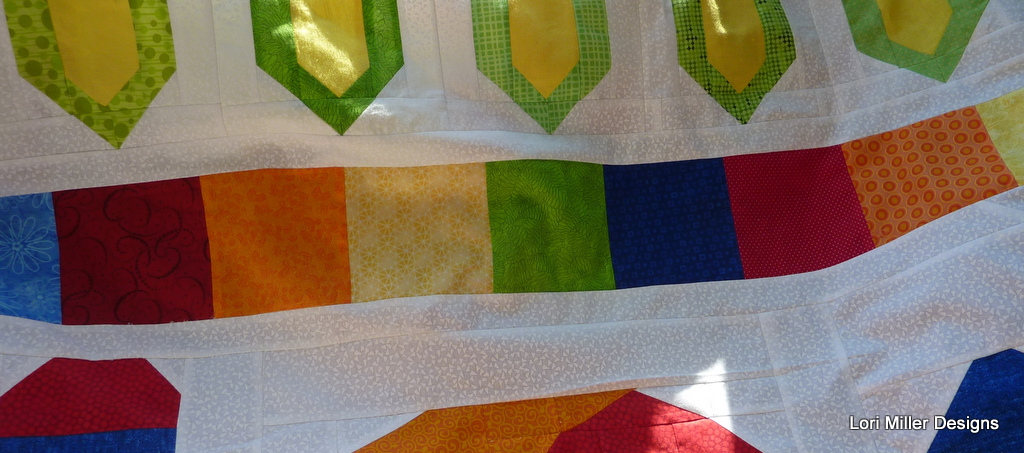
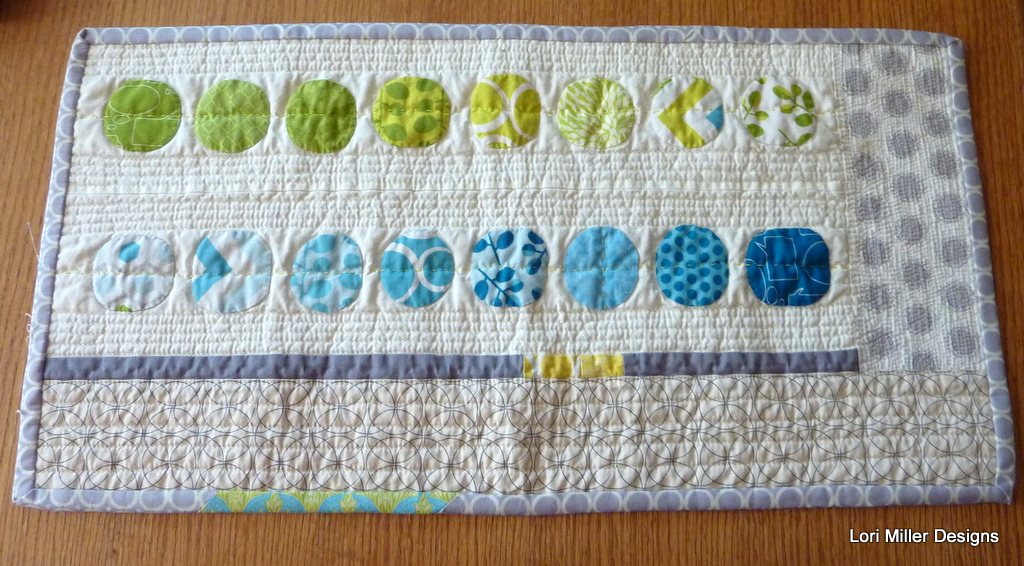
You will also need to make two rows of color blocks.  This is just a group of 4 inch finished blocks.

P1100160

 They highlight the center farm blocks and are arranged above and below to frame them.  You will need 16 blocks for each row.  A comprehensive pattern and directions for the Nine Patch block and color row blocks along with the whole BOM is currently in development.

Enjoy!

Grandma Town Block of the Month

If you are new to the Grandma Town BOM, this row by row quilt was a labor of love to celebrate my Iowa roots.  I spent my childhood visiting my Grandparents on their farm just west of Des Moines in Earlham, Iowa.  It is especially a tribute to my dear Grandma.

When my sisters, brother and I were little and my parents would drive us to my grandparents farm, my brother would yell, “We are going to Grandma Town!”.  It was a loving tribute that stuck.  This little quilt is full of those reminders of the farm and of Grandma, who loved to garden and loved to cook.  Each block is a sweet memory of my youth growing up on that country farm.

I hope you will find some shared love for your family, a cherished farm  or your own grandma in my quilt.  You can make all of these sweet blocks or pick and choose the blocks you like the most to make something special for yourself or a dear loved one.

Grandma Town Pic


Released Blocks – 2015

FEB  Block 1 – Forget Me Not Flower

MAR  Block 2 – Sewing Machine

Finish it up Friday

I have had a couple of project due dates and I really should be doing my taxes, but I definitely put blogging on the back burner.  I am off on another trip while this posts to visit my dear friend, Ann.  I like being busy but this trip will really welcome Spring and I was tired of being cooped up with the weather.  I thought I would share a few of the things I have been working on for Finish it Up Friday and what I have accomplished.

Moda Apron Lori Miller Designs

My Moda Apron

At Quiltcon, yes it was awesome, I won this super cute dish towel in the Moda Booth.  It was just too cute to not stitch it into something, so I grabbed some fabric from the stash and started cutting.

SONY DSC

I was able to keep most of the printing visible.  Don’t you love the 50’s style ruffle?

P1100098

I even managed to craft a little cupcake pocket.  Love it!

Donna (dolce-t), Carolyn Friedlander and myself with our aerial grove projects

Donna (dolce-t), Carolyn Friedlander and myself with our aerial grove projects

Also at Quiltcon, I took the Aerial Grove class with Carolyn Friedlander and my fellow Detroit Area Modern Quilt Guild Gal, Donna Tarnas.  I managed to get most of my circles appliqued in class.  (I was making a small table runner, not the full quilt.)

SONY DSC

I took my grove strips and decided to just improvise the rest to create the table runner size I wanted.  Then I just used straight line quilting with my walking foot.

P1100152

Here is my finished runner.

P1100149

I tried some matchstick quilting at the end.  Interesting texture, but it sure takes a long time to stitch!

P1100150

I also had a freebie spool of bold quilting thread from Coats and Clark in my Quiltcon gift bag.  So I used it to big stitch quilt through the circles.  Not as bold as a Perle Cotton, but it added a nice touch.

Lots of folks are making their own Aerial Grove quilts, quite inspiring.  The hand applique is a nice thing to work on when you are on the go.  Check out instagram for some wonderful inspiration.

My version of the Noodlehead zip bag – Gold Kitties

P1100147-001

I am going to visit my friend Ann, and I thought she needed a cute little gift.  I have made a lot of zip bags, but I had not tried the Open Wide Zippered Pouch by Noodlehead.  I figured this was a great time to try it out.  And I have to say I think this is my new favorite zipper bag.  The design is super easy to sew and the zipper is even easier!  If you have not tried making one, it is time you did.  She has a great tutorial with lots of pictures on her blog.

P1100129

I started out with this adorable japanese kitty head fabric that I picked up at Quiltcon.  The gold kitties are nice and I simply love the bow ties.  It is called Trefle by Kokka Fabric.  I used a quarter yard for two small zip bags.

P1100130

I got this perfectly matching fat quarter in my Quiltcon goodie bag, it was the perfect size for two bag linings.

P1100132

I had some vintage coral cotton that matched and I gathered up the rest of my materials.

P1100137

I really wanted my bag to have some quilting, so I quilted it.  I just made a sandwich of muslin, batting and the outside of the bag and started quilting some straight lines.

P1100136

I used straight lines about 1/4 inch apart for the top of the bag.

P1100139-001

Then I quilted the base of the bag about an inch apart using my trusty walking foot.

P1100143-001

I should have gotten a few more pictures for you of the zipper.  You don’t include it in the side seams, so the bag can literally open wide.  A little pinning and measuring and you just sew a straight seam right through it.  This picture shows me turning it right side out just before I tuck the lining inside.

P1100148-001

Here is what it looks like WIDE OPEN.  So versatile.

P1100145-001


Two super cute bags, one for me and one for Ann.

It is a perfect girlfriend gift.  I am filling it with small samples of lotions and lip balm.  Hope she likes it.

Have you made one of these wide open zip bags?  What do you use it for?

Easy Shamrock Door Decoration – Free Tutorial


Finished Size  12″ x 12″

Materials:

  • 1/8 yard of green for shamrock
  • 1/8 yard of black for background
  • 1/2 yard of green print for back, binding and hanger
  • 1/2 yard of batting
  • Coordinating thread

Directions:

shamrock fabric Lori Miller Designs

Cut Fabric:

Green for Shamrock

  •  8 — 2  1/2″ x 4  1/2″ strips

Black

  • 8 — 2  1/2″ x 2  1/2″ squares
  • 2 — 2  1/2″ x 8  1/2″ strips
  • 2 — 2  1/2″ x 12  1/2″ strips

Green Print

  • 2 1/2 x 60″ strip for binding
  • 2 1/2″ x 20″ strip for hanger
  • 12 1/2″ x 12 1/2″ square for back

Batting

  • 12 1/2″ x 12 1/2″ square

 Sew

SONY DSC

  1. Place black square on the top of each of the shamrock strips matching the edges.  Mark four strips with a diagonal line to the left and four strips with a diagonal line to the right.Shamrock cut Lori Miller Designs
  2. Stitch on the lines. Trim.
    SONY DSC
  3. Iron the flaps out.  Sew two strips together to form a point with the shamrock material.SONY DSC
  4.  Continue to sew three more.  Arrange the four squares so that each point of each square rotates clockwise and stitch together. Press.shamrock sew borders
  5. Sew the black 8 1/2″ strips to each side. Press.SONY DSC
  6. Sew the black 12 1/2″ strips to the top and bottom. Press.

Quilt

quilt shamrock Lori Miller Designs

  1. Layer the back of the quilt right side down, the batting and the top of the quilt, right side up,  in a quilt sandwich.shamrock quilting Lori Miller Designs
    shamrock
  2. Baste together with quilting safety pins and quilt as desired.  I used straight line quilting with a walking foot at about 1/4″ intervals.

Finish

SONY DSC

  1. Fold the binding in half, wrong sides together, and press.  Attach the binding to the little quilt.SONY DSC
  2. Fold the hanger fabric strip in half, right sides together and stitch down the long edge.
  3. Turn the hanger right side out and iron flat with the seam on the back.SONY DSC
  4. Tie a bow in the hanger, centered at the top.  Tuck in the ends and stitch closed.shamrock hanger
  5. Attach the ends to the back side of the quilt about 3″ from each side.  I just used a whip stitch.SONY DSC
  6. That finished up your decorative door hanger.  Hang it on your door or as a wall hanging for decoration!May the luck of the Irish be with you!


Grandma Town BOM #2 – Sewing Machine

Sewing Machine Block 2


It is a new month and time for the next block in my block of the month (BOM) series for 2015, Grandma Town.  It is a sewing machine!   P1100118   Grandma loved to sew by hand or on her trusty green sewing machine.  She made her own clothes or mended Grandpa’s overalls or was happily hand stitching quilt squares while watching TV.   P1100123      

  This quilt block honors her memory with a row of 6 blocks of sewing machines.

P1100121


A comprehensive pattern and directions for the Sewing Machine block along with the whole BOM is currently in development.

Enjoy!

Grandma Town Block of the Month

If you are new to the Grandma Town BOM, this row by row quilt was a labor of love to celebrate my Iowa roots.  I spent my childhood visiting my Grandparents on their farm just west of Des Moines in Earlham, Iowa.  It is especially a tribute to my dear Grandma.

When my sisters, brother and I were little and my parents would drive us to my grandparents farm, my brother would yell, “We are going to Grandma Town!”.  It was a loving tribute that stuck.  This little quilt is full of those reminders of the farm and of Grandma, who loved to garden and loved to cook.  Each block is a sweet memory of my youth growing up on that country farm.

I hope you will find some shared love for your family, a cherished farm  or your own grandma in my quilt.  You can make all of these sweet blocks or pick and choose the blocks you like the most to make something special for yourself or a dear loved one.

Grandma Town Pic


Released Blocks – 2015

FEB  Block 1 – Forget Me Not Flower