New Pattern: Calico Table Runner and More

This festive fall table runner features a harvest of Calico Corn.  I supersized my ear of corn quilt block from my Grandma Town block of the month quilt and added the colors of fall.  Make it scrappy or planned, but this lovely table runner will look wonderful on your fall table or even as the star attraction of the Thanksgiving table.


I have also included instructions for a large hot pad which is large enough for a casserole dish or cake pan.

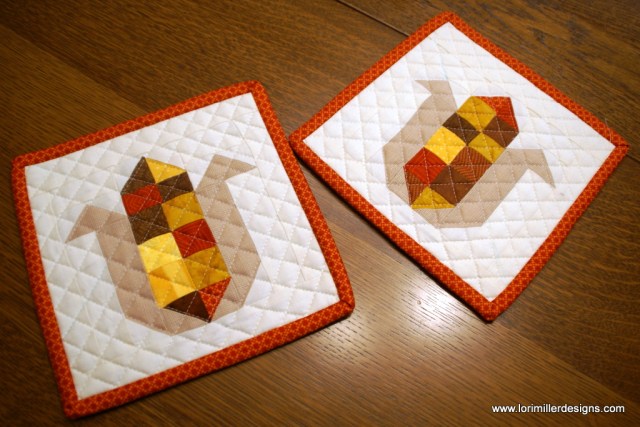
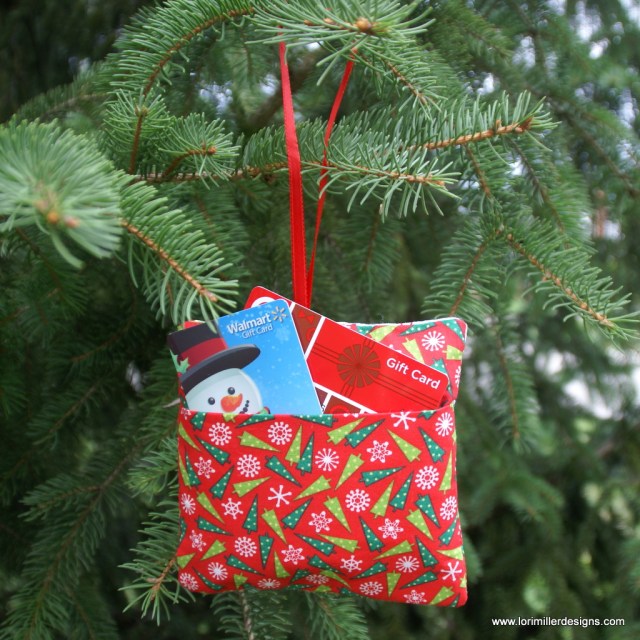
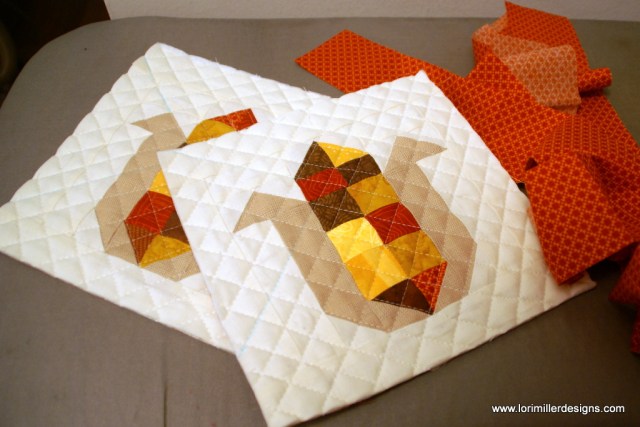
The two small hot pads use the 6” version of the calico corn block.  Both hot pads would make lovely mini quilts as well.  A nice idea for a hostess or holiday gift.

Finished Sizes are Table Runner – 36 ½” x 12 ½”; Large Hot Pad  – 12” x 16”; and Small Hot Pad 8” x 8”.

I started with my ear of corn from my Grandma Town Block of the Month from 2015.  I started playing around with my design in EQ7, the quilt design software.  I ended up ditching the bottom part of the ear of corn.  It added complexity to the block, was hard to get the alignment just right, and without it I had a square block.  And in the design, you do not even miss it.

calico-corn-hot-pad-sm

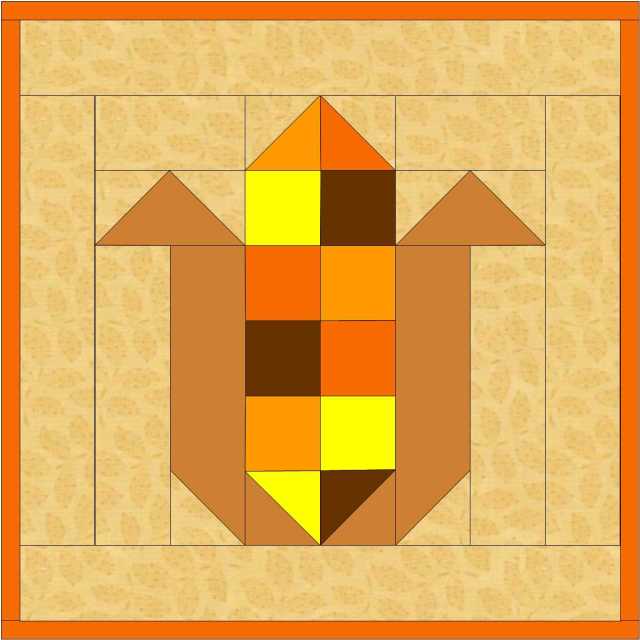
Here is my updated ear of corn in fall colors with my multicolored calico corn.  It was easy to play around with the different parts of the design in the software.  I decided I wanted a much larger 12″ block to make a table runner, so I resized the block.

calico-corn-hot-pad-lg

Here is the larger 12″ block with the extra borders for the large hot pad.  It was so easy to add a pieced component to the corn itself with the EQ7 software.

To make piecing the ear of corn easier, I used scrappy fall 1 1/2″ strips in groups of four and sewed them together.

Then I cut them again into 1 1/2″ strips and mixed and matched randomly.

I made 16 patch units to assemble the large ears of corn.  You need 3 – 16 patch units for each one.

I used three large ear of corn for the table runner and quilted hash lines through the corn and a free motion echo on the husk.

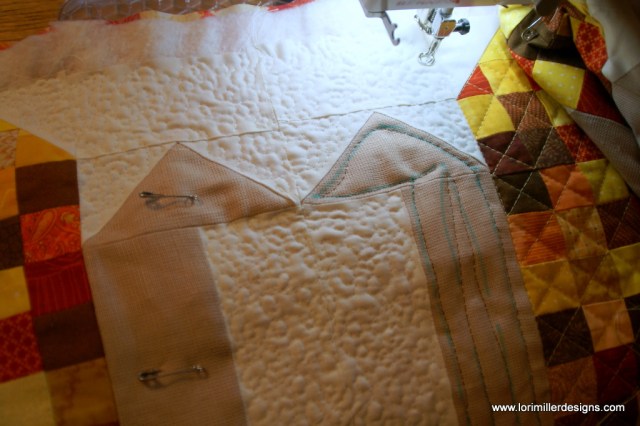
I quilted little loops all through the background so it looks like small stippling.  It makes the calico corn the star!

For the small hot pads, I just kept the hash lines through the whole thing.  I did add a layer of Insul Bright heat resistant fabric, so the extra quilting made it lay nice and flat.

The large hot pad is perfect for a casserole dish or cake pan size item.

Wouldn’t this hotpad make a great mini quilt to hang on your door for Thanksgiving too?

You can find lots of great patterns like this and Add-on EQ8 Block Libraries for AccuQuilt in my shop.

Thanks for letting me share!  Tag me on Instagram and Facebook @lorimillerdesigns, I would love to see your version!

New Pattern: Gingerbread House Pincushion and More

lori miller designs gingerbread house pincushion

I am pleased to share that my original pattern for My Gingerbread House Pincushion is now available for sale.  I have even added bonus instructions to make it into a soft tree ornament or a Gift Card Holder to hang on your Christmas tree.  This adorable holiday gift idea might look familiar.

SONY DSC

It was featured in Quilting Arts Holiday Magazine in 2014.  It holds a special place in my heart because this was the very first original pattern that I had published in a Magazine.

SONY DSC

I was inspired to grab my holiday scraps to come up with a gift idea for my small sewing group.  Each year, we like to exchange home made gifts for Christmas.  We are all quilters and since I am totally addicted to pincushions, the idea took shape to make a Gingerbread House.

Lori Miller Designs supplies

I thought the jumbo white rick rack was a stroke of genius to mimic the snowy icing.
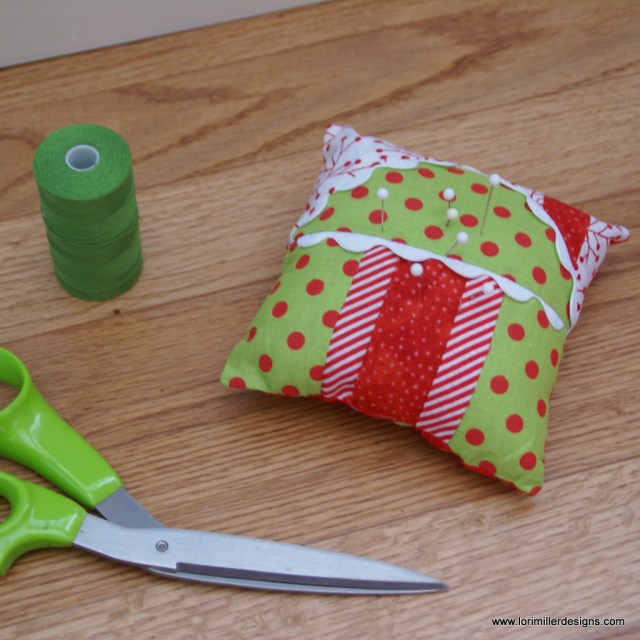
 It made an adorable pincushion and I use some very easy techniques to piece it all together that make it a jiffy to stitch up in an afternoon.  You can make multiples at once very easily.  Finished size is 5 ” square.

One of the bonuses I added to the pattern is to create a soft ornament for your tree.  You just add a ribbon hanger and only lightly stuff the little Gingerbread House.

The second bonus instructions included is to add a little pocket on the back of the Gingerbread House to make it into a Gift Card Holder.  You can tuck in a couple of gift cards, a note from Santa or even a candy cane for fun.

You purchase  my Gingerbread house Pincushion and more pattern  as a PDF download by going to MY PATTERNS tab and following the link to My Etsy Shop!

Thanks for letting me share!  Tag me on Instagram at lorimillerdesigns, I would love to see your version!

Jennifer’s Messenger Bag

My girlfriend, Jennifer, wanted me to make her a messenger bag.  She is a knitter and spinner extraordinaire and wanted something to take to a spinning conference and classes.
P1090834

I had made her this cute Sew Together Bag, a Peekaboo Pencil Case by Pickle Pie Designs, and a name tag last year and she wanted something to match.
P1090833

It has the cutest pattern of sheep knitting in red, black and white.  Can you spot something weird with that white sheep in the upper left corner?

1-IMG_3117

I could not really find a pattern I liked, so I combined a bunch of patterns and ideas and created this prototype. I just used some fabric I had on hand.  I did quilt the fabrics.
1-IMG_3120

I used duck cloth or canvas for the sides and bottom to give it a bit more structure.  When I showed it to Jennifer,  she offered a few suggested updates including a pocket for her tablet, some strips inside the sides so she could tuck in some knitting needles and more pockets.  All the more friendly for a knitter to use.

I decided that the front flap was going to be quilt as you go with snippets of the fabrics including the cute little knitting sheep in red, white and black.

Here are the step by steps of my quilt as you go Messenger flap so you can see how I do it.

 qayg


Here is the back of the bag.  That is a really large pocket that has Headliner fabric in it to cushion her ipad.  It closes with a velcro strip.

I lined the inside and added this little pocket with a cute little sheep on it.

Jennifer also wanted a little zip bag to tuck some money, chapstick and a few necessities in.  I sized down another pouch I had found to make this wristlet.

Here is a little better view of the inside of the bag.

I added a wide adjustable strap.  She really liked it and has used it several times.  I love the zip that the striped binding gives to the front flap.  The solid sides add a calming factor to the busy sheep print, but it is still just too cute.  I think the QAYG flap really makes it look special.