Grandma Town BOM #4 – Ear of Corn

Grandma Town BOM Ear of Corn Lori Miller Designs

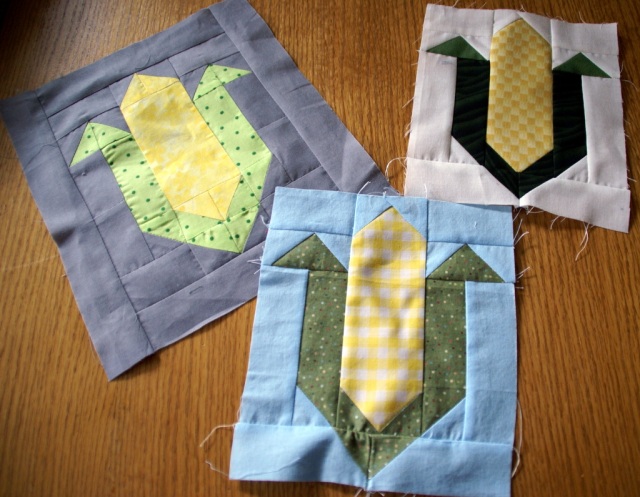
It is time for another block in my Grandma Town BOM series.  This month is one of my favorites, an ear of corn.  You can imagine it as field corn, but I prefer sweet corn.  I love, love, love some delicious Iowa Sweet corn.

SONY DSC

We would pick it right out of the field, husk it and give it to Grandma to throw in a giant pot of boiling water on her stove.  I and my siblings would roll them in a stick of butter and eat the tender, juicy ears. There was nothing like eating it fresh.

SONY DSC

This ear of corn block is pieced  I used a solid yellow for the corn and used lots of bright scrappy greens.  They look good enough to eat!  You will need to make one row of 10 blocks.

SONY DSC

A comprehensive pattern and directions for the Ear of Corn block along with the whole BOM is currently in development.

Enjoy!

Grandma Town Block of the Month

If you are new to the Grandma Town BOM, this row by row quilt was a labor of love to celebrate my Iowa roots.  I spent my childhood visiting my Grandparents on their farm just west of Des Moines in Earlham, Iowa.  It is especially a tribute to my dear Grandma.

When my sisters, brother and I were little and my parents would drive us to my grandparents farm, my brother would yell, “We are going to Grandma Town!”.  It was a loving tribute that stuck.  This little quilt is full of those reminders of the farm and of Grandma, who loved to garden and loved to cook.  Each block is a sweet memory of my youth growing up on that country farm.

I hope you will find some shared love for your family, a cherished farm  or your own grandma in my quilt.  You can make all of these sweet blocks or pick and choose the blocks you like the most to make something special for yourself or a dear loved one.

Grandma Town Pic

Released Blocks – 2015

FEB  Block 1 – Forget Me Not Flower

MAR  Block 2 – Sewing Machine

APR Block 3 – Nine Patch and Color Block Rows

Published – Summer Harvest Quilt

From Quick to Stitch Precuts Magazine Spring/Summer 2015

From Quick to Stitch Precuts Magazine Spring/Summer 2015

I am so pleased to announce that my work has been published in a new magazine, Quick to Stitch Precuts 2015.  This magazine is from the folks that produce the fun and modern Fresh Quilts Magazine.  I had worked with the editors, Deb Gore Orhn and Riane Menardi, on a small startup crafting website a few years ago.  When I had the opportunity to submit a few ideas for their new Precuts concept magazine, I jumped at the chance.  Fortunately, they accepted two of my projects, my Summer Harvest Quilt and some cute Pinwheel Pincushions.  I documented my adventure and thought you might like to see how I put together the projects.  I am first going to share the making of my quilt.

IMG_2300

Yes, I was kind of delighted to be on the cover.

summer harvest quilt

For the first project, I decided to use 10 inch squares which are also called a layer cake.  I had just gotten myself  Electric Quilt  7 software and I was working my way through learning how to use it.  Here is what the initial design concept looked like.  I was very new to the software, so I did not know how to add the thin sashing that I eventually added between the rows of leaves.
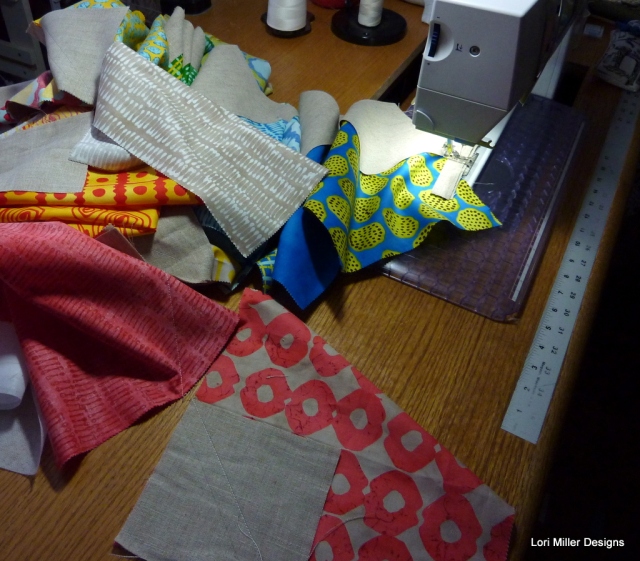
String piecing Lori Miller DesignsI knew I wanted a bold, modern print and I had seen some fabric designed by Malka Dubrawski called Outside in.  So I grabbed a layer cake package of it to work with.  I started out by string piecing the corners in an natural linen.

P1090924

Since the corners were pretty big.  I did double stitching so I would have some instant left over half square triangles.

P1090927

I started laying out the pieces in rows.  At first, I mixed all the colors and squares up but the chaos was too much for me.  Then I started to arrange in groups of color and prints and it came to life.  i have a design floor instead of a design wall.  A design wall is on my to do list.

P1090966

Here I have it all pieced and sewn together.  There were two squares in the bundle that were about the same color as the linen I had used for the squares.  So I just flipped that leaf pair and used some poppy red corners for it.  See it on the right hand side?  It kind of added a little spontaneity in the quilt.

P1090967

Here I am trying to pin the quilt on the floor.  It is too hard to move that rug, so I just vacuum really well and then I use painters tape and tape the quilt back right to the carpet.  There is a lot of smoothing and adjusting and then I pin from the center out.

P1090970

This quilt is a large throw size, so I decided to quilt it myself.  I got out my trusty BSR Bernina foot and I marked a few of the leaves but after two or three, I just went for it free hand.  On the corners, I just zig zagged bag and forth.  All of the leaves had the same quilt design except for the solid fabrics.  In each of those, I varied the design for interest.

P1090973

The middle sashing just got meandering rows of sort of straight lines.  The effect was still very nice.  I think I am going to do that on a whole quilt next time.

From Quick to Stitch Precuts Magazine Spring/Summer 2015

From Quick to Stitch Precuts Magazine Spring/Summer 2015

Here is the full finished quilt.  You can see I used the poppy red print for the binding with a little bit of an extra print here and there.

SONY DSC

What did I do with all of those extra half square triangles?  I used them and the leftover linen and fabrics to create a fun back for the quilt.  You can really see the quilting of the leaves on the linen.

precuts

You can get the pattern to create my quilt by picking up a copy of Quilt to Stitch Precuts!  I found it in JoAnn Fabrics, Meijer and Kroger.

I will save the Pinwheel Pincushions for next time.  Happy Stitching!


Charity Sewing – Quilts of Valor

SONY DSC

Today I thought I would share a few of the quilts I have made for one of my Charity Groups.  I belong to the Stitching Sisters Quilts of Valor group.  This group was started by three sisters, Maureen, Sue and Terry and it meets once a month in Clawson, Michigan.  We get together to sew, eat, and quilt.  Our group is part of the National Quilts of Valor Foundation organization.  The mission of the Quilts of Valor Foundation is to cover service members and veterans touched by war with comforting and healing Quilts of Valor.  Many of our Stitching Sisters members have or had a loved one who was serving our nation during war time and making quilts was one way to do something useful and helpful for those deserving men and women.

SONY DSC

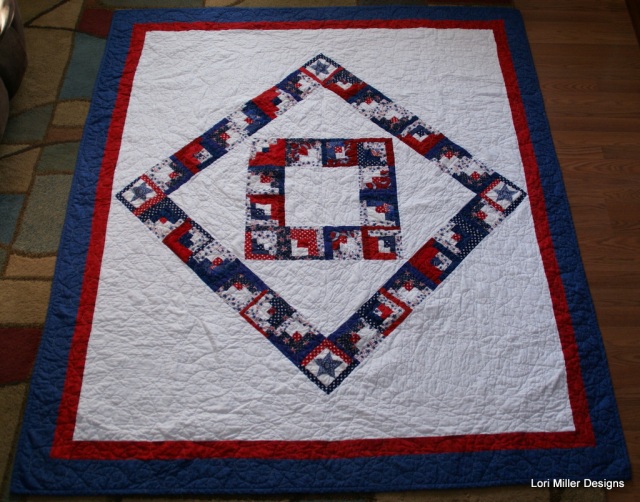
Our members make the quilt tops and then volunteers longarm machine quilt the quilts.  I started out making quilts for my own family members who were in the service.  I finished three tops for three of my cousins who have served.

QOV SS 1

Our group has focused on completing and awarding quilts to as many WWII veterans as we can.  We have supported the local VFW and veterans organizations in our area.  Our group has a waiting list that we try to fill as quickly as possible.

QOV SS

Here is a picture of our last large award ceremony held at the Clawson Community Center.  It is just a special moment to share this small token with the men and women who have sacrificed so much for our country.  There are usually a few good tears all around when they are awarded.

SONY DSC

This quilt is my own design, I was trying to use up scraps!

SONY DSC

This scrappy quilt is based upon a pattern design by Carol Loessel called Now Starring Leftovers.  I used as many scraps as I could for the centers.


If you are in the southeast Michigan area, you are welcome to join our Stitching Sisters group, check out our facebook page for more info HERE.

If you are looking for a group in your area, check out the Quilt of Valor Foundation Website.

Do you make Quilts of Valor?  Do you have a favorite pattern that you use?  Please share!

Sporty Cell Phone Case – Free tutorial

March Madness is over and the Championship game should be finishing up.  With all of that basketball talk, I pulled out some appropriate fabric from my stash to make this sporty cell phone case.  My son wanted an easy, protective pouch to throw his cell phone into and stash in his golf bag while he was at golf practice after school.  This clever, quilted pouch features a handy velcro opening and it is teenager approved to boot.  You could easily mix and match the sporty fabrics of your choice or just choose some solid school colors.  I even made one for myself to protect my phone in my tennis bag.

Materials Required:

  • 1/4 yd main fabric
  • 1/4 yd contrast fabric
  • 1/4 yd batting
  • coordinating thread
  • 4″  of  3/4″ wide velcro strip, coordinating color

Directions:

Note: Use a 1/4″ seam allowance.

SONY DSC

Cut out your fabric

  •  1 – 7″ x 8″ rectangle of main fabric
  •  1 – 4″ x 8″ rectangle of main fabric
  •  1 – 7″ x 8″ rectangle of lining fabric
  •  1 – 4″ x 8″ rectangle of lining fabric
  •  1 – 2″ x 8″ lining strip
  •  1 – 2″ x 20″ lining strip
  •  1 – 8″ x 10 1/2″ rectangle of batting

Stitch up the case

SONY DSC

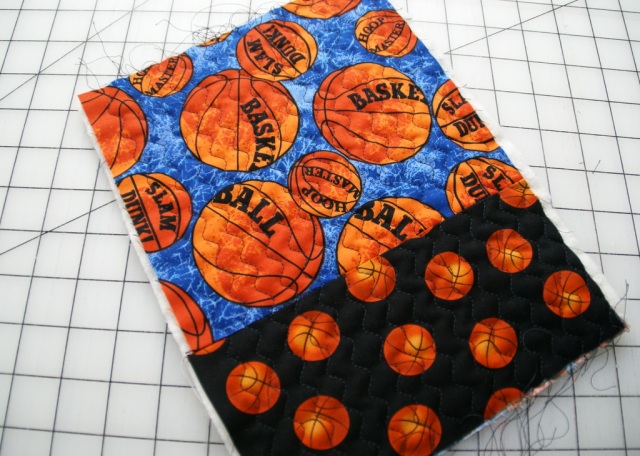
  1. Piece together the main fabric and the contrast fabric to make the outside and lining of the cell phone case.
    SONY DSC
  2. Join the small rectangle of the main fabric to the larger lining rectangle.  Join the smaller lining rectangle to the larger main fabric rectangle.  The smaller pieces will form a contrasting flap.
    SONY DSC
  3. Create a quilt sandwich, lining right side down, batting, outside right side up.  Line up the shorter flap pieces of both the lining and the outer cover at the top.
    SONY DSC
  4. Quilt the case.  You can quilt it however you like.  I used a decorative stitch #4 on my Bernina, it kind of looks like a squiggle.  I set the stitch length to 2 1/2 and then stitched rows straight down the case.
    SONY DSCSONY DSC
  5. Trim the case down to 7″ x 9 3/4″.  You may want to use your own phone as a guide to get the width that you want.
    SONY DSC
  6. Cut off the corner of the flap.  Mark 1 1/2″ from the point of each corner and cut the corner off.
    SONY DSC
  7. Take the smaller binding piece and iron it in half the long ways, wrong sides together.  Line up the raw edges with the bottom of the case and stitch it on.SONY DSC
  8. Flip the binding over to enclose the raw edges and sew to the case.
    SONY DSC
  9. Measure 1 1/4″ down from the edge of the binding on the outside of the case and center the soft half of the velcro.  Stitch it on.  Measure 1/2″ down from the flap edge of the case and center the sticky half of the velcro.  Stitch it on.  Make sure you have it on the inside of the case.
    SONY DSC
  10. Form the pouch by folding the case from the bottom up with the lining on the inside.  Fold it just past where you joined the fabrics.  Pin in place.
    SONY DSC
    SONY DSC
  11. Take the long binding.  Fold up the ends so there are no raw edges.  Carefully start at one end of the bag and stitch around the outside to add the binding.  When you get to the other end, you will want to stop to fold in that end as well so there are no raw edges.  Flip the binding over and sew closed to finish off.
  12. SONY DSC

SONY DSC

This would make a quick gift for anyone who needs to tuck away their phone in style while they go to sports practice.

Happy Stitching!