
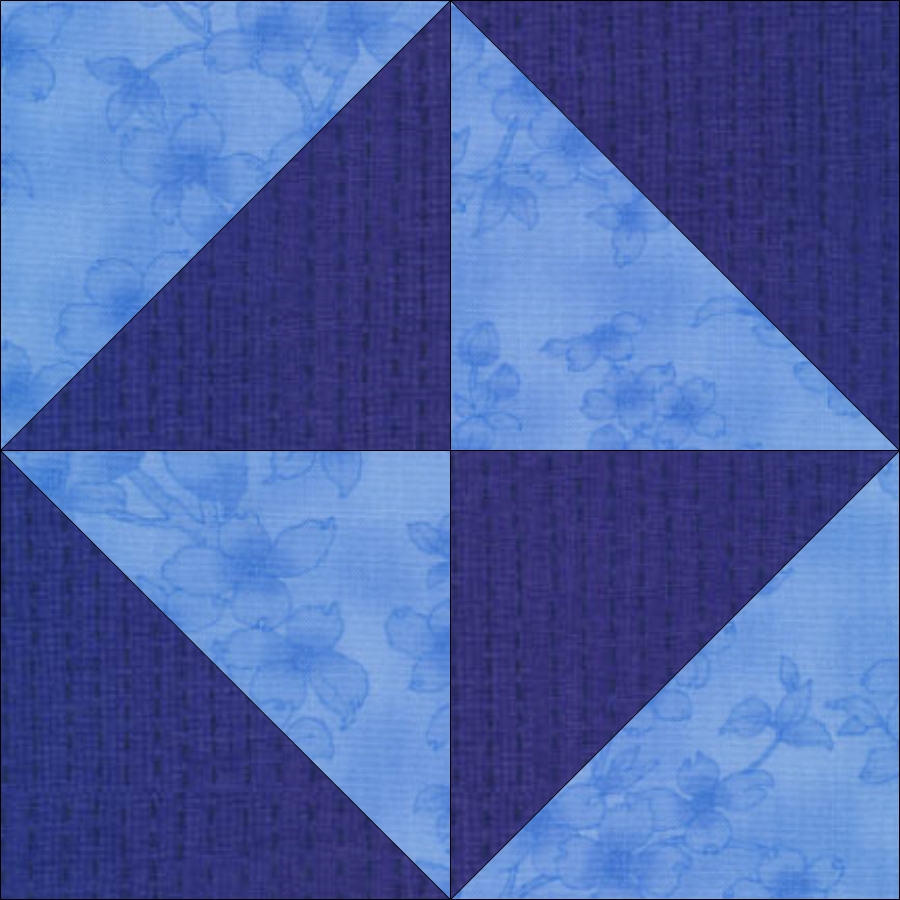
This Liberty Quilt of Valor is the project of the month with a free tutorial designed with EQ Mini Software by The Electric Quilt Company . It uses Broken dishes blocks set on point using light and dark blue prints from my stash. The scattered triangles of red pull it together and add that pop of color along with the candy strip bias binding. This quilt looks complicated but was easy to design and is easy to stitch together.
I belong to the Stitching Sisters Quilt of Valor group. The mission of the Quilts of Valor Foundation is to cover service members and veterans touched by war with comforting and healing Quilts of Valor. This quilt is made using the traditional patriotic colors of red, white and blue.
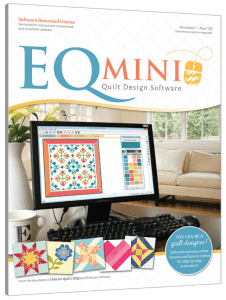
EQ Mini is the new scaled down, simpler version of EQ7 quilt design software. This program was created for quilters who are just getting started using software for quilt design. EQ Mini will help you create, edit, share, and print patterns and yardage for your quilt designs.

Liberty Quilt of Valor
Finished size is 60″ x 75″.
Materials
- 1 5/8 yd white background
- 1 3/8 yd Light blue
- 2 7/8 yd dark blue
- 3/4 yd solid red for triangles and thin border
- 1/2 yard red and blue stripe for binding
- 4 yards fabric for backing
- 70″ x 84″ batting
WOF = Width of Fabric
Directions
Cut Fabric:
Light blue
Dark Blue
- 10 — 13″ squares
- 7 — 5 1/2″ x WOF strips for outside border
Red
- 2 — 13″ squares
- 6 — 2″ x WOF strips for border
White background
Striped fabric
- Cut 7 — 2 1/2″ x Width of Fabric strips
Make Blocks
Hint: Because you need to match seams, be sure to keep an accurate 1/4″ seam allowance and make sure blocks are square as you sew them to keep things in alignment.
- Take one light blue 13″ square and one dark blue 13″ square and place them right sides together.
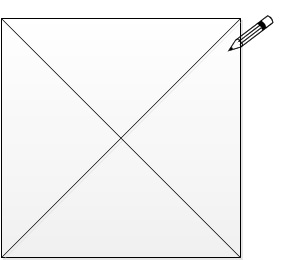
- Mark a line diagonally from corner to corner, both ways.
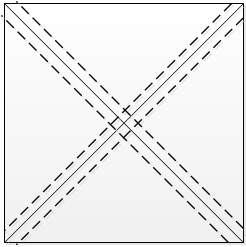
- Stitch 1/4″ away from the lines on both sides.

- Next mark two lines down the center of the block.

- Cut along the solid lines to create 8 half square triangle units.
- Press the half square triangle units open pressing to the dark fabric side.
- Make 7 more sets of dark and light blue half square triangle units.
- Make 2 more sets of half square triangle units using the dark blue and red fabrics.

- Mark a diagonal line on each of the white background squares. Be careful not to stretch the bias edge.

- Arrange your pieces using this design as a guide. There will be a few extra half square triangles.

- Sew together the individual broken dishes blocks, then sew the center together in diagonal rows, aligning edges.
- Piece together the red border with 45 degree seams.
- Cut 2 side red border strips 2″ x 62 3/4″ long. Stitch to the sides of the quilt being careful not to stretch the bias edges of the white background.
Hint: You may want to stitch 1/8″ from the bias edge of the white background pieces to keep them from stretching.
- Cut 2 red border strips 2″ x 50 1/8″ long. Sew to the top and bottom of the quilt.
- Piece together the dark blue border.
- Cut 2 side dark blue border strips 5 1/2″ x 65 3/4″. Sew to the sides of the quilt.
- Cut 2 dark blue border strips 5 1/2″ x 60 1/2″. Sew to the top and bottom of the quilt.
- Piece together the backing.
- Make a quilt sandwich with the backing face down, then the batting, then your quilt top face up.
- Pin baste the quilt layers together.


- Quilt as desired. I echoed the seam lines for the half square triangles. I added feathers for the white background space and quilted a large chain in the dark blue border.

- Sew the 2 1/2″ binding strips together and add to the quilt.
- Finish the binding and you are done!
Make it scrappy! I used up light and dark blue fabrics from my stash to give this quilt a scrappy look. You can too. Or you can use 8 light blue fat quarters, 10 dark blue fat quarters and 2 red fat quarters for the center blocks.
This quilt meets the guidelines for a quilt of valor, but it would make a great patriotic quilt for your home too. Change up the colors to match a bedroom or even in your favorite team’s colors. I would love to see your Liberty quilt, tag me on instagram @lorimillerdesigns.
Looking for the EQ Mini Design Instructions? You can find them HERE
For more projects and tips and techniques on using EQ Mini, visit my Electric Quilt blog series EQ Mini Friday Fun.
For more information on EQ Mini software, go to EQ Mini.


