
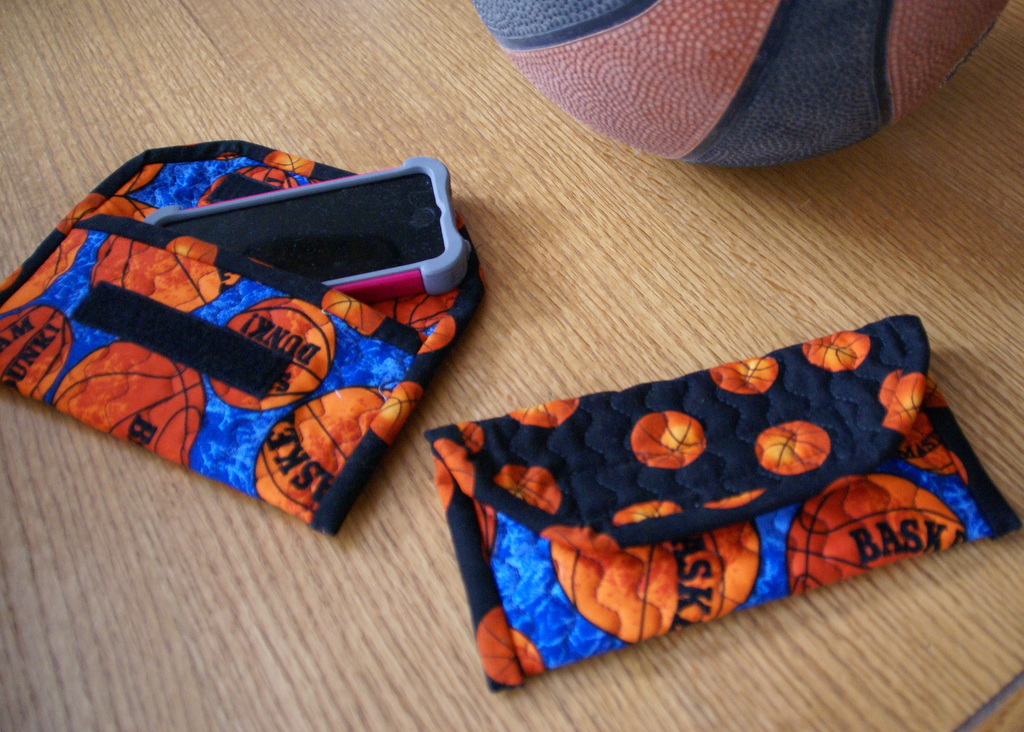
 March Madness is over and the Championship game should be finishing up. With all of that basketball talk, I pulled out some appropriate fabric from my stash to make this sporty cell phone case. My son wanted an easy, protective pouch to throw his cell phone into and stash in his golf bag while he was at golf practice after school. This clever, quilted pouch features a handy velcro opening and it is teenager approved to boot. You could easily mix and match the sporty fabrics of your choice or just choose some solid school colors. I even made one for myself to protect my phone in my tennis bag.
Materials Required:
- 1/4 yd main fabric
- 1/4 yd contrast fabric
- 1/4 yd batting
- coordinating thread
- 4″ of 3/4″ wide velcro strip, coordinating color
Directions:
Note: Use a 1/4″ seam allowance.
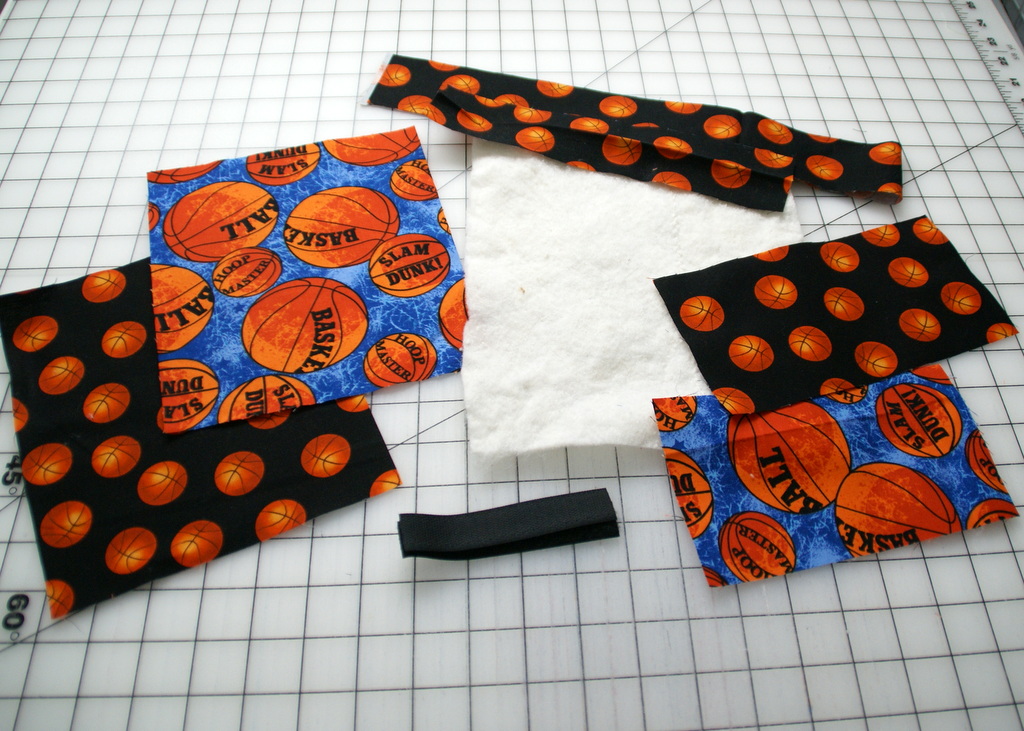
Cut out your fabric
- 1 – 7″ x 8″ rectangle of main fabric
- 1 – 4″ x 8″ rectangle of main fabric
- 1 – 7″ x 8″ rectangle of lining fabric
- 1 – 4″ x 8″ rectangle of lining fabric
- 1 – 2″ x 8″ lining strip
- 1 – 2″ x 20″ lining strip
- 1 – 8″ x 10 1/2″ rectangle of batting
Stitch up the case

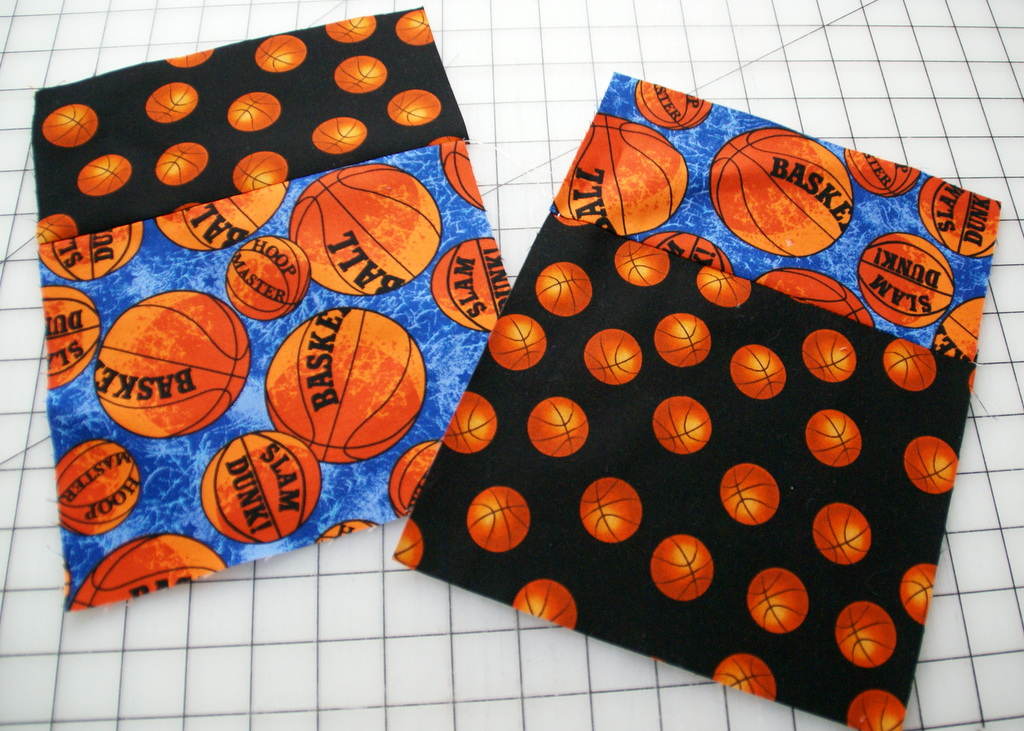
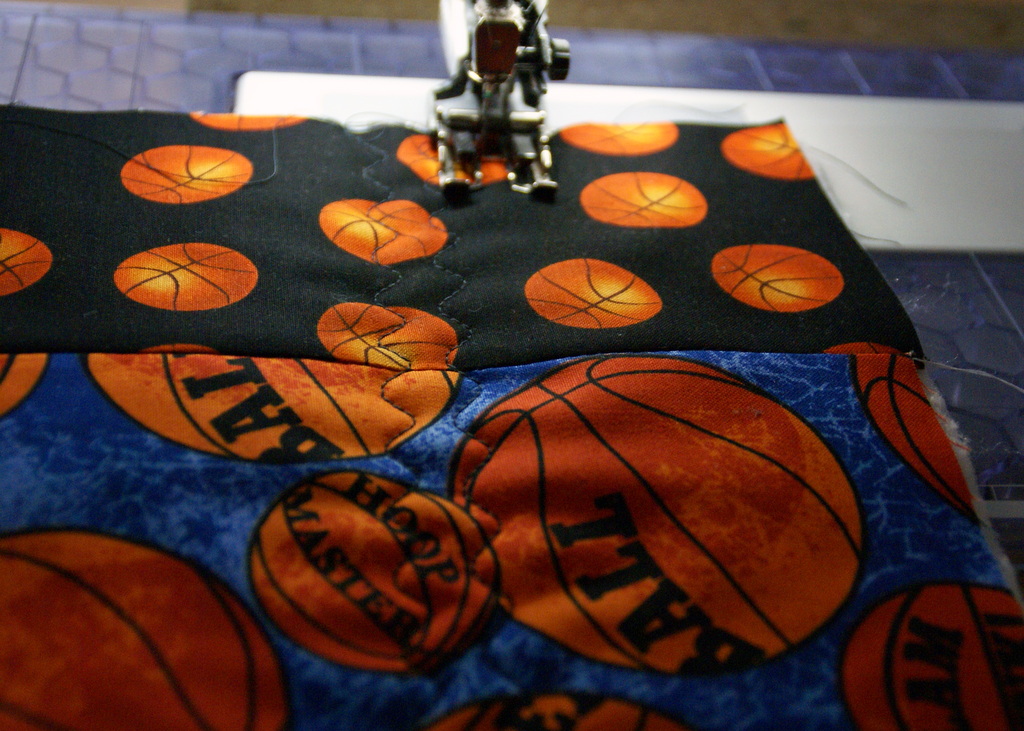
- Piece together the main fabric and the contrast fabric to make the outside and lining of the cell phone case.

- Join the small rectangle of the main fabric to the larger lining rectangle. Join the smaller lining rectangle to the larger main fabric rectangle. The smaller pieces will form a contrasting flap.

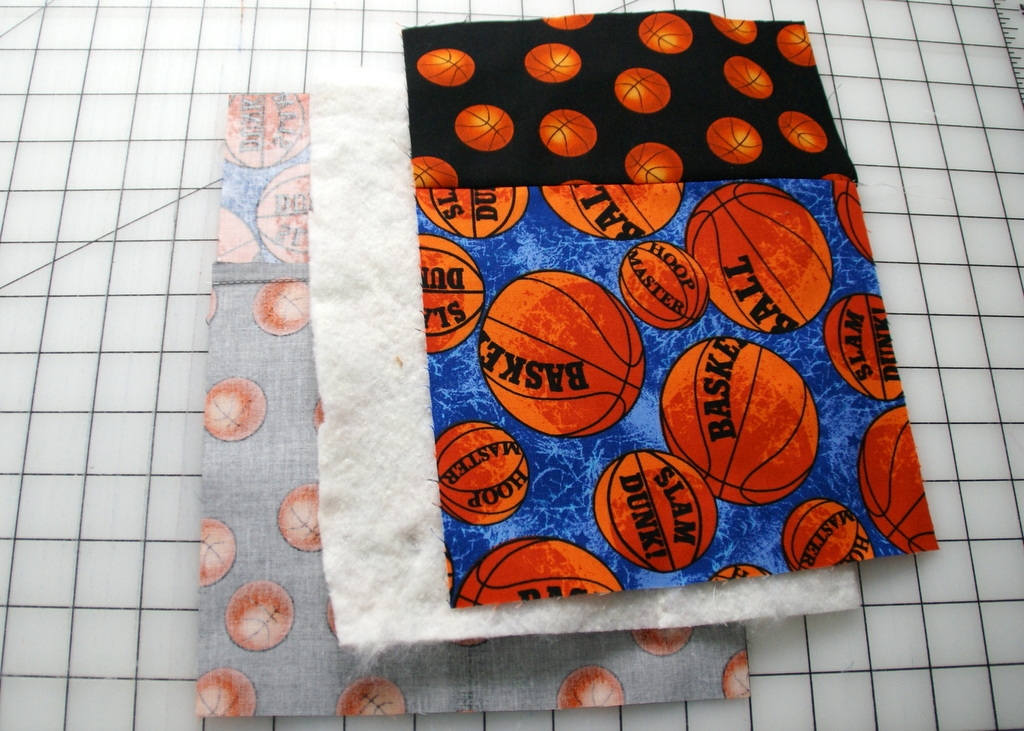
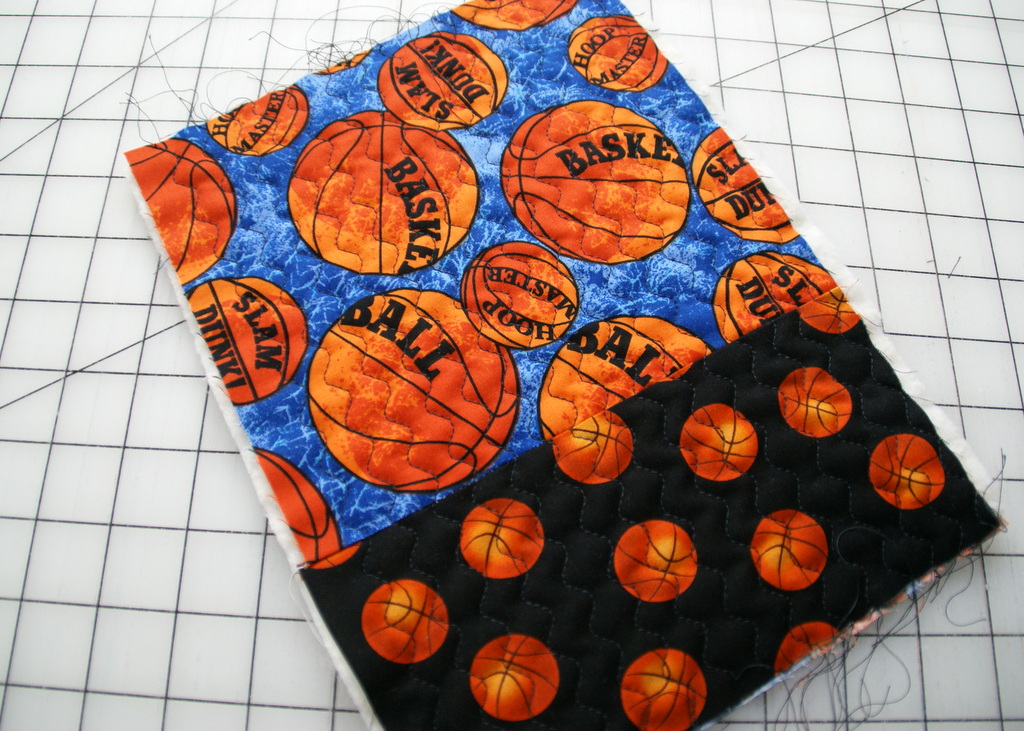
- Create a quilt sandwich, lining right side down, batting, outside right side up. Line up the shorter flap pieces of both the lining and the outer cover at the top.

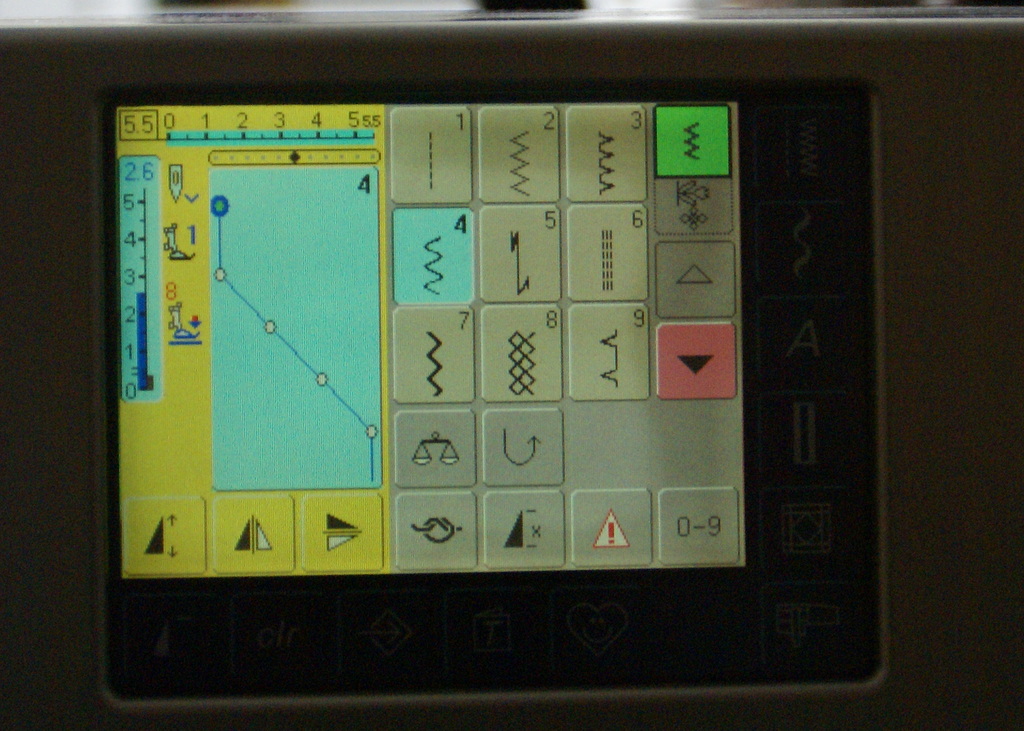
- Quilt the case. You can quilt it however you like. I used a decorative stitch #4 on my Bernina, it kind of looks like a squiggle. I set the stitch length to 2 1/2 and then stitched rows straight down the case.


- Trim the case down to 7″ x 9 3/4″. You may want to use your own phone as a guide to get the width that you want.

- Cut off the corner of the flap. Mark 1 1/2″ from the point of each corner and cut the corner off.
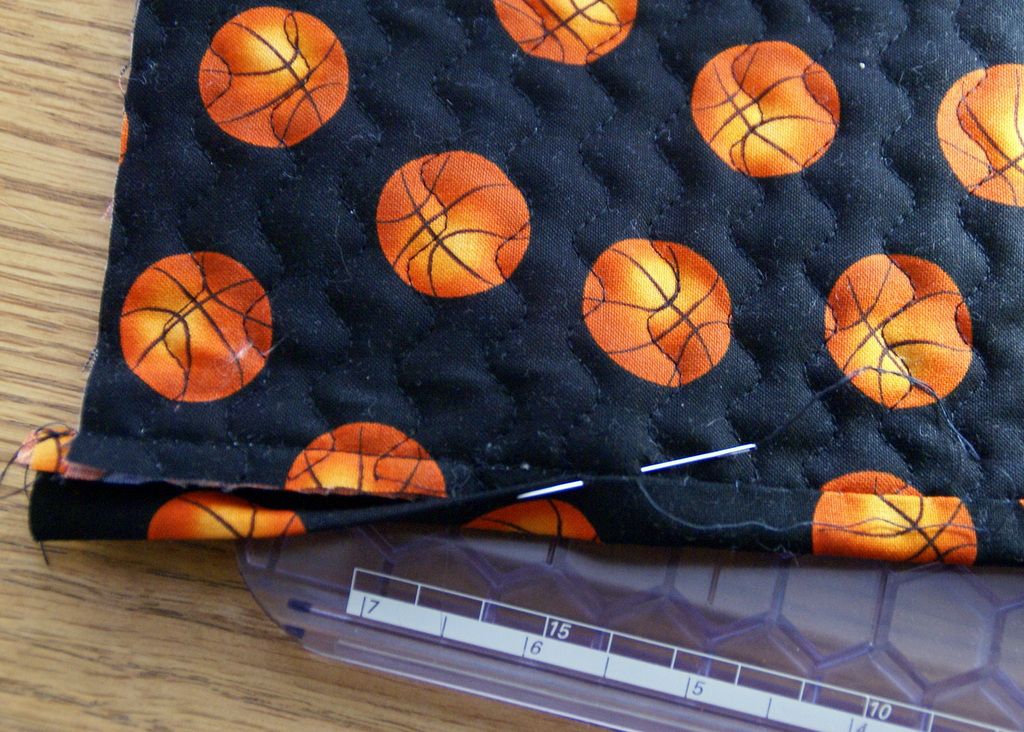
- Take the smaller binding piece and iron it in half the long ways, wrong sides together. Line up the raw edges with the bottom of the case and stitch it on.

- Flip the binding over to enclose the raw edges and sew to the case.

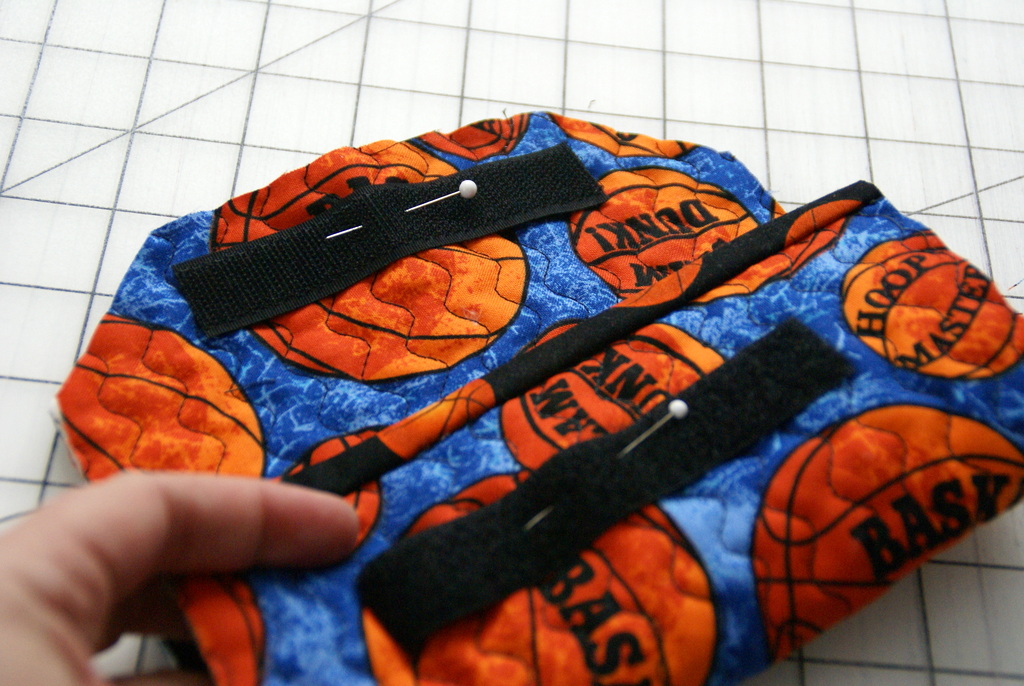
- Measure 1 1/4″ down from the edge of the binding on the outside of the case and center the soft half of the velcro. Stitch it on. Measure 1/2″ down from the flap edge of the case and center the sticky half of the velcro. Stitch it on. Make sure you have it on the inside of the case.

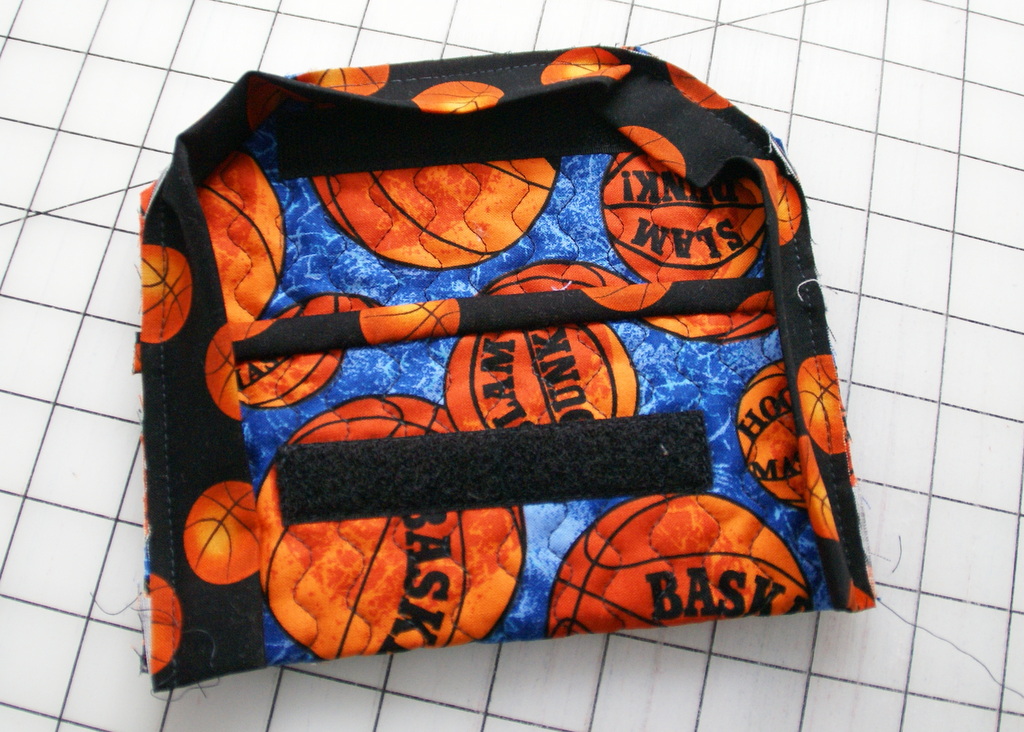
- Form the pouch by folding the case from the bottom up with the lining on the inside. Fold it just past where you joined the fabrics. Pin in place.


- Take the long binding. Fold up the ends so there are no raw edges. Carefully start at one end of the bag and stitch around the outside to add the binding. When you get to the other end, you will want to stop to fold in that end as well so there are no raw edges. Flip the binding over and sew closed to finish off.


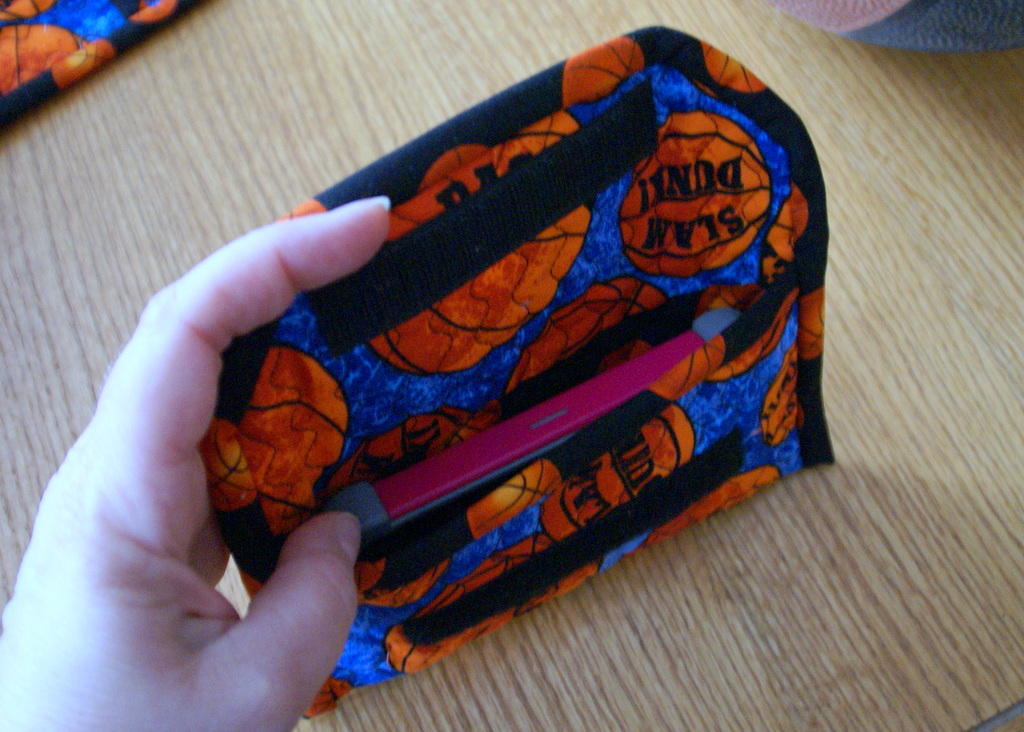
 This would make a quick gift for anyone who needs to tuck away their phone in style while they go to sports practice.
Happy Stitching!

