

This months free tutorial for a project designed with EQ Mini Software by The Electric Quilt Company is this icy blue Winter Icicles Throw Quilt. It uses vertical strips of giant flying geese to create modern icicles. This frosty quilt will keep you cozy warm and the large pieces will stitch up quickly. I even used a blue polkadot binding that made me think of little snowflakes.

EQ Mini is the new scaled down, simpler version of EQ7 quilt design software. This program was created for quilters who are just getting started using software for quilt design. EQ Mini will help you create, edit, share, and print patterns and yardage for your quilt designs.

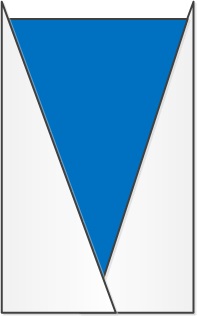
Winter Icicles Throw Quilt
Finished size is 48″ x 56″.
Materials
- 3 5/8 yd white background
- 1 3/8 yd Light blue
- 1 3/8 yd medium blue
- 1 3/8 yd dark blue
- 1/2 yard blue polkadot for binding
- 3 1/2 yards flannel for backing
- 54″ x 62″ batting
- Icicle Templates (Download HERE) (Please note there is a 1/4″ seam allowance printed around the templates so be careful when cutting them out to include that.)
Directions
Cut Fabric:
White background
- 14 — 4 3/4 ” x 9 1/2″ rectangles
- 8 — 4 3/4 ” x 15 3/4″ rectangles
- 10 — 4 3/4 ” x 13″ rectangles
Light blue
- 14 — Template A triangles
Dark Blue
- 8 — Template B Triangles
Medium Blue
- 10 — Template C Triangles
Blue Polkadot
- Cut 7 — 2 1/2″ x Width of Fabric strips
Make Icicle Blocks
Hint: Because you need to match seams, be sure to keep an accurate 1/4″ seam allowance and make sure blocks are square as you sew them to keep things in alignment.
- Take the 4 3/4″ x 9 1/2″ rectangles and stack them in two’s right sides together.

- Cut diagonally from the upper left corner to the bottom right corner.

- Cut off 1 inch from the pointy skinny end.

- Using left and right pieces, carefully sew the sides onto the template A Icicle.

- Continue to make a total of 14 Template A icicle blocks.
- Using the same method above, take the dark blue 4 3/4″ x 15 3/4″ rectangles and stack them in two’s right sides together.
- Cut diagonally from the upper left corner to the bottom right corner.
- Cut off 1 inch from the pointy skinny end.
- Using left and right pieces, carefully sew the sides onto the Template B Icicle.

- Continue to make a total of 8 template B icicle blocks.
- Using the same method above, take the medium blue 4 3/4″ x 13″ rectangles and stack them in two’s right sides together.
- Cut diagonally from the upper left corner to the bottom right corner.
- Cut off 1 inch from the pointy skinny end.
- Using left and right pieces, carefully sew the sides onto the template C Icicle.
- Continue to make a total of 10 template C icicle blocks.

- Sew the icicle blocks together in vertical rows per the diagram above.
- Sew the pieces together in vertical rows, then sew the rows together, aligning edges.
- Piece together the backing.
- Make a quilt sandwich with the backing face down, then the batting, then your quilt top face up.
- Pin baste the quilt layers together.
- Quilt as desired. I used organic wavy lines.
- Sew the 2 1/2″ binding strips together and add to the quilt.


Variation Suggestions

- Reverse the background and icicle colors for a different look or color in a scheme to match your decor.
- Try using frosty winter prints, the large icicles really show off larger prints.
This quick throw is perfect to snuggle under with a cup of cocoa and your favorite book this winter. It will look perfect with my January snowman decor. I would love to see your icicle quilt, tag me on instagram @lormillerdesigns.
Looking for the EQ Mini Design Instructions? You can find them HERE
For more projects and tips and techniques on using EQ Mini, visit my Electric Quilt blog series EQ Mini Friday Fun.
For more information on EQ Mini software, go to EQ Mini.

