
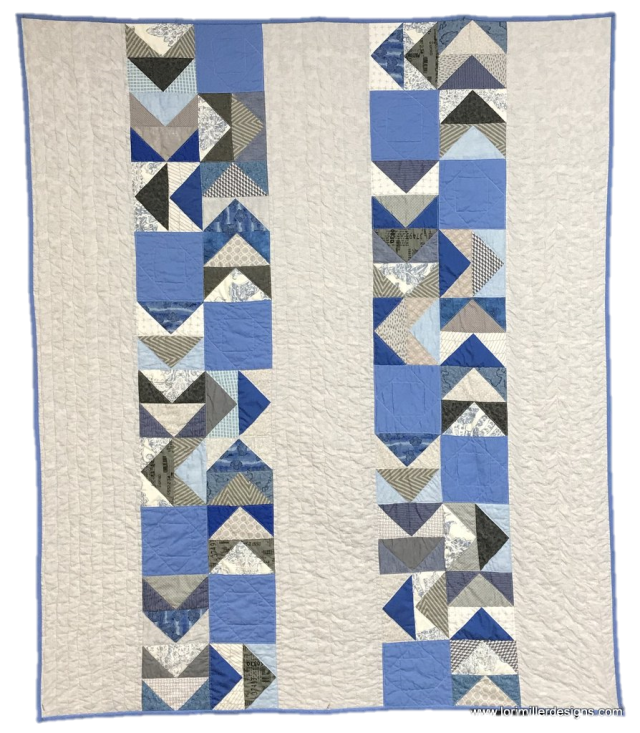
This is my son Colin’s quilt. It is called Goose Trot. I wanted something to give him for his tiny house to make it a bit cozier. I also knew I wanted to try my new AccuQuilt GO! 12″ Qube dies with my AccuQuilt GO! Cutter and use some fabrics from my stash to make it scrappy. This is the design that I came up with and I really think he will like it.
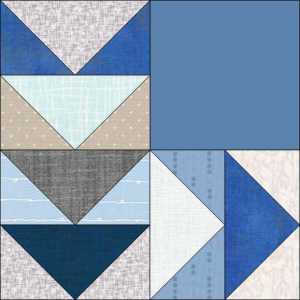
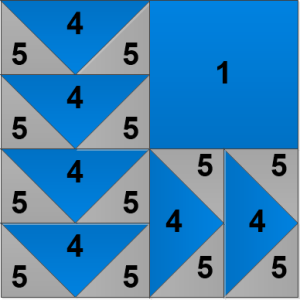
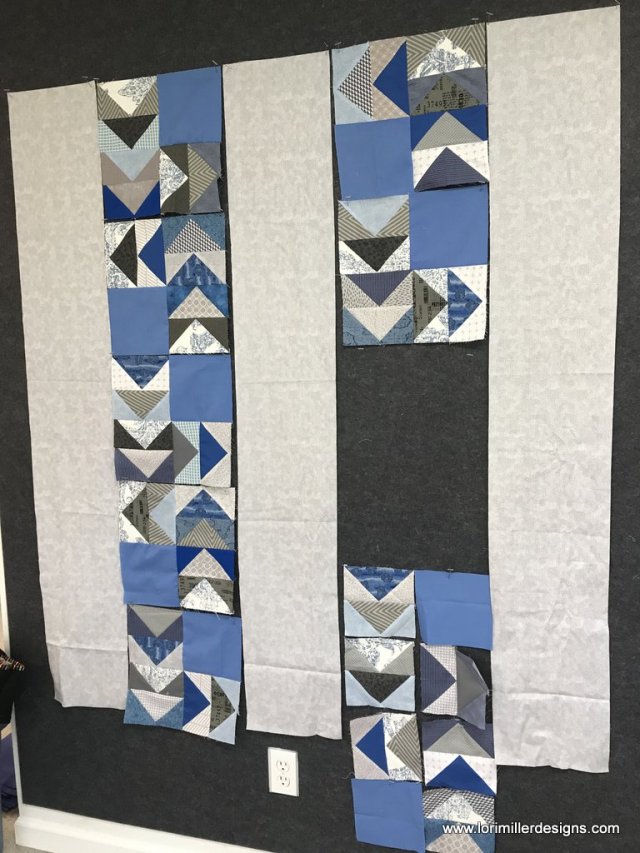
It is made with this simple four patch block I designed. I just rotated the block to create the overall design.
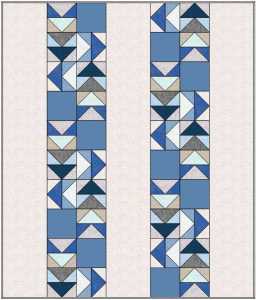
Here is the full design of the quilt. If you want to design it with EQ8, you can find a design tutorial on my EQ8 Lessons with Lori Blog post over at Electric Quilt HERE
Goose Trot Quilt
Finished size is 51″ x 60″
Finished block size is 12″
Materials
- 2 yd assorted blue and gray fabrics for geese
- 1/2 yd light blue solid
- 1 3/4 yd light gray print for vertical strips
- 1/2 yd for binding
- 4 yd Backing
- 4 yd Batting
Directions
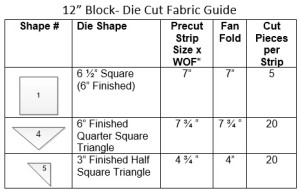
Please note: This assumes you will be using your AccuQuilt GO! 12″ Qube and die cutter to cut out the quilt. There is enough fabric to cut the traditional method. See tip at end of tutorial.
Dies used in this design:
- GO! Square-6 1/2″ (6″ Finished) (55000)
- GO! Quarter Square Triangle-6″ Finished Square (55726)
- GO! Half Square Triangle-3″ Finished Square (55703)
- GO! Strip Cutter – 2 1/4″ (1 3/4 ” Finished) (55053)
Cut Fabric:
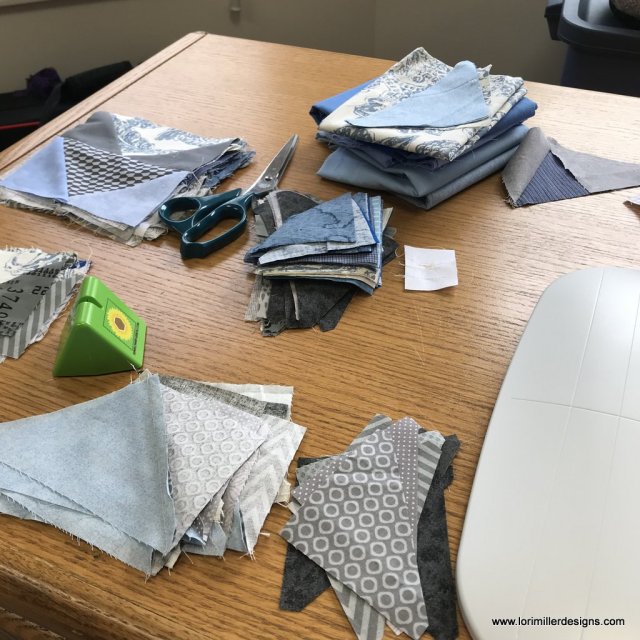
Assorted blue and gray fabrics. I mixed half and half blue and grey fabrics, using light and darks for interest. I wanted to use up a bunch of scraps and this was the perfect way to do that. You just have to count as you go so you have enough pieces of each shape.
Using 7 3/4″ strips of fabrics to cut Number 4 shape (6″ finished Quarter Square Triangle), CUT
- 30 – Assorted blue Number 4’s
- 30 – Assorted Gray Number 4’s
Using 4 3/4″ strips of fabrics to cut Number 5 shape (3″ finished Half Square Triangle), CUT
- 60 – Assorted blue Number 5’s
- 60 – Assorted Gray Number 5’s
Light Blue Solid
- Using 2 – 7″ x WOF strips of fabric to cut Number 1 shape (6″ Square), CUT
- 10 – Number 1’s
Light Grey Print
- 3 — 9 1/2 ” x 60 ” strips
Binding
- 6 — 2 1/4″ x WOF strips for binding
Assemble the blocks
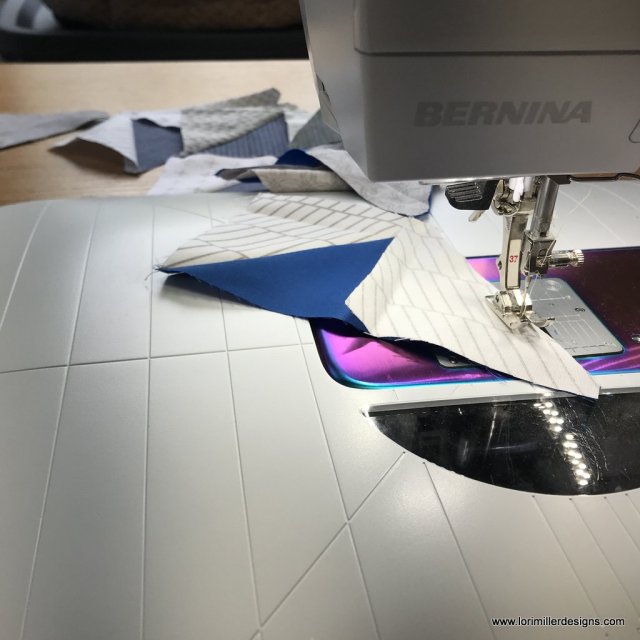
Begin by making 60 sets of Flying Geese. I alternated using the greys and blues.

Then join two geese together and make 30 sets of these.

Then arrange your flying geese blocks with your light solid blue squares into a 12 ” block. I actually arranged the whole strip before I assembled the blocks to make sure they were scrappy and to spread around the different prints. There are five complete 12″ blocks in a strip.
Assemble the Quilt
Once you have your blocks together and arranged, add your light grey print strips to complete the quilt top.
Finish the Quilt
- Create a quilt sandwich with the backing, batting and pieced quilt top.
- Baste the quilt layers together. Quilt as desired.
- Add binding and finish.
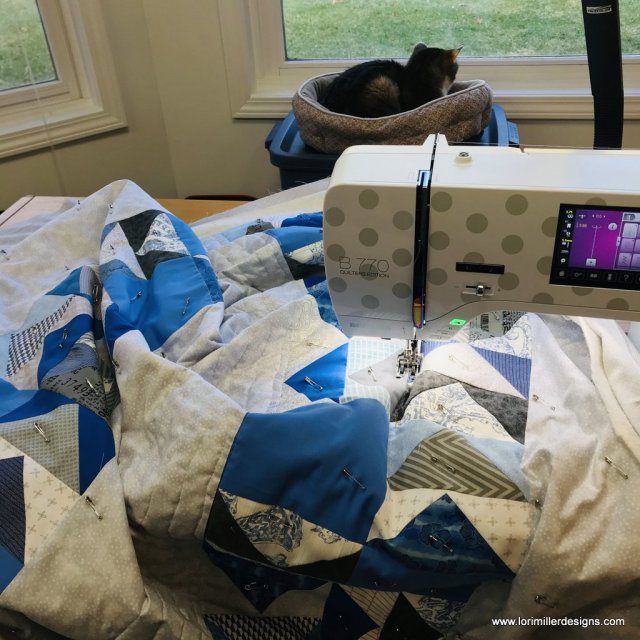
Here is my quilt sandwich, pin basted and ready for quilting. Notice my helper, Cookie cat in the window seat.

I like to hand bind my quilts most of the time. I just watch a little TV and stitch away. I used the solid light blue for my binding.
For traditional cutting, you can try these charts.

NEW PRODUCTS for EQ8 and ACCUQUILT GO! QUBE
If you like designing quilts with EQ8 and then cutting them out with your Accuquilt GO! Qube, you might want to check out my new EQ8 block libraries for Accuquilt.

I have created EQ8 Block Library files for each of the 216 blocks shared by AccuQuilt to go with their GO! Qube dies and companion dies.
You can find a variety of EQ8 Block Library files and my original patterns in my Shop.
Were you inspired to try this quilt? Be sure to let me know your thoughts in the comments and share pictures with me on social media on Facebook or Instagram. Be sure to hashtag #LoriMillerDesigns so I see it! And don’t forget to sign up for my blog updates to you get ideas like these right to your inbox.
Looking for the EQ8 Design Instructions? You can find them HERE
For more projects and tips and techniques on using EQ8, visit my Electric Quilt blog series EQ8 Lessons with Lori.
For more information on EQ8, go to Electric Quilt 8 Software.

