
I had a lovely christmas with my family. One of my favorite gifts was a new Die Cutter machine. It is a little machine to cut out accurate quilt blocks and appliques from fabric! These machines have been popular with scrapbookers but now they have a lot of options for fabric. You can really cut out intricate pieces fast with this little machine. I needed something to carry the machine and dies in and searched all over for a case or tote. I found an older design that did not seem to be in stock anywhere. So what does a pattern designer do but design a cute storage bag? Here is a little journey through my process.
I rough sketched a sort of retro bag design and drew up some pattern pieces. Yes, when the inspiration strikes, things just seem to work out. I had it in my head to do some kind of quilt as you go design. I wanted some structure to my bag, so I used headliner to quilt on with a bottom fabric of natural canvas. Some people use Soft and Stable brand but I had headliner on hand so that is what I used. I also had two colors of headliner, so you will see that in the pictures.

I had a lot of black and white scraps left over from another quilt project and I used scraps of bright blue for some contrast. I even did some fancy quilting on a few of the accent blue boxes. I started the quilting in three places so there would be lots of different fabrics.

Of course, my usual quilt helper, Cookie cat, showed up. How he knows I am in my studio quilting is amazing and he always sits right on top of whatever I am trying to work on. I just stop and give him some loving and then get back to work. It is a nice break. Smile.

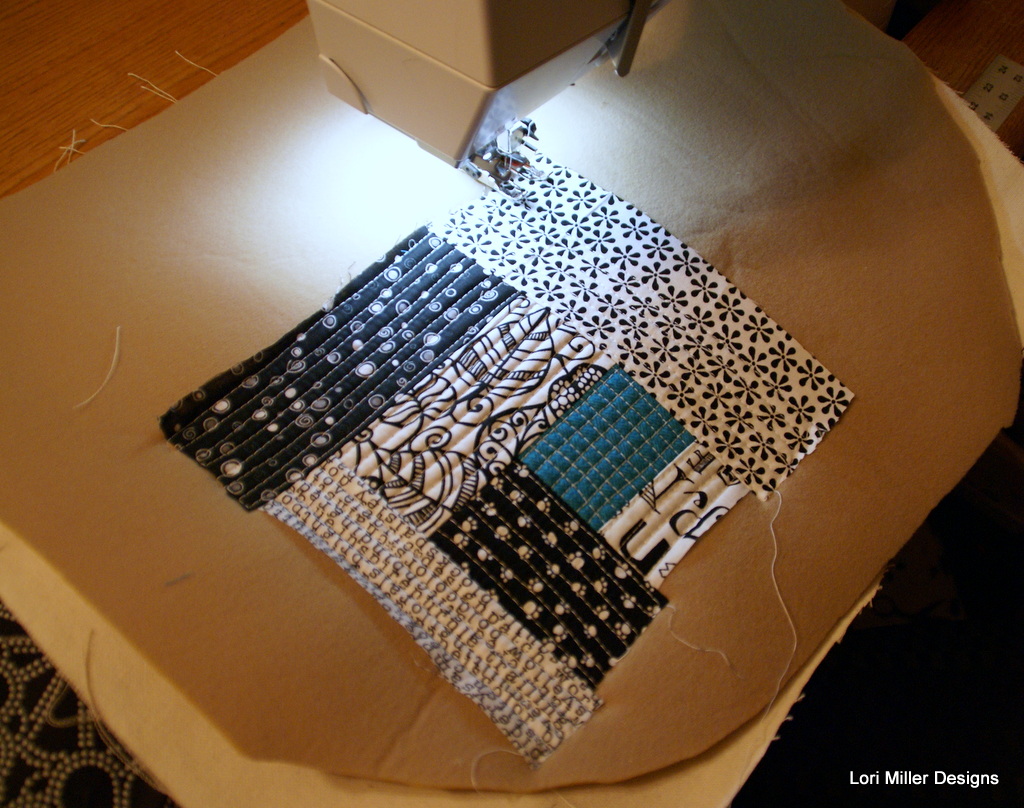
Here you can see how I just kept working my way around each of the three sections of quilting and I am getting ready to join two sections.

In this picture, you can see how I pull together the different places where I started the quilt as you go. The middle strip on the left pulled those two sections of quilting together. I just pieced it with two fabrics, but it is really one sewn piece.

Here is that section sewn into one side of the bag. I left this side plain just attaching the handles.

This is one of the ends on the sides of the bag. I made two of these.

I quilted some black canvas for the center sides in just a diamond shape. I added a double zipper that I upcycled from an old backpack. This design allows me to open up the bag wide enough to drop the Fabric die Cutter in easily. It fits right down inside. I have room on the inside to add the rest of my die cutters. The bag is tall enough for the medium size dies as well so there is room to grow.
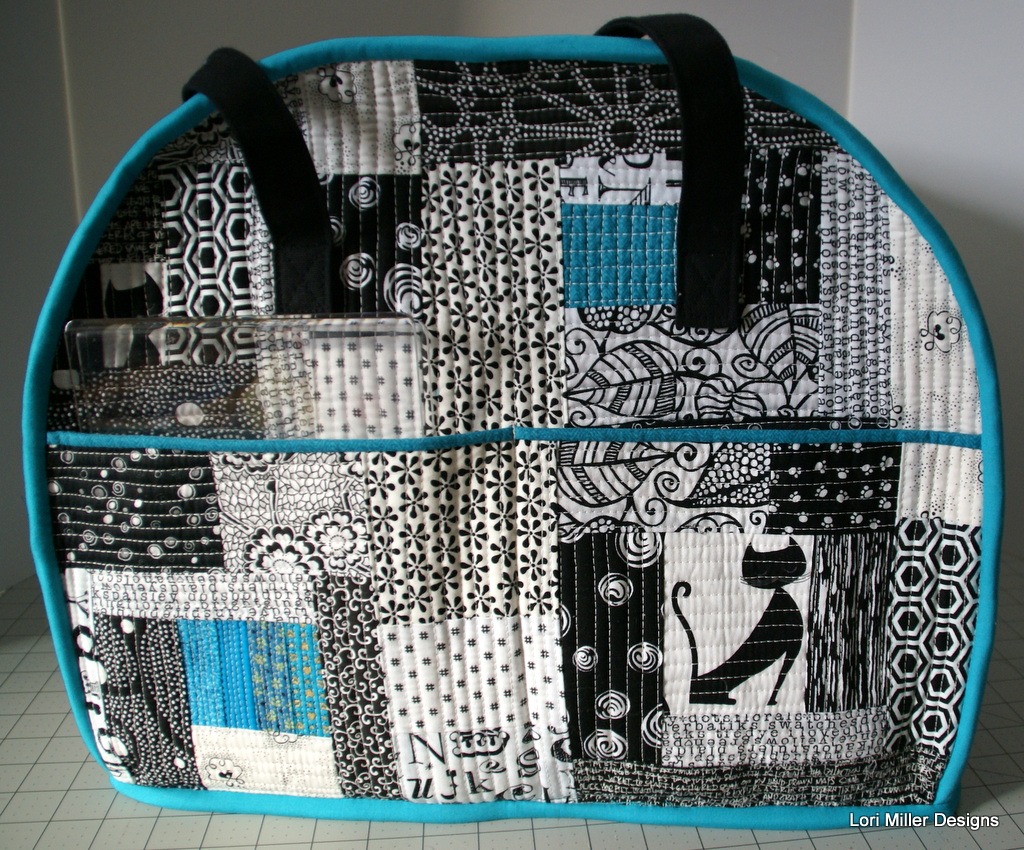
On this side, I added a pocket. Can you see the little clear cutting pads tucked into the left side, they fit perfectly. The pocket could hold a smaller die as well. I sewed the seams on the outside and just bound them like I would have added binding to a quilt.

I fussy cut little black kitties all over this bag. Look through the pictures to see if you can find them.

My other cat, Oreo, had to check out the bag too! I am thinking of writing up the pattern. Let me know if that is something that might interest you. I think I might make some small totes to go inside to fit the individual dies so I can keep them all together. I love how this turned out.
Happy Stitching!


I think the pattern would be a great idea. I love the bag
Pingback: Hexie Pincushion Tutorial | Lori Miller Designs