

Ahoy! It is summer and that means sewing projects that are fun, easy and quick to stitch up. That leaves you plenty of time to soak up the sun and play in the outdoors. This nautical themed pillow is designed to sit on an outdoor bench or decorate a bench in your home. It was designed with Electric Quilt 8 using a Horizontal Strip quilt layout. With some very easy shortcut piecing and machine applique, you can make this pillow up in an afternoon. Enjoy!
Shipmates Bench Pillow
Finished size is 16″ x 28″
Materials
- 1/2 yd light blue fabric
- 1/8 yd navy blue fabric
- 1/2 white fabric
- 1 yd backing print
- 1/4 yd red fabric for binding
- 1/2 yd muslin
- 1/2 yd batting or 20″ x 32″ piece
Directions
Cut Fabric:
Light Blue
- 1 — 16 1/2″ square
- 2 — 4 1/2″ x 16 1/2″ rectangles
Navy Blue
- 2 — 6 ” squares
White
- 2 — 6 ” squares
- 1 — 16 ” square
Red
- 3 — 2 1/4″ x WOF strips for binding
Printed Backing
- 2 — 18″ x 33″ rectangles
Muslin
- 1 — 18″ x 30″ rectangle
Batting
- 1 — 18″ x 30″ rectangle
Water Soluble Marker or Pencil
1 — 16″ square of double sided fusible web
Piece the Pillow Top

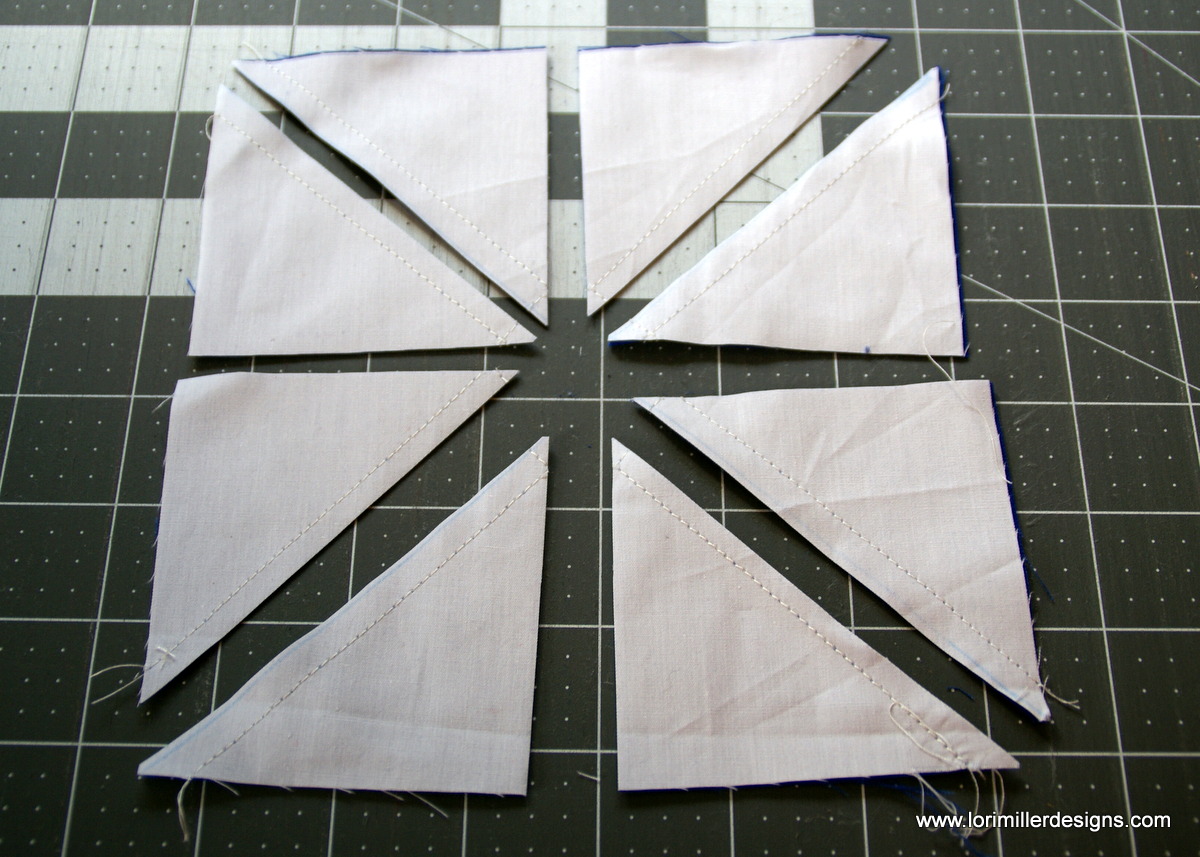
- Make the half square triangles to resemble a rope design. Take the two white 6″ squares and mark them from corner to corner.
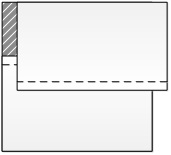
- Place the white square right sides together with the navy blue 6″ squares. Stitch 1/4″ away from each side of the diagonal marked lines.

- Carefully cut the squares on the diagonal lines and then in half both ways as in diagram above. This will create 8 half square triangles for each square for a total of 16.

- Press the seams to the darker fabric. Trim the blocks to 2 1/2″ square.

- Stitch the half square triangles together in groups of two to start, then piece them all together to form the rope strips. I stitched both in the same directions. Set aside.

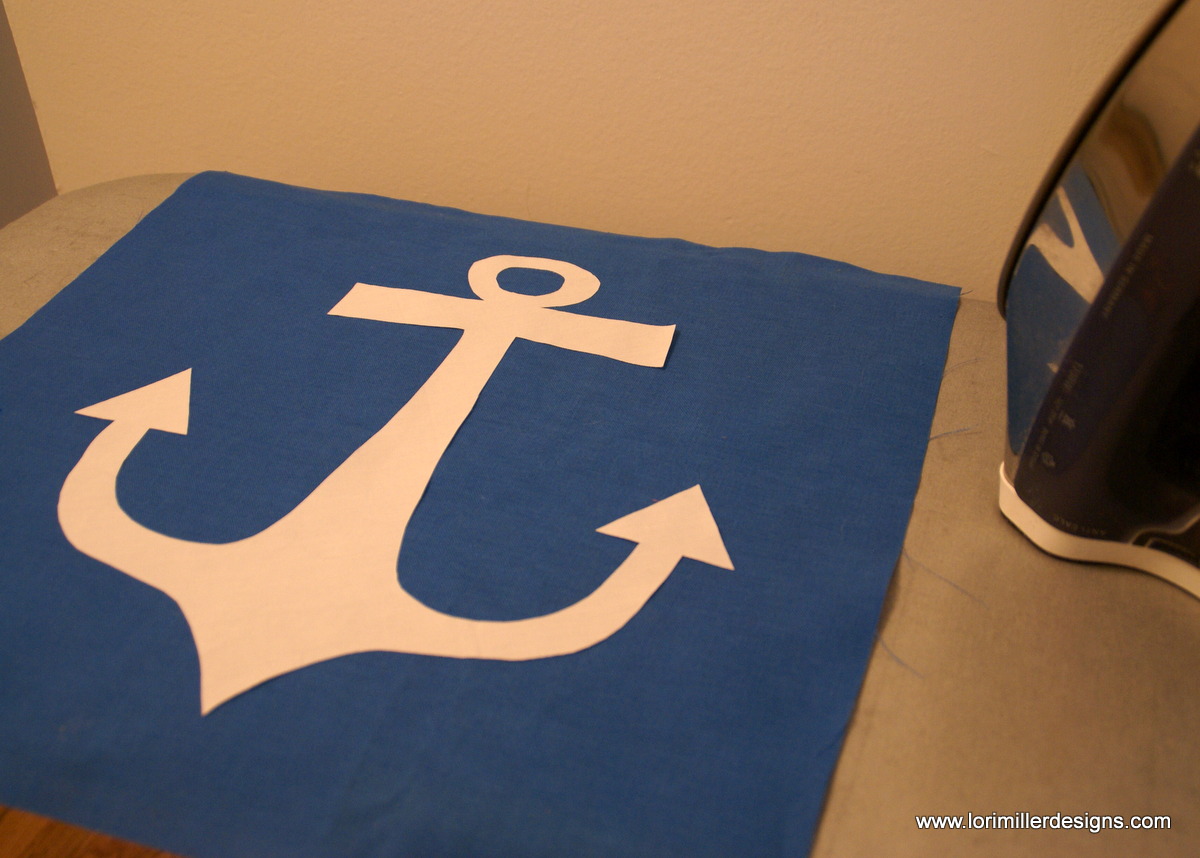
- Next, print out the anchor template and tape it together using the guidelines. Using a light box or a window, trace the anchor outline to one side of the fusible web. Press the fusible web according to the manufacturers instructions to the wrong side of the white fabric 16″ square. Carefully cut out your anchor applique. Peel off any backing.

- Position the anchor in the center of the 16 1/2″ light blue square. One you have it where you like it, press the anchor onto the center of the pillow.

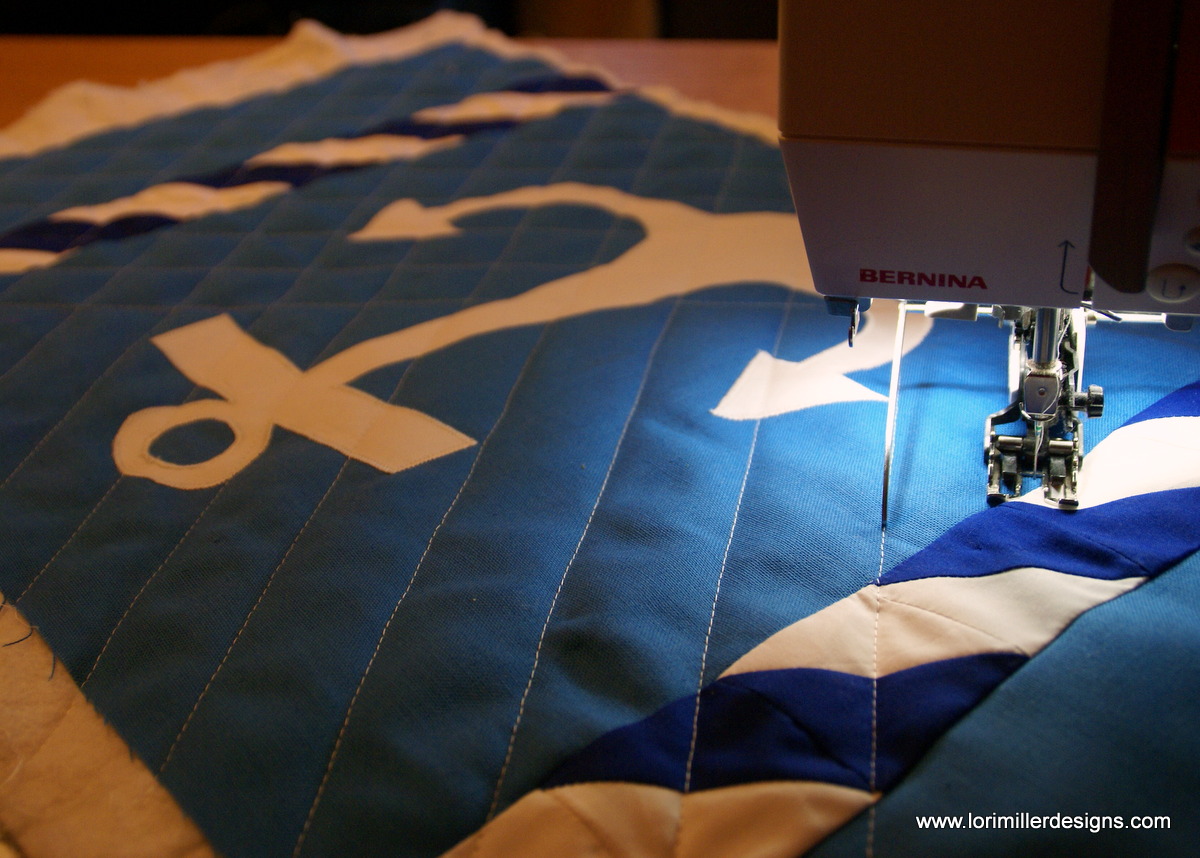
- Now applique around the outside edge of your anchor to finish the applique. You may need to use some stabilizer underneath the design as you stitch so that the background fabric does not pucker. Use a light tear away or other stabilizer of your choice. I used a zig zag stitch that was a little bit larger than a satin stitch. For the points, I taper the stitch down before I turn.

- Next assemble all of the strips to create the pillow top.


Quilt the pillow top
- Layer pillow top with the muslin, batting and pillow top, right side up.
- Pin baste the quilt layers together.

- Quilt as desired. I used painters tape to mark diagonal lines and then I quilted straight lines diagonally. Trim the pillow top to 16 1/2″ x 28 1/2″. It might be slightly smaller depending on how much quilting you did.


Finish the Pillow
- Fold each 18 ” x 33″ background print rectangle in half, wrong sides together, to form two 18″ x 16 1/2″ rectangles. Press.
- Top stitch along the folded edge of the pillow about 1/2″ away from the fold.
- Place the quilted pillow top, right side down.

- Place two folded rectangles over each pillow, overlapping the folded edges in the center by about 4″.

- Baste 1/8″ along the outside of the layers. Trim. Don’t you love this cute print that matches the applique so perfectly? I found it in my stash.

- Bind with the red binding strips.
- Finish by inserting a pillow form through the opening.


I would love to see pictures of your Shipmates pillows! Tag me on Facebook or Instagram @lorimillerdesigns
Looking for the EQ8 Design Instructions? You can find them HERE!
For more projects and tips and techniques on using EQ8, visit my Electric Quilt blog series EQ8 Lessons with Lori.
For more information on EQ8, go to Electric Quilt 8 Software.


Hey Lori, in step#3 of quilt the top, the last sentence says to trim the top to 16.5 inches Square. I don’t think that’s correct, is it? 16.5 is just the middle part with the anchor. At this point we’ve just finished quilting the whole thing. Why would we cut the sides off?
Julie, You are right, great catch. I have updated the blog post. It should say trim to 16 1/2″ x 28 1/2″. Thanks for letting me know!
Lori, i do love that fabric you used for the back of the pillow. It’s just perfect! I know you said you got it from your stash. Any chance you might remember who made it and/or what it’s called?
I am so sorry, I have no idea, I have had it quite a while and I cut off the selvages. I did see nautical prints around the shops this summer so maybe you will be able to come across some.