

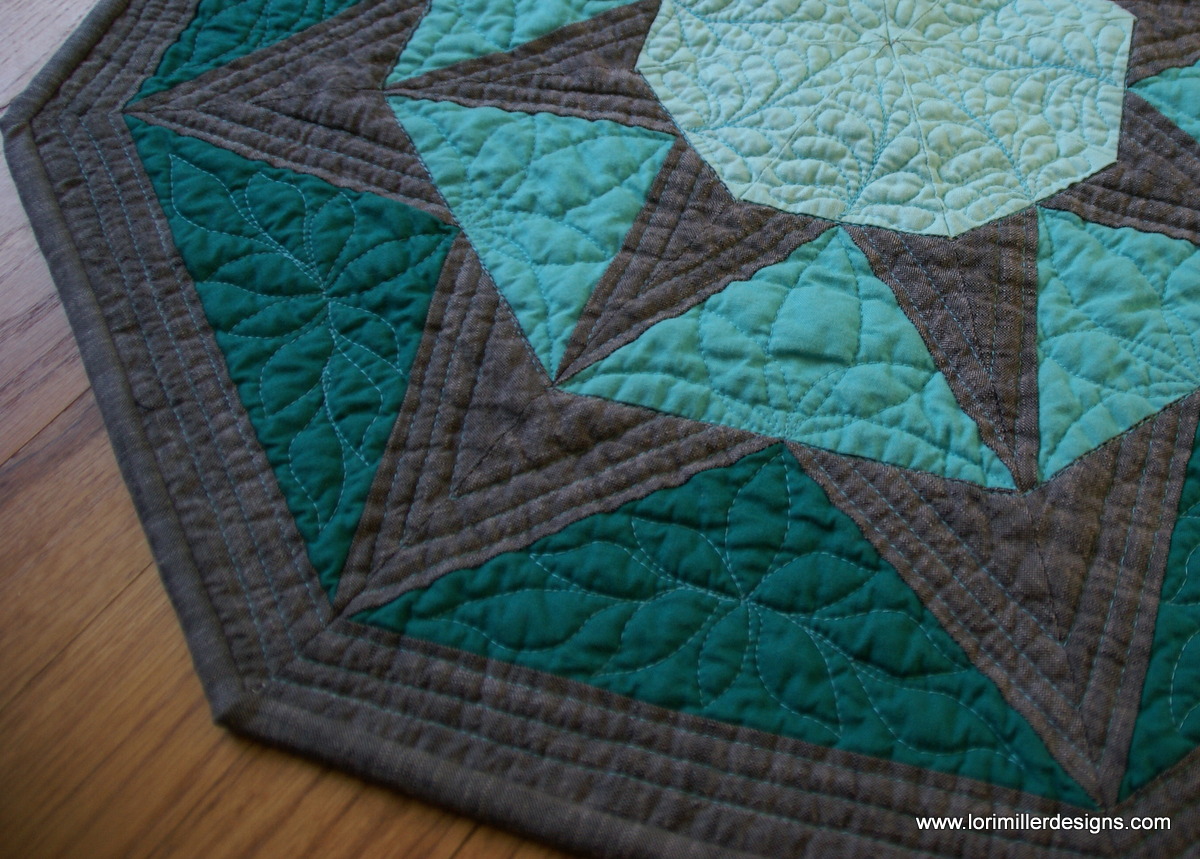
This fun Octagon shaped Stardrop Table Topper was designed with EQ8 Quilt Design Software by The Electric Quilt Company . This tutorial takes that design and gives you the information to make it yourself. This is a very easy beginner foundation pieced mini quilt but it is helpful to have some basic knowledge of paper piecing. you will assemble eight units to combine to create the top of this little quilt. I made this with gradations of aqua and teal solid cotton fabrics and the background is a lovely linen. This is the perfect base for your table centerpiece.
Stardrop Table Topper
Finished size is approximately 24″ x 24″
Materials
- 1/8 yd of light aqua cotton
- 1/8 yd of medium aqua cotton
- 1/8 yd of teal cotton
- 1 yd for background, backing and binding
- 28″ square piece of batting
- Stardrop Template 1 Updated 2022
- Stardrop Template 2
- 16 sheets of Foundation Paper or Quilters Newsprint
Directions
Cut Fabric:
From light aqua, cut:
- 8 — 4 1/2 ” x 5″ rectangles
From medium aqua, cut:
- 8 — 5″ x 7″ rectangles
From dark teal, cut:
- 8 — 5″ x 10″ rectangles
From the dark linen, cut:
- 1 – 28″ square for the backing
- 16 — 2 1/2″ x 6″ rectangles for top template background
- 16 — 3″ x 7″ rectangles for bottom template background
- 8 — 2″ x 11″ strips for bottom template background
- 95″ x 2 1/4″ strips for binding (can be pieced together)


Paperpiecing

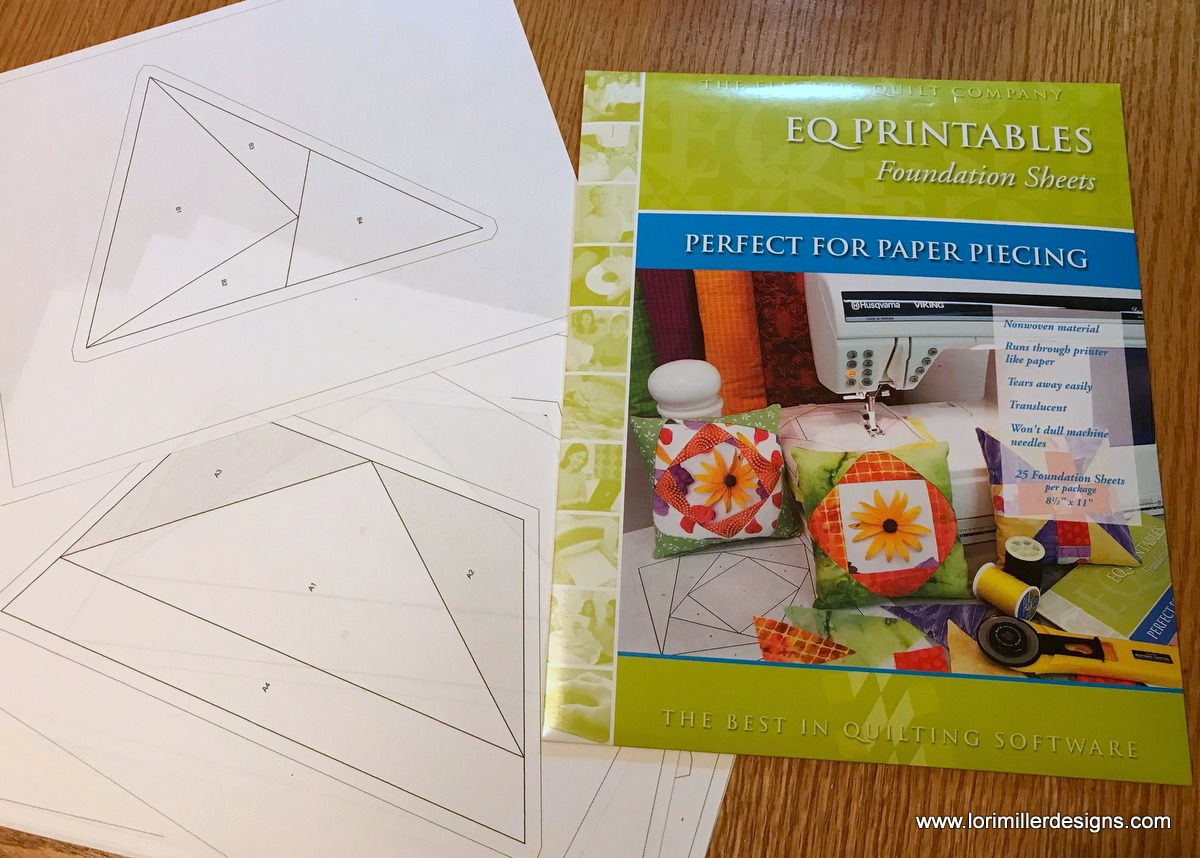
- Use a pencil to trace the foundation pattern once onto a lightweight copy or foundation piecing paper of your choice. I used EQ Printables Foundation sheets for this project generously provided by EQ.
- Use a very short machine stitch, I use 1.8 mm so the paper will tear off easily later.
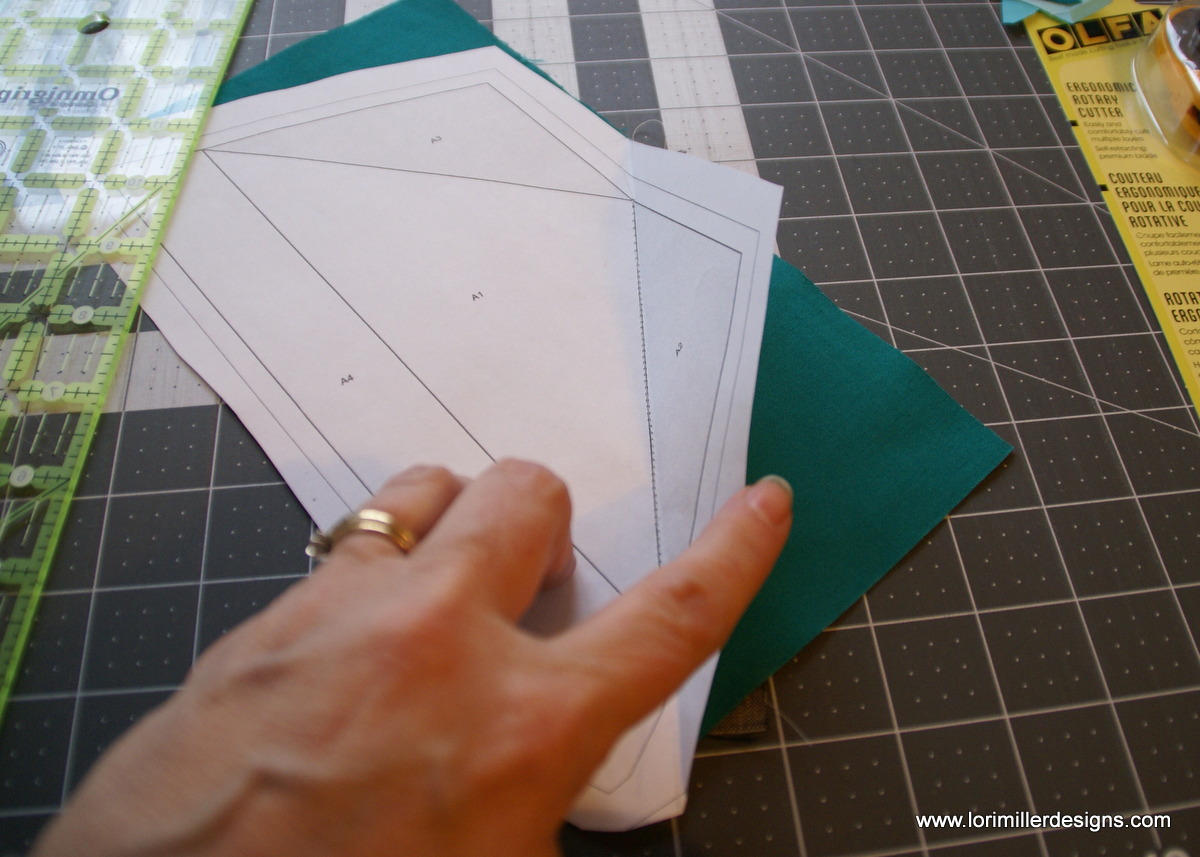
- To foundation paper piece, stitch fabric pieces to a foundation paper with the marked side of the paper facing up and the fabric pieces layered underneath. The resulting pieced unit is a mirror image of the foundation paper.

- Using the larger template and starting in the number order, place the first two fabric pieces, RST, on the back side of the foundation paper with the edges of the fabrics extending ¼” beyond the first stitching line. The first stitching line is between section A1 and A2.
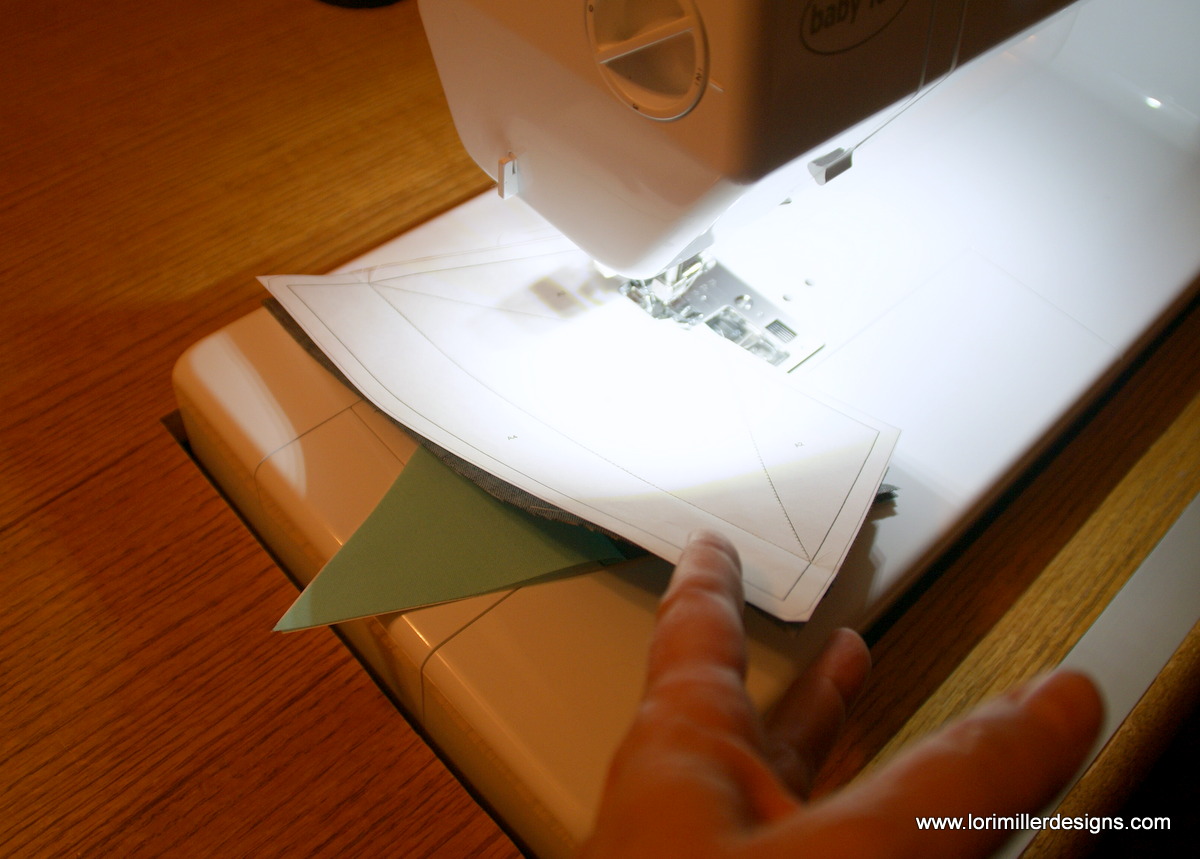
- Holding the pieces in place, stitch from the top side on the line between the two areas, starting and stopping just past the seam allowances.

- Above, you see the back side of the pieces we just stitched.

- Flip the piece back over and fold the paper back on the line you just sewed.

- Using a ruler, trim the seam to 1/4″. Be careful not to cut through your paper template.

- Fold the paper back and flip it over again.

- Open out the piece and press the seam. The right sides of the fabrics will show on the back side of the paper template.
- Continue to add pieces in order step by step until you have finished the bottom template.

- Trim the bottom template around the outside seam allowance on the paper.
- Use the same method to sew the top template pieces.

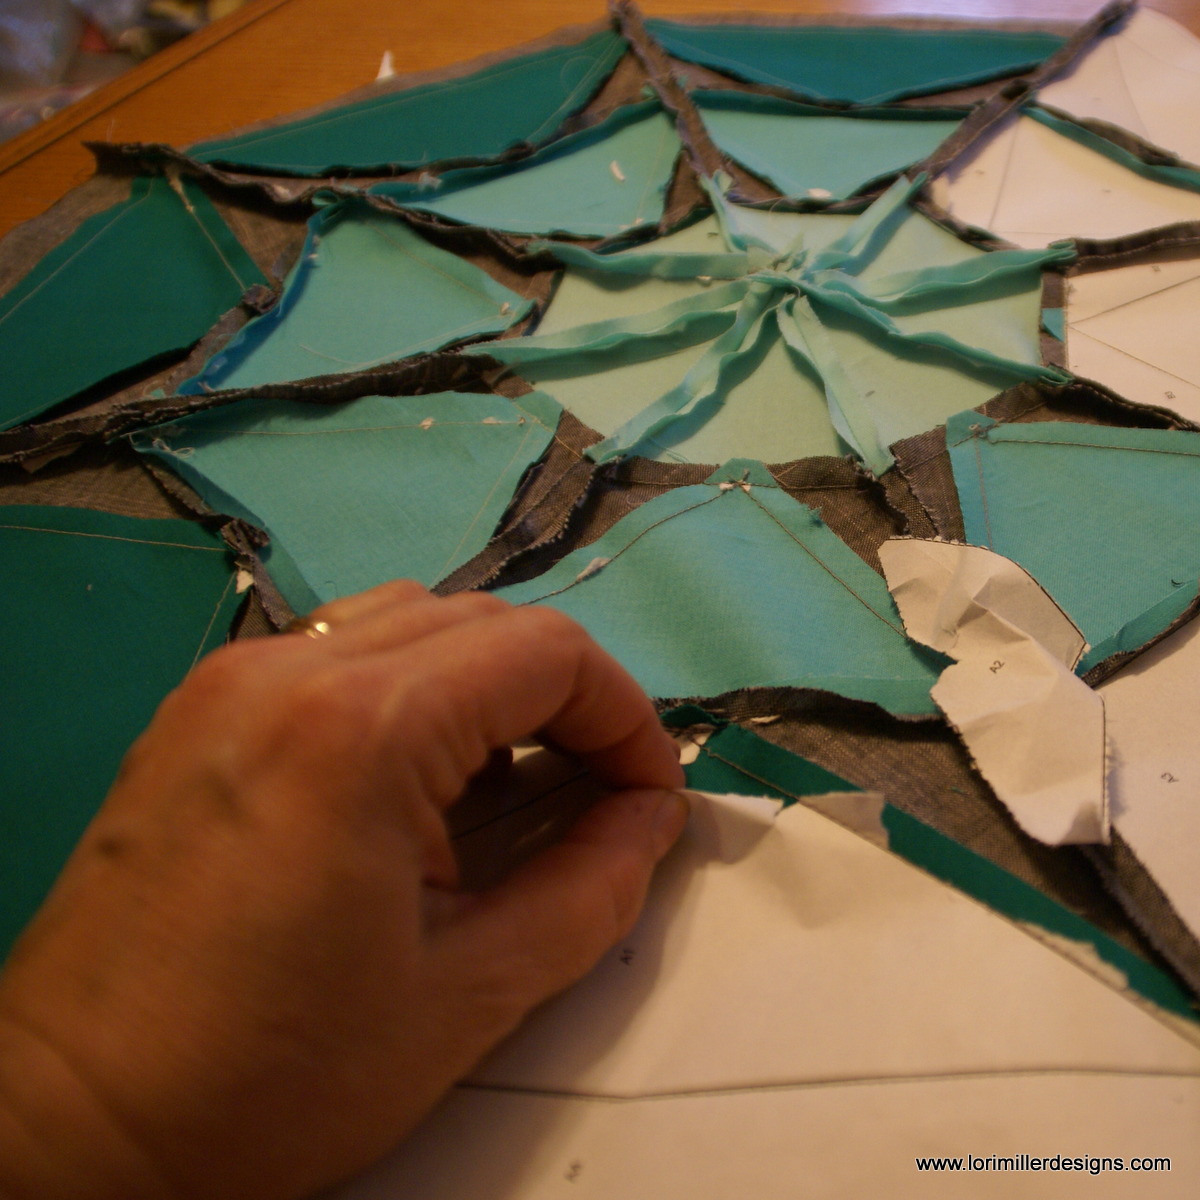
- Carefully sew the top and bottom foundation templates together. You should have a total of 8 triangle shapes.

- Sew together the paper pieced shapes, two at a time, aligning seams and points.

- Then stitch together the pieces to form two halves. Now you can sew together the two halves, aligning the center points and seams.

- Carefully tear off the foundation pattern when you have finished the block


Assemble the Stardrop Table Topper
- Make a quilt sandwich with the quilt top, batting and backing.
- Baste the quilt layers together.

- Quilt as desired. I used some free motion feathers and leafy motifs in the triangles.

- Sew the 2 1/4″ strips together for the binding and add to the quilt. You are finished!

I would love to see your Stardrop Table Topper Quilt, tag me on instagram @lorimillerdesigns.
Looking for the EQ8 Design Instructions? This quilt was designed in two parts, follow the links below:
EQ8 Stardropper Table Topper Design – Part 1
EQ8 Stardropper Table Topper Design – Part 2
For more projects and tips and techniques on using EQ8, visit my Electric Quilt blog series EQ8 Lessons with Lori.
For more information on EQ8, go to Electric Quilt 8 Software.


Thanks Lori. Just happened to be on line and saw your post on Iowa, your. Favorite state. Careful driving this weekend.
On Fri, Apr 13, 2018, 9:09 AM Lori Miller Designs wrote:
> lorimillerdesigns posted: ” This fun Octagon shaped Stardrop Table Topper > was designed with EQ8 Quilt Design Software by The Electric Quilt Company > . This tutorial takes that design and gives you the information to make it > yourself. This is a very easy beginner foundation piec” >
Pingback: Published – Welcome Neighbor Table Topper | Lori Miller Designs
I have just come across this free pattern and am trying paper piecing with freezer paper for the first time, I have done a test block with your templates and they don’t fit together properly. The bottom of the top section (B) does not align with the top of the bottom section (A) once it is time to put the two sections together. Section B is too large. If I sew them together “as is” the top section will lose its points once all pieces are joined together. Can you please have a look at this and adjust the template as needed. The topper is very pretty and I would like to work on it, however it isn’t working out for me. Can you let me know if anyone else is having this problem? Thanks.
Angie,
This pattern has been on my website for four years and no one had mentioned a problem. But I wanted to investigate. I checked the templates on the website to my original templates that I had created and you are right! Template 1 was too small. I have updated the template and updated my tutorial on the website. I hope you would be willing to download and print out to double check the correction. Thank you so much for bringing this to my attention! Lori
I made this using freezer paper, but I made is larger for my table (36″) so I redrew it entirely, making the triangles longer, as well as adding borders. It is turning out very nice, and I thank you for this pattern.
Hi, I printed the two templates today and the top is still too narrow for the bottom. Is there somewhere else I should be patenting it from?
Thanks, Jackie
Let me check on that for you.
Jackie, I discovered the second template was a word file instead of a pdf. So if you had different settings than mine when you opened in word, it could distort the image to not match the original. It is now saved as a pdf and should retain the original shape to fit. Thanks for bringing this to my attention. Lori