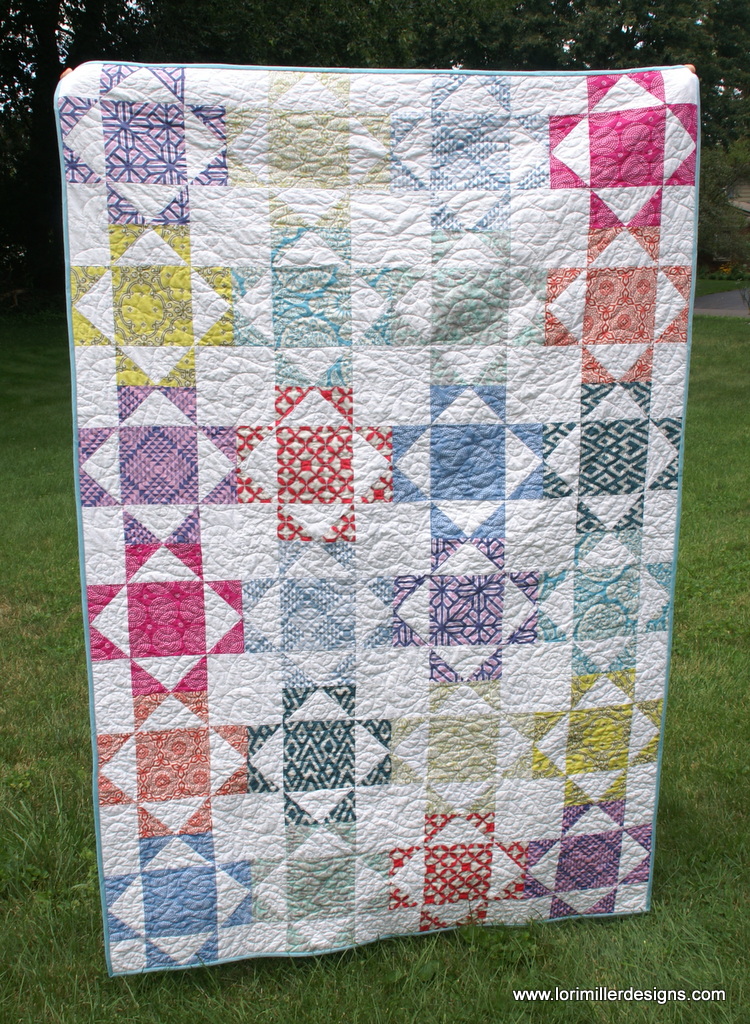
Lets have a party before summer ends with this fun and cheery Fiesta Quilt! My next tutorial is a quilt designed with EQ Software by The Electric Quilt Company . It uses a simple Horizontal layout with only one block. The large 12 inch block shows off some lovely Joel Dewberry prints that I picked up from Crimson Tate at Quiltcon this year. If you have a stack of fat quarters that you have been wanting to use, this quilt makes two blocks from each fat quarter with a single background color. All of the varied colors give a scrappy look, so you could certainly use whatever fun fabrics you have on hand.
EQ Mini is a scaled down, simpler version of EQ7 quilt design software. This program was created for quilters who are just getting started using software for quilt design. EQ Mini will help you create, edit, share, and print patterns and yardage for your quilt designs.

When I designed this little quilt, I used a simple horizontal layout using just one block called the Economy Block. I wanted a large block to show off the fabric prints that I had so I made the blocks 12 inches square. It worked out that I could get two blocks made from each fat quarter with a little to spare. I kept playing with the sizes of the blocks in the software to try and use as much of a fat quarter as I could. The software lets you print how much fabric is required for a block so you can play with the sizes until it matches what fabric you have on hand.
Fiesta Quilt
Finished size is approximately 48″ x 72″
Materials
- 12 pack of coordinating fat quarters
- 2 1/8 yds white fabric for the background
- 3 yds for backing
- 1/2 yd blue solid for binding
- 54″ x 80″ piece of batting
Directions
Cut Fabric:
From white background, cut:
- 96 — 3 1/2″ squares
- 24 — 7 1/4″ squares
From each fat quarter, cut:
- 2 — 6 1/2″ squares
- 8 — 3 7/8″ squares
From the binding fabric, cut:
- 6 — 2 1/4″ strips x WOF

Make the Economy Block


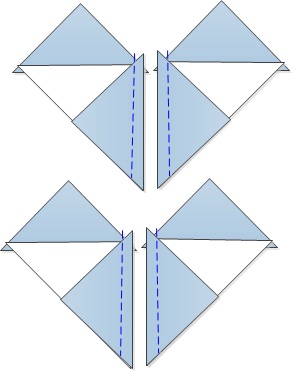
- This block contains 4 flying geese components and there is a great way to make 4 matching flying geese.
- On the back side of each 3 7/8″ print square, mark a line diagonally through the center of opposite corners.
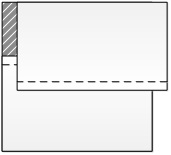
- Place two print squares diagonally, right sides together (RST) over one of the 7 1/4″ white background squares. The print squares will slightly overlap. Stitch 1/4″ away from each side of the marked center line.
- Carefully cut between the two lines of stitching.
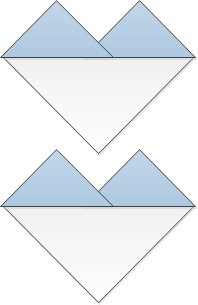
- Press towards the small print squares.

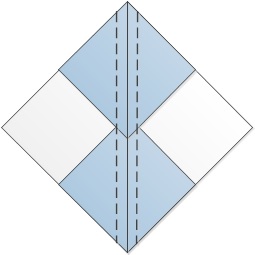
- Place two 3 7/8″ print squares, RST, over the two triangle units. Stitch 1/4″ away from each side of the marked center line.

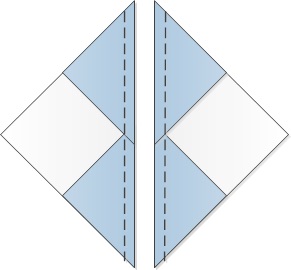
- Carefully cut between the two lines of stitching.

- Press towards the small print squares. You will have 4 identical flying geese.

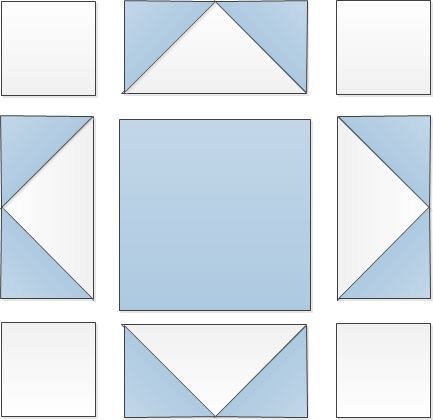
- Once the geese are assembled, layout all of the pieces of the block.
- Stitch together in rows.
- Trim the blocks carefully to 12 1/2″ x 12 1/2″ square.


Assemble the Fiesta Quilt top


- Layout your blocks in a pleasing arrangement. You have two of each block but you can randomly lay them out. I used this fancy design wall, ok, well it is really my bed up at the cottage.

- I sewed them in group of four and then put them all together.
- Piece together the backing so that it is about 4 inches larger than the quilt top all around.
- Make a quilt sandwich with the quilt top, batting and backing.

- Pin baste the quilt layers together.

- Quilt as desired. I used an all over swirly pattern.
- Sew the 2 1/4″ strips together for the binding and add to the quilt. You are finished! Time to Fiesta!


Use that fat quarter bundle from your stash or cut up some colorful scraps for this quilt. I would love to see your Fiesta Quilt, tag me on instagram @lorimillerdesigns.
Looking for the EQ Mini Design Instructions? You can find them HERE!
For more projects and tips and techniques on using EQ Mini, visit my Electric Quilt blog series EQ Mini Friday Fun.
For more information on EQ Mini software, go to EQ Mini.