New Product! EQ8 Block Library: AccuQuilt BOB Set 1


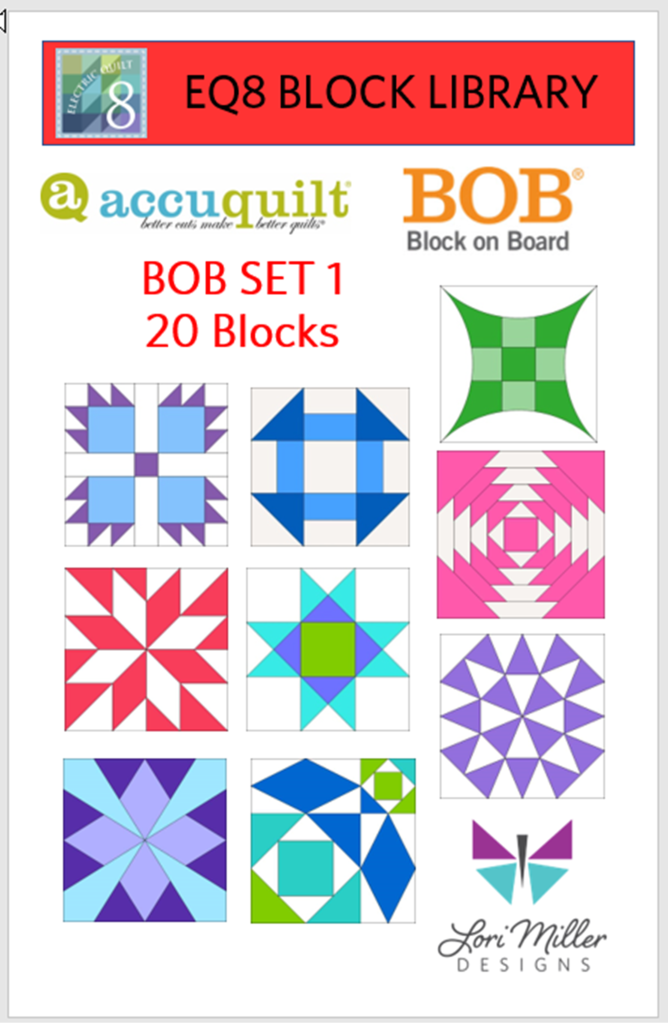
It’s Here!!! Ever since I published my EQ8 block library files for the AccuQuilt GO! Qube Mix & Match sets, you have been requesting more.  You tell me how convenient they are to use with EQ8 and then cut out with your AccuQuilt GO! cutters.  They make your design process speedier and that it is so nice to have the block to match your BOB die.  So I decided to create block files for the AccuQuilt Block on Board (BOB) dies. 

BOB die blocks enable you to create an entire block with one die board.  Every piece needed for the block is on the design board.

This file contains SET 1 of the BOB block designs which includes 20 blocks.  The blocks vary in size as indicated to match the BOB die. I have included the size of the block by the name reference.

The ONLY designs included in this set are:

  • Bear’s Paw 14”
  • Chimney Sweep 10”
  • Churn Dash 9”
  • BIG Churn Dash 12”
  • Crossed Canoes 9″
  • Glorified Nine Patch 9”
  • Hattie’s Choice 8”
  • Hunter’s Star 6”
  • LeMoyne Star 9”
  • Log Cabin 12”
  • Maple leaf 8″
  • Morning Star 12”
  • Ohio Star 12”
  • Pineapple 10”
  • Snail’s Trail 12”
  • Snail’s Trail 8″
  • Snowball 6”
  • Spool 6”
  • Starry Path 9″
  • Storm at Sea 9”

Required: A running copy of EQ8 Quilt Design Software from The Electric Quilt Company.

Required: You will need the AccuQuilt BOB die set in the size that matches the EQ8 library file in order to cut out these block designs with the AccuQuilt GO! Cutter.  Make sure your cutter is the right size for the BOB die.

This is a downloadable digital file that you will place into your personal block library.  Once you place the block file in your library, you will be able to use it immediately to draw and design quilts.  I have included all of the instructions to add the files to your EQ8 Design Software.  You will receive the EQ8 Block library, a block reference guide and an instruction document.  The blocks are all labeled to match the reference guide.

Now you can use the power of EQ8 to recolor and combine blocks to design beautiful quilts.

Once you have designed your quilt, you can use your AccuQuilt GO! Cutter to make it.  I have also included tips and suggestions for determining what dies to use and how to determine fabric requirements.

I hope you enjoy these files as you create your BOB design quilts.

Happy designing with your AccuQuilt Block on Board Set 1 library blocks in EQ8.

If you liked this EQ8 Block Library File, check out my other available files that work with AccuQuilt.  See the complete line of products available!

I appreciate your feedback and suggestions on this product.

Happy Designing!

Free Tutorial – Fiesta Quilt

Lets have a party before summer ends with this fun and cheery Fiesta Quilt!  My next tutorial is a quilt designed with EQ  Software by The Electric Quilt Company .  It uses a simple Horizontal layout with only one block.  The large 12 inch block shows off some lovely Joel Dewberry prints that I picked up from Crimson Tate at Quiltcon this year.  If you have a stack of fat quarters that you have been wanting to use, this quilt makes two blocks from each fat quarter with a single background color.  All of the varied colors give a scrappy look, so you could certainly use whatever fun fabrics you have on hand.

eqmini-nohole-sm-226x300

EQ Mini is a scaled down, simpler version of EQ7 quilt design software.  This program was created for quilters who are just getting started using software for quilt design.  EQ Mini will help you create, edit, share, and print patterns and yardage for your quilt designs.

When I designed this little quilt, I used a simple horizontal layout using just one block called the Economy Block.  I wanted a large block to show off the fabric prints that I had so I made the blocks 12 inches square.  It worked out that I could get two blocks made from each fat quarter with a little to spare.  I kept playing with the sizes of the blocks in the software to try and use as much of a fat quarter as I could.  The software lets you print how much fabric is required for a block so you can play with the sizes until it matches what fabric you have on hand.

Fiesta Quilt

Finished size is approximately 48″ x 72″

Materials

  • 12 pack of coordinating fat quarters
  • 2  1/8 yds  white fabric for the background
  • 3 yds for backing
  • 1/2 yd  blue solid for binding
  • 54″ x 80″ piece of batting

Directions

Cut Fabric:

From white background, cut:

  • 96 — 3 1/2″ squares
  • 24 — 7 1/4″ squares

From each fat quarter, cut:

  • 2 — 6 1/2″ squares
  • 8 — 3 7/8″ squares

From the binding fabric, cut:

  • 6 — 2 1/4″ strips x WOF

Make the Economy Block

  1. This block contains 4 flying geese components and there is a great way to make 4 matching flying geese.
  2. On the back side of each 3 7/8″ print square, mark a line diagonally through the center of opposite corners.
  3. Place two print squares diagonally, right sides together (RST) over one of the 7 1/4″ white background squares.  The print squares will slightly overlap. Stitch 1/4″ away from each side of the marked center line.
  4. Carefully cut between the two lines of stitching.
  5. Press towards the small print squares.
  6. Place two 3 7/8″ print squares, RST, over the two triangle units.  Stitch 1/4″ away from each side of the marked center line.
  7. Carefully cut between the two lines of stitching.
  8. Press towards the small print squares.  You will have 4 identical flying geese.

  9. Once the geese are assembled, layout all of the pieces of the block.
  10. Stitch together in rows.
  11. Trim the blocks carefully to 12 1/2″ x 12 1/2″ square.

Assemble the Fiesta Quilt top

  1. Layout your blocks in a pleasing arrangement.  You have two of each block but you can randomly lay them out.  I used this fancy design wall, ok, well it is really my bed up at the cottage.
  2. I sewed them in group of four and then put them all together.
  3. Piece together the backing so that it is about 4 inches larger than the quilt top all around.
  4. Make a quilt sandwich with the quilt top, batting and backing.
  5. Pin baste the quilt layers together.
  6. Quilt as desired.  I used an all over swirly pattern.
  7. Sew the 2 1/4″ strips together for the binding and add to the quilt.  You are finished! Time to Fiesta!


Use that fat quarter bundle from your stash or cut up some colorful scraps for this quilt.   I would love to see your Fiesta Quilt, tag me on instagram @lorimillerdesigns.

Looking for the EQ Mini Design Instructions?  You can find them HERE!

For more projects and tips and techniques on using EQ Mini, visit my Electric Quilt blog series EQ Mini Friday Fun.

For more information on EQ Mini software, go to EQ Mini.

Free Tutorial – Americana Placemat

For this month’s free tutorial project, we are sticking with a mini approach.  This striking design is for a patriotic placemat which certainly qualifies as a mini quilt.  This placemat was designed with EQ Mini Software by The Electric Quilt Company .  It uses a Vertical strip layout and a traditional Ohio Star block to create a winning red, white and blue design.  Stitch up as many as you need for your holiday celebrations or just make one for a cute centerpiece design.

eqmini-nohole-sm-226x300

EQ Mini is a scaled down, simpler version of EQ7 quilt design software.  This program was created for quilters who are just getting started using software for quilt design.  EQ Mini will help you create, edit, share, and print patterns and yardage for your quilt designs.

When I designed this little quilt, I used a vertical strip layout with two strips.  Each strip uses a pieced row of blocks.

Americana Placemat

Finished size is 14″ x 17″.

Materials

This will make one placemat.

  • 1/4 yd Red
  • 1/4  yd White
  • 1/4 yd Blue
  • 1/4 yd for binding
  • 1/2 yd for backing
  • 16″ x 20″  piece of batting

Directions

Cut Fabric:

From red fabric, cut:

  • 3 — 3 1/4″ x 12 1/2″ strips

From white fabric, cut:

  • 2 — 3 1/4″ x 12 1/2″ strips
  • 3 — 2″ squares
  • 6 — 3″ squares

From blue fabric, cut:

  • 12 — 2″ squares
  • 6 — 3″ squares

From binding fabric, cut:

  • 2 — 2 1/4 ” x WOF strips  for binding

From backing fabric, cut:

  • 1 — 16″ x 20″ rectangle

Make Ohio Star Blocks

  1. You will make three Ohio Star blocks for each Americana Placemat.
  2. Start with quarter square triangle units.
  3. Mark a line on the wrong side of the 3″ white fabric squares diagonally from corner to corner.
  4. Place the marked white fabric square right sides together (RST) with a 3″ blue fabric square.
  5. Sew two seams, each 1/4″ away from the center marked diagonal line.
  6. Cut along the marked line to separate the half square triangles.  Press seams to the darker fabric.
  7. Mark a line on the wrong side of one of the half square triangles.
  8. Pair the half square triangles, RST. with opposite fabrics facing each other.
  9. Sew two seams, each 1/4″ away from the center marked diagonal line.
  10. Cut along the marked line to separate the now quarter square triangles.  Press seams open.
  11. Make a total of 12 quarter square triangles.
  12. Trim the quarter square triangles to 2″ square.
  13. Arrange the parts of the Ohio Square block and stitch together.
  14. Sew the three stars together for the left side of the placemat.  Sew the red and white strips together for the right side of the placemat and then join them together.
    Note:  I rounded up some of the numbers to 1/4 inches so you may have to adjust a bit to match up the stars with the stripes.  I did not want you to have to work with sixteenths of inches.
  15. Make a quilt sandwich with the backing face down, then the batting, then your quilt top face up.
  16. Pin baste the quilt layers together.
  17. Quilt as desired.  I stitched some fun loops in the red and white strips.
  18. Sew the 2 1/4″ binding strips together and add to the quilt.
  19. Finish the binding and you are done!

This is a fun placemat to make.  Take your time with the Ohio stars so you can really line up the points.  Share your pictures of the Americana placemat, tag me on instagram @lorimillerdesigns.

Looking for the EQ Mini Design Instructions?  You can find them HERE.

For more projects and tips and techniques on using EQ Mini, visit my Electric Quilt blog series EQ Mini Friday Fun.

For more information on EQ Mini software, go to EQ Mini.