Published – Welcome Neighbor Table Topper

Used with permission from American Patchwork & Quilting®. ©2020 Meredith Corporation. All rights Reserved.

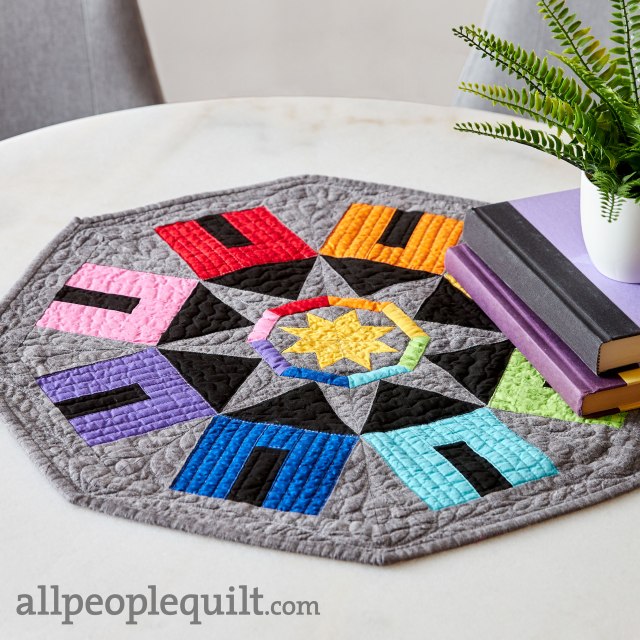
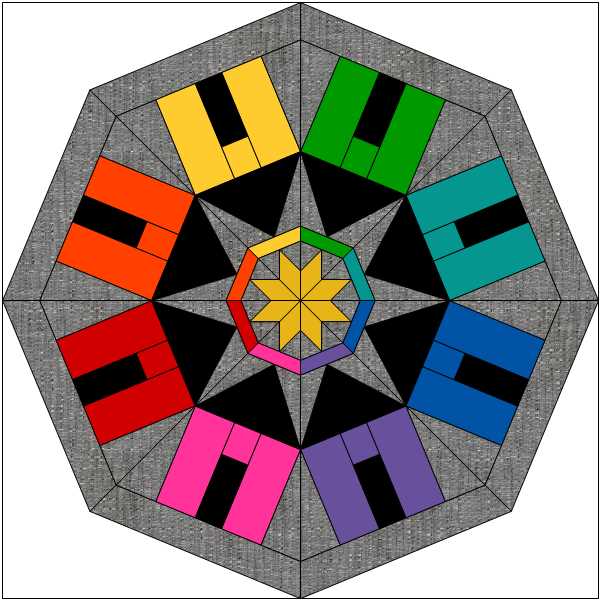
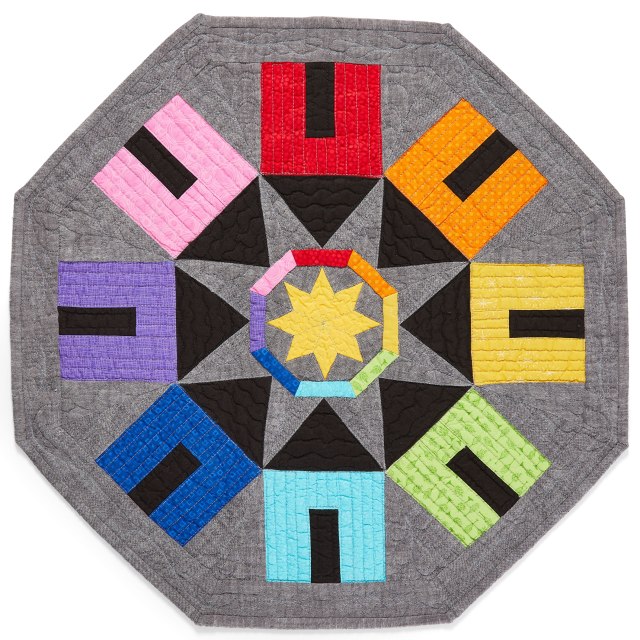
In the August 2020 issue of American Patchwork and Quilting Magazine, you will find my latest design. It is a table topper of little rainbow paper pieced houses.  I used a linen background and colorful fabrics from my stash to make this little cutie.  It is a great gift idea to celebrate a new home, welcome new friends or just spiff up your own table.

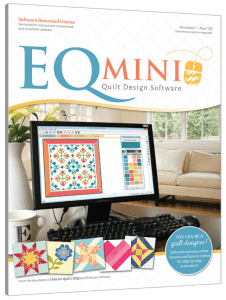
Here is the cover of the August issue to look for, there are lots of fun projects in this issue just in time for summer sewing.

I designed my topper in EQ8 Quilt Design Software.  It is a foundation paper pieced design that would be great for an intermediate quilter or a dedicated beginner.  I find starting on paper pieced projects that are smaller is a great way to try out this technique.

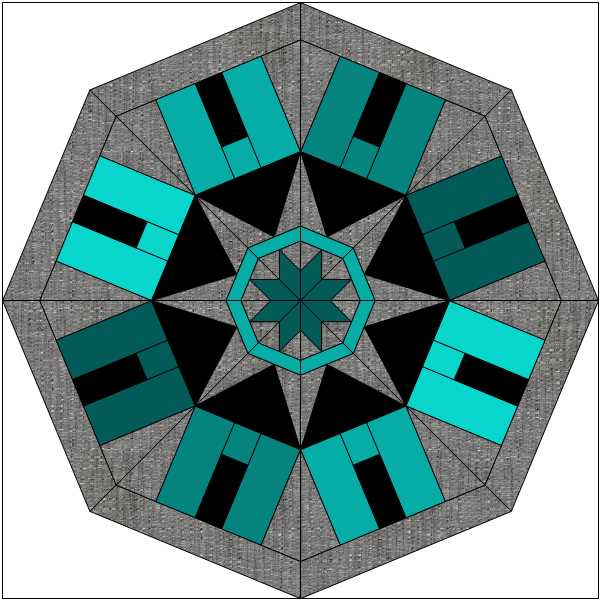
I played with a lot of different color ideas, EQ8 Quilt design software makes it easy to do that, try on different fabrics and styles.  Here is another color way that I played with in EQ8.


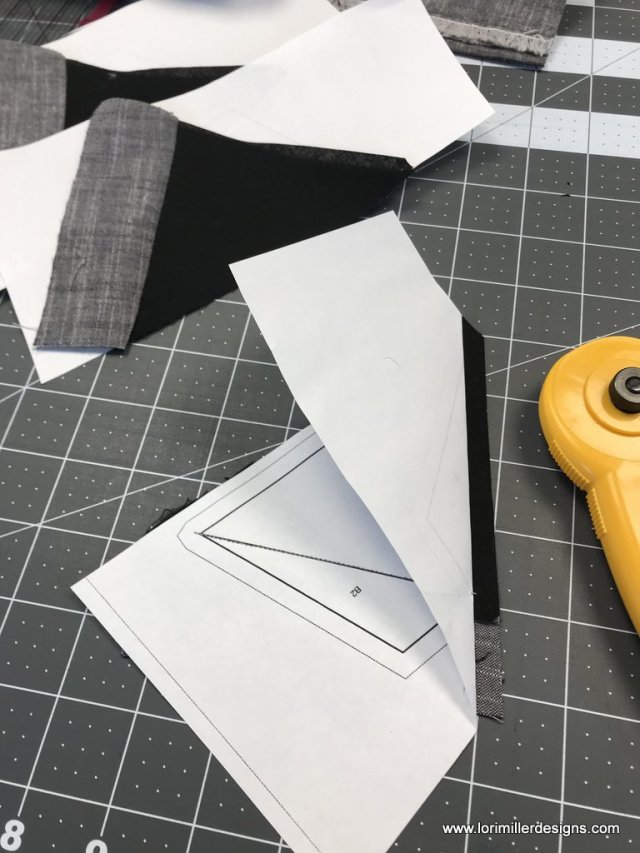
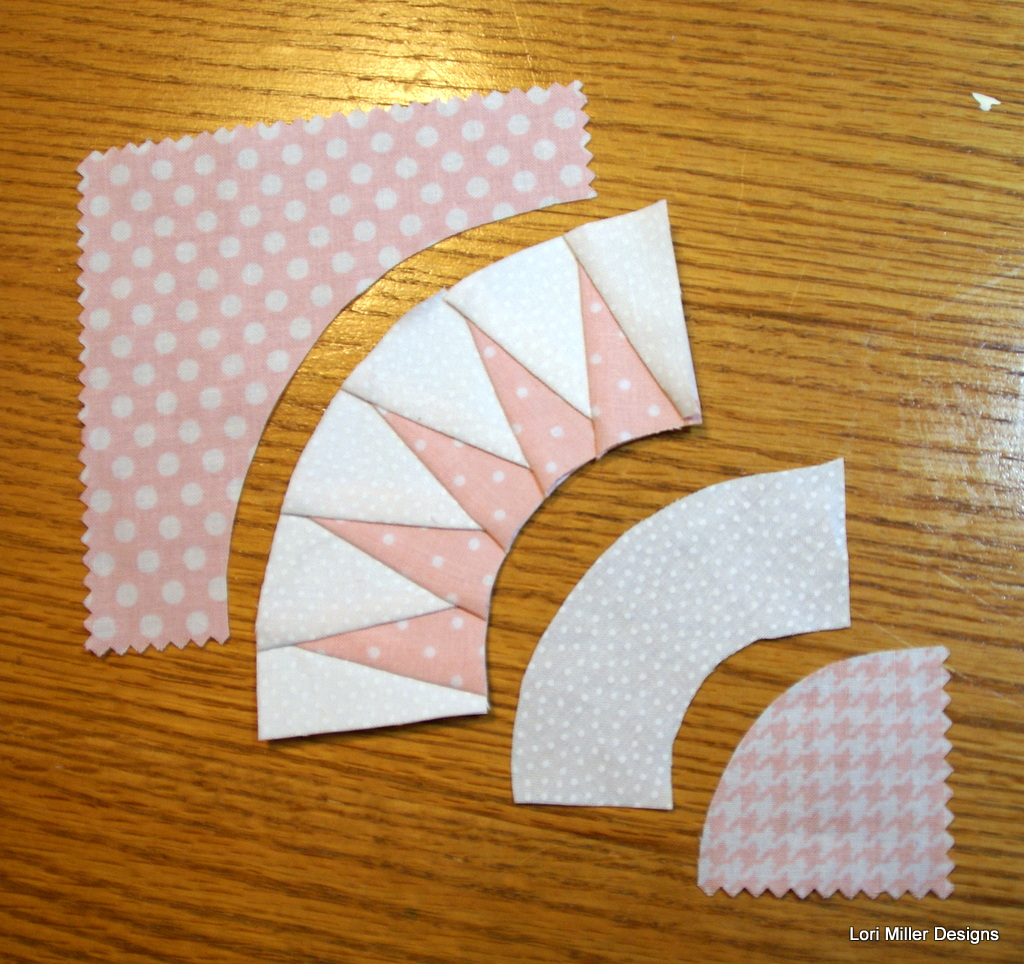
I used foundation patterns created with #EQ8 to make each of the eight sections of the quilt.  This section is the top of the house.

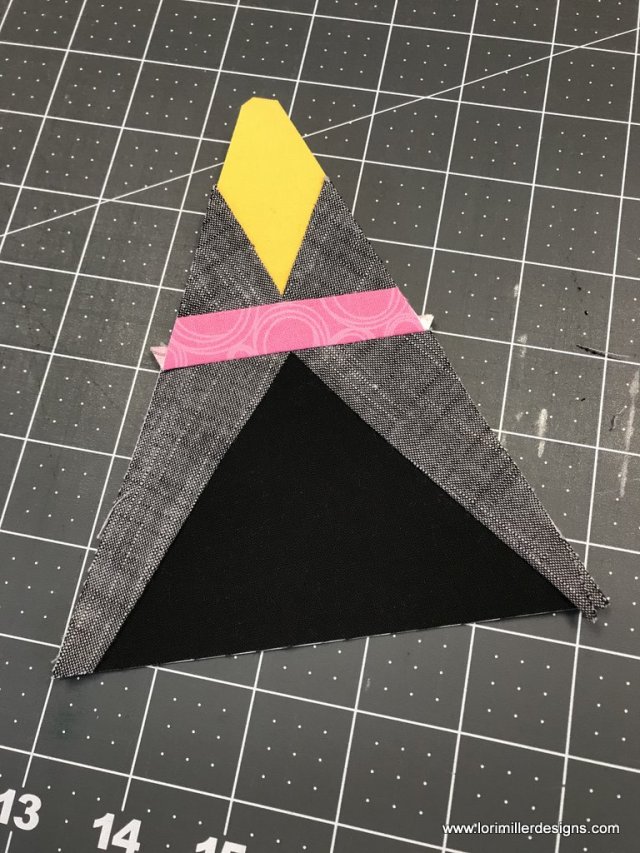
i just took my time carefully pressing and trimming.  I did not want to handle too much to keep the linen edges from fraying.

I always think it is a little weird to sew upside down and backwards, lol, but the precise stitching lines it creates are so worth it.


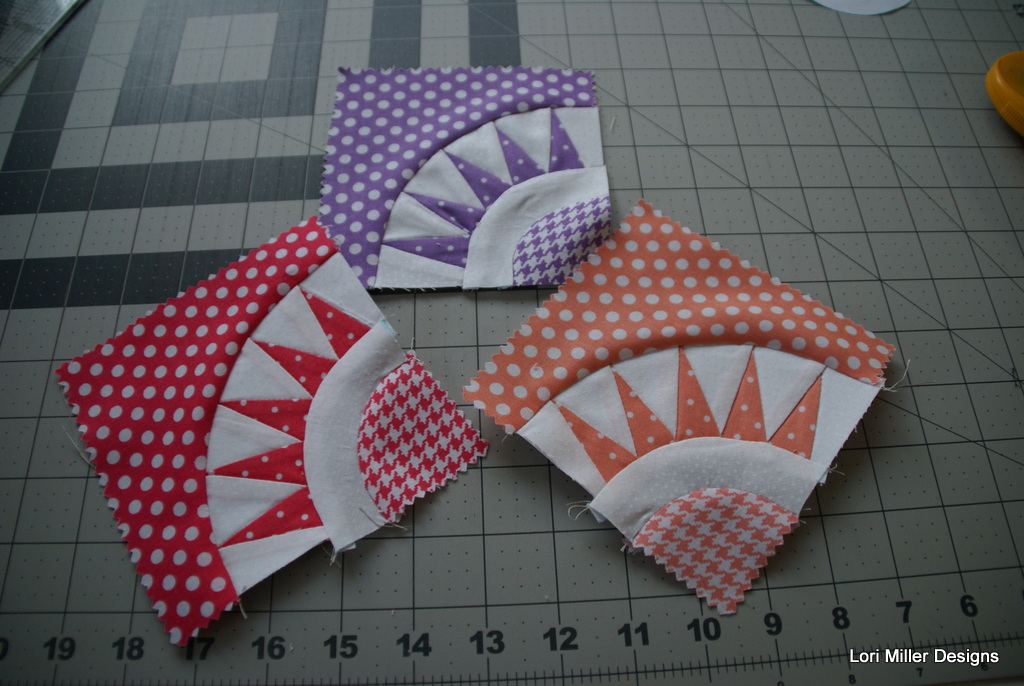
Here is one of the 8 little house wedges all put together.  Ignore my well used ironing board cover.  I will have to make a new cover one of these days.

I did assembly line sewing for each section.  I just love how they take shape.

I stitch the wedges into pairs aligning the seams.  Then I sew the four sections of the block together to make half of the table topper.  I then sew the two half together and press seams open.

Used with permission from American Patchwork & Quilting®. ©2020 Meredith Corporation. All rights Reserved.

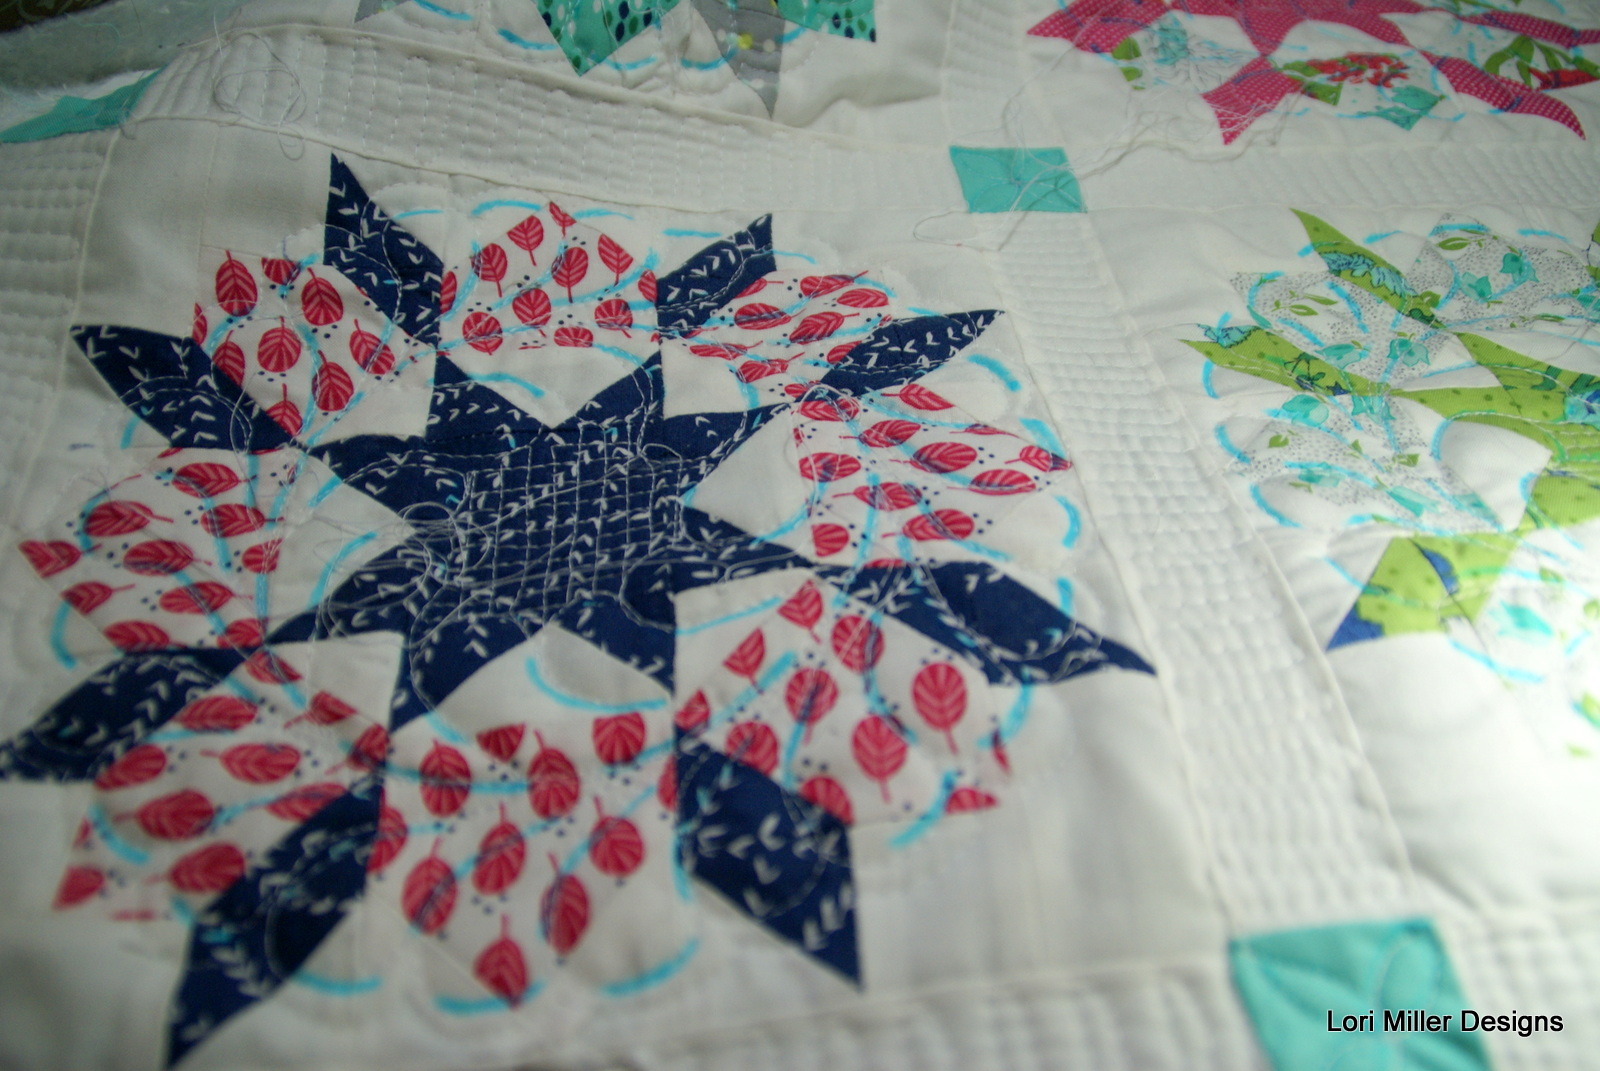
I used a combination of walking foot quilting and free motion quilting on the topper.  It is small enough that you can experiment with some detail to get the lovely texture.

I would love to see your version, just tag me on facebook or instagram @lorimillerdesigns

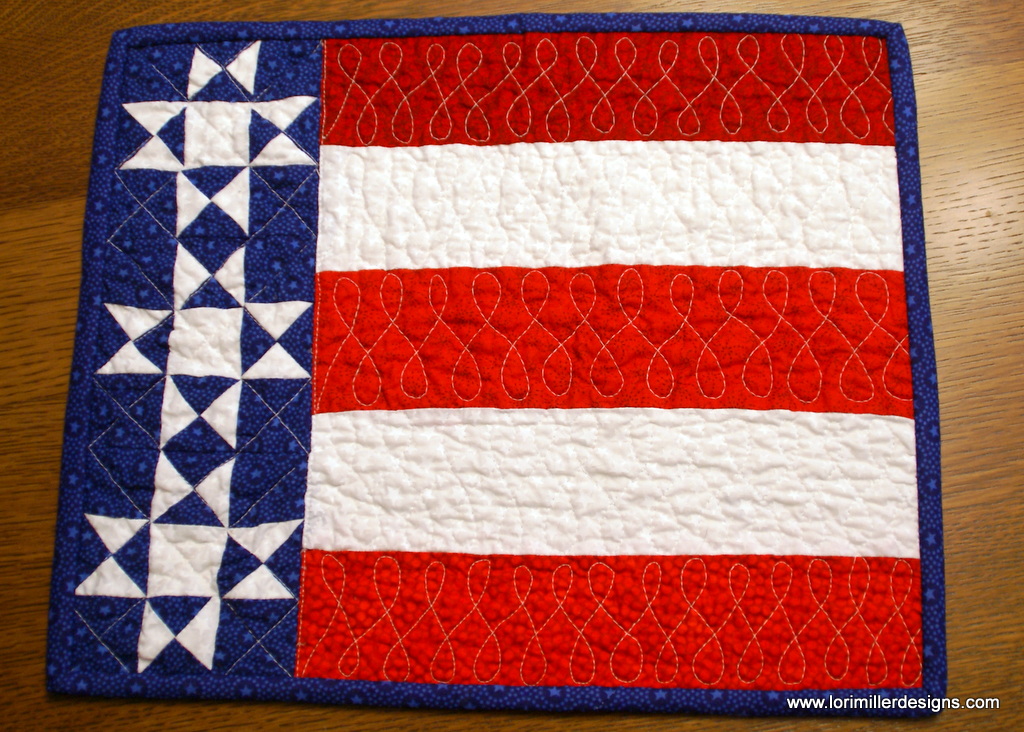
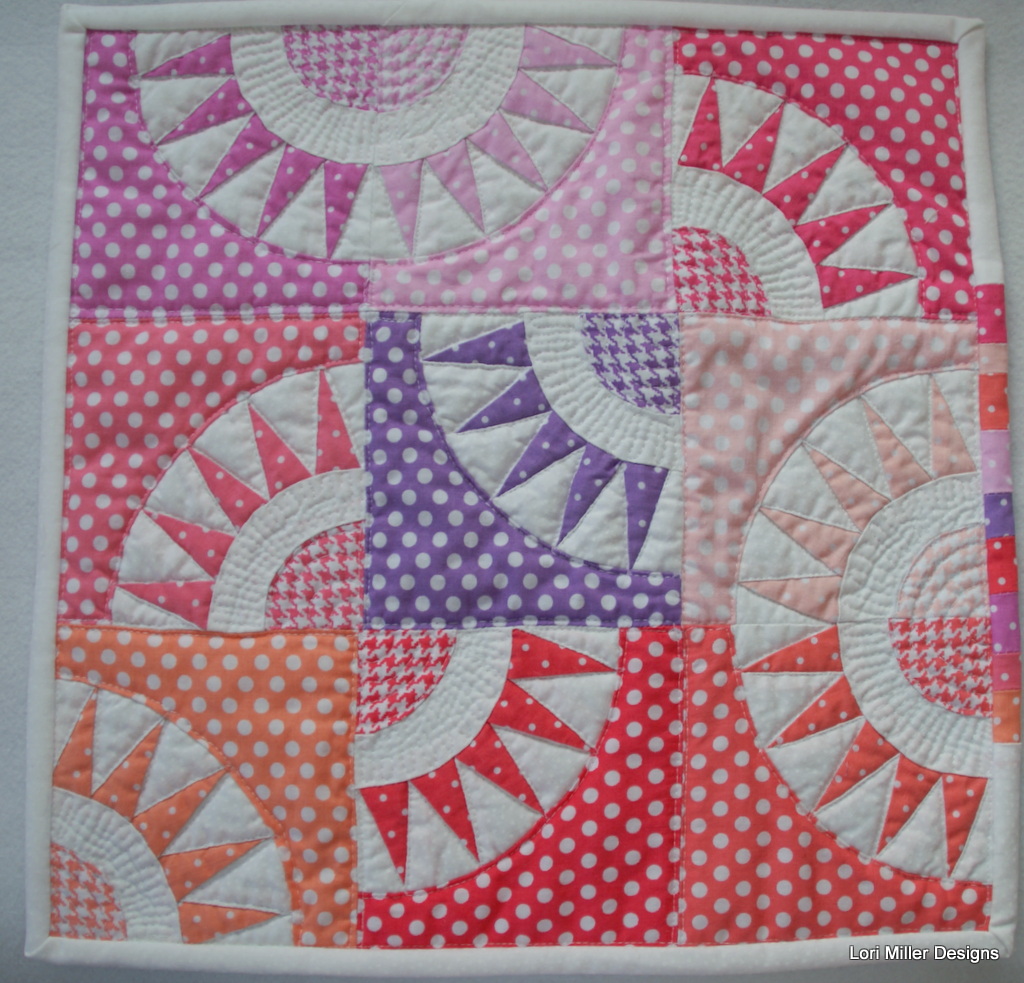
I love a good table topper.  Check out my other designs on these posts.

Welcome Home Pineapple Topper information can be found HERE.

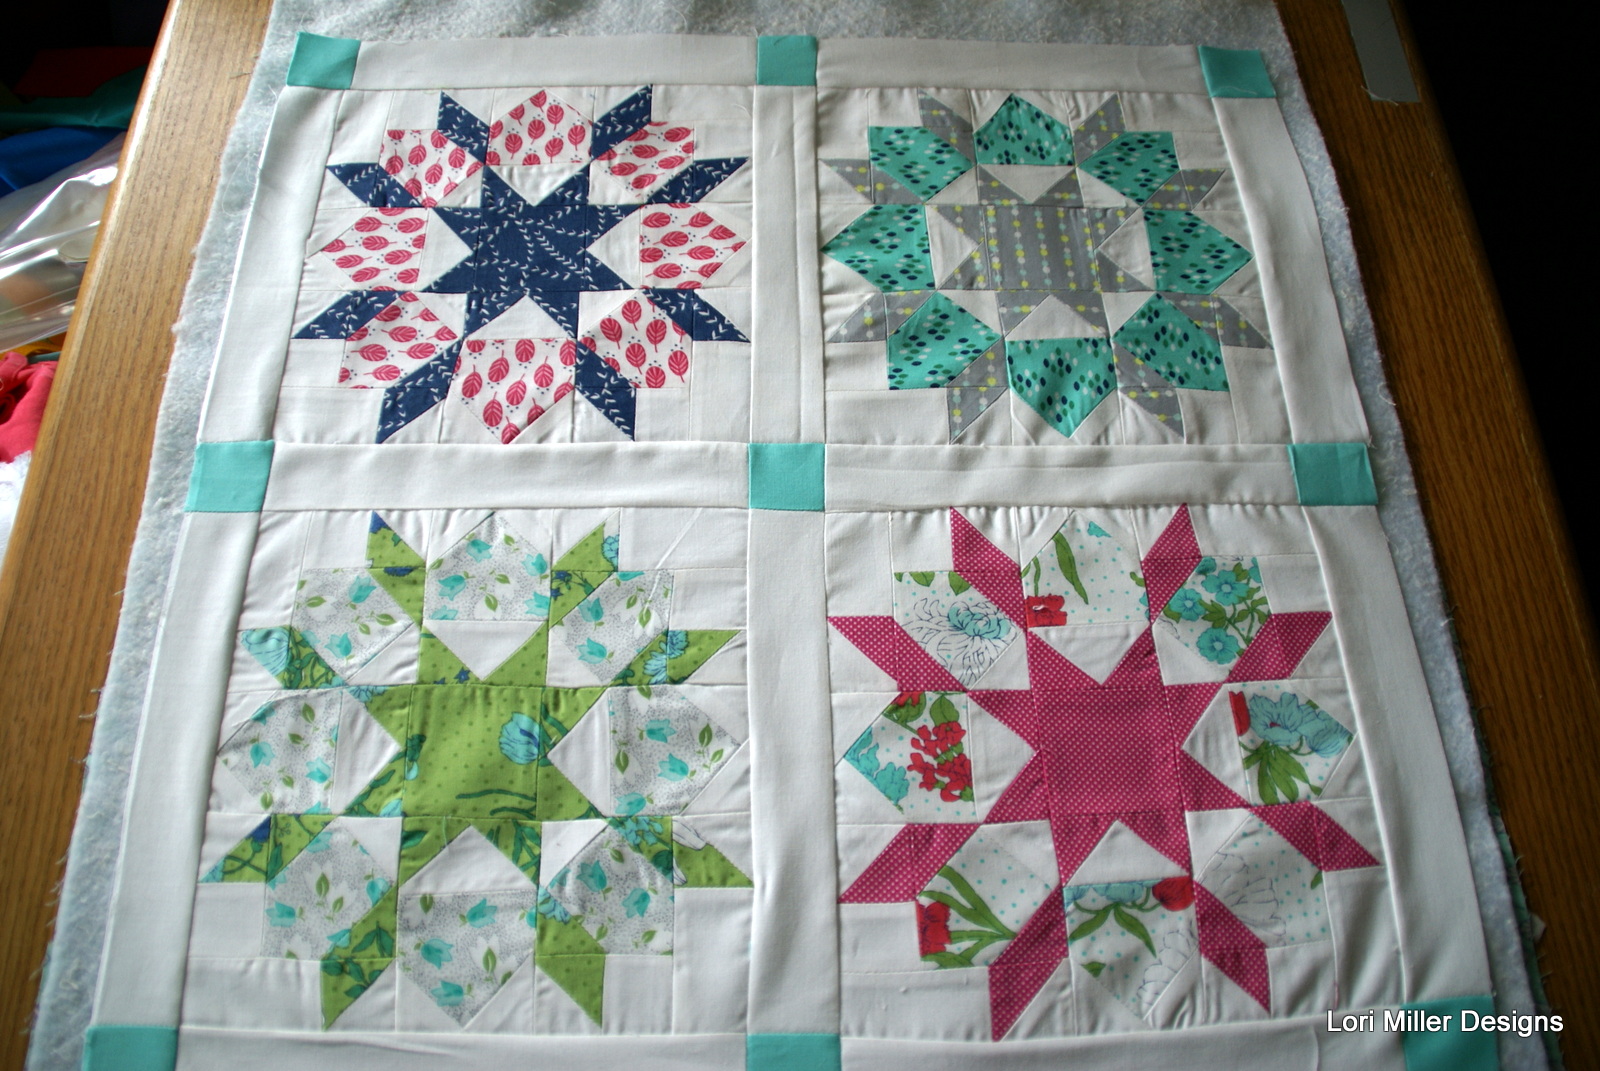
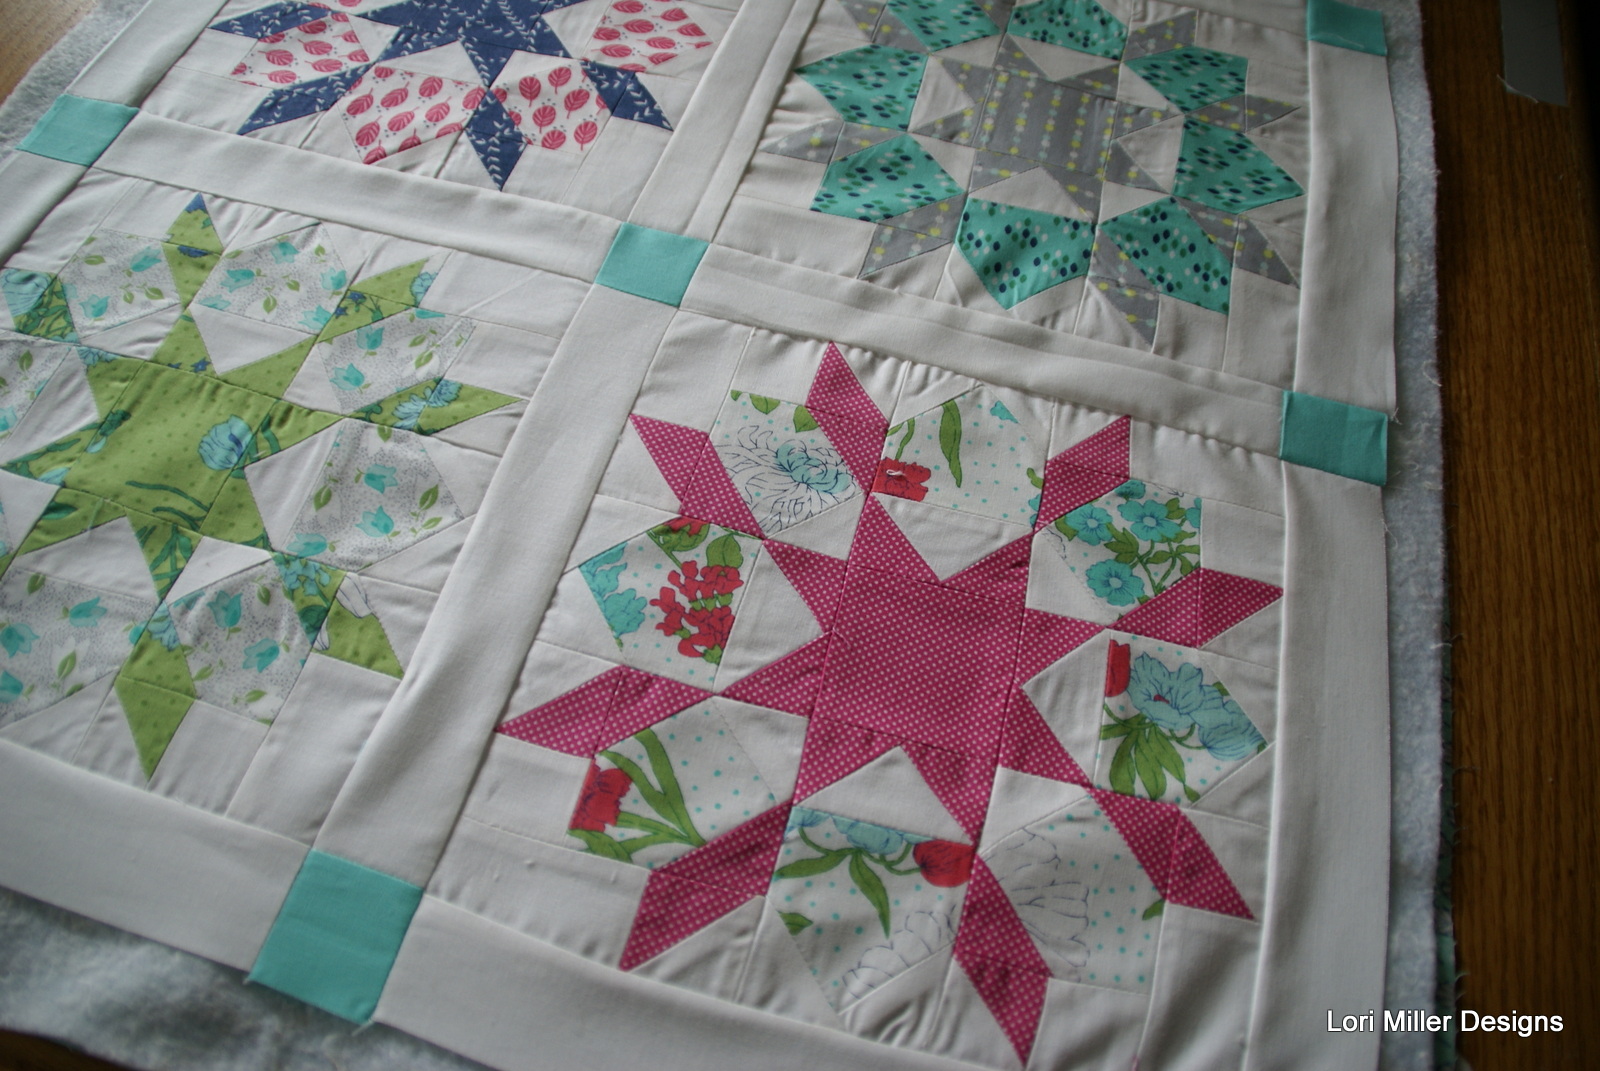
If you are new to paper piecing, you might like to try my Stardrop Table Topper first.  I have a free tutorial HERE.

Please tag me on instagram @lorimillerdesigns or on facebook @lorimillerdesigns.  I would love to see your version!

Happy Stitching!


Free Tutorial – Americana Placemat

For this month’s free tutorial project, we are sticking with a mini approach.  This striking design is for a patriotic placemat which certainly qualifies as a mini quilt.  This placemat was designed with EQ Mini Software by The Electric Quilt Company .  It uses a Vertical strip layout and a traditional Ohio Star block to create a winning red, white and blue design.  Stitch up as many as you need for your holiday celebrations or just make one for a cute centerpiece design.

eqmini-nohole-sm-226x300

EQ Mini is a scaled down, simpler version of EQ7 quilt design software.  This program was created for quilters who are just getting started using software for quilt design.  EQ Mini will help you create, edit, share, and print patterns and yardage for your quilt designs.

When I designed this little quilt, I used a vertical strip layout with two strips.  Each strip uses a pieced row of blocks.

Americana Placemat

Finished size is 14″ x 17″.

Materials

This will make one placemat.

  • 1/4 yd Red
  • 1/4  yd White
  • 1/4 yd Blue
  • 1/4 yd for binding
  • 1/2 yd for backing
  • 16″ x 20″  piece of batting

Directions

Cut Fabric:

From red fabric, cut:

  • 3 — 3 1/4″ x 12 1/2″ strips

From white fabric, cut:

  • 2 — 3 1/4″ x 12 1/2″ strips
  • 3 — 2″ squares
  • 6 — 3″ squares

From blue fabric, cut:

  • 12 — 2″ squares
  • 6 — 3″ squares

From binding fabric, cut:

  • 2 — 2 1/4 ” x WOF strips  for binding

From backing fabric, cut:

  • 1 — 16″ x 20″ rectangle

Make Ohio Star Blocks

  1. You will make three Ohio Star blocks for each Americana Placemat.
  2. Start with quarter square triangle units.
  3. Mark a line on the wrong side of the 3″ white fabric squares diagonally from corner to corner.
  4. Place the marked white fabric square right sides together (RST) with a 3″ blue fabric square.
  5. Sew two seams, each 1/4″ away from the center marked diagonal line.
  6. Cut along the marked line to separate the half square triangles.  Press seams to the darker fabric.
  7. Mark a line on the wrong side of one of the half square triangles.
  8. Pair the half square triangles, RST. with opposite fabrics facing each other.
  9. Sew two seams, each 1/4″ away from the center marked diagonal line.
  10. Cut along the marked line to separate the now quarter square triangles.  Press seams open.
  11. Make a total of 12 quarter square triangles.
  12. Trim the quarter square triangles to 2″ square.
  13. Arrange the parts of the Ohio Square block and stitch together.
  14. Sew the three stars together for the left side of the placemat.  Sew the red and white strips together for the right side of the placemat and then join them together.
    Note:  I rounded up some of the numbers to 1/4 inches so you may have to adjust a bit to match up the stars with the stripes.  I did not want you to have to work with sixteenths of inches.
  15. Make a quilt sandwich with the backing face down, then the batting, then your quilt top face up.
  16. Pin baste the quilt layers together.
  17. Quilt as desired.  I stitched some fun loops in the red and white strips.
  18. Sew the 2 1/4″ binding strips together and add to the quilt.
  19. Finish the binding and you are done!

This is a fun placemat to make.  Take your time with the Ohio stars so you can really line up the points.  Share your pictures of the Americana placemat, tag me on instagram @lorimillerdesigns.

Looking for the EQ Mini Design Instructions?  You can find them HERE.

For more projects and tips and techniques on using EQ Mini, visit my Electric Quilt blog series EQ Mini Friday Fun.

For more information on EQ Mini software, go to EQ Mini.

Swoon Mini for EQ 25 and Moda Challenge

The Electric Quilt Company is celebrating its 25th Anniversary in business this year and is hosting monthly contests.  They joined with sponsor Moda for the March challenge.  You needed to make a mini quilt with Moda Fabrics.  Luckily, I had a Mini Swoon Quilt Kit by Thimble Blossoms that I had picked up when I was at the AQS Grand Rapids show last year.  I hadn’t had a chance to make it yet, so this was the perfect opportunity to stitch it up.

The kit had really pretty fabrics by V and Co. Color Me Happy.  They have some smaller prints that work well for this mini.

This pattern has a lot of intricate pieces and I think it almost takes as long as piecing a larger quilt.  I tried very hard to get all of the pieces to align and match carefully.  There are a few artistic licenses but overall, I was pretty pleased with my effort.

I decided to quilt a feathered medallion motif inside each of the blocks.  I had a feathered wreath stencil shape that was just the right size and I marked it with washout markers.

Natalia Bonner book

I was looking for designs and saw the feathered medallion in Natalia Bonner’s latest book, Next Steps in Machine Quilting.  So all I had to add was a crosshatch section in the center of the wreath to add some pizzazz.

I added a little flower in each of the cornerstones and free motion quilted rolling parallel lines in the rest of the sashing.

Here is a closer look at the crosshatching.  The wreath template was for traditional quilting, but I just used it as a guideline for continuous line free motion quilting.  The small size made the free motion quilting so much easier.  All that quilting really added some interesting texture.

I didn’t win the challenge for the month, but I certainly stitched up a treasure.  I need to get all of these mini’s up on the wall in my studio so I can admire them!


My NY Beauty Mini for the EQ25 and MMF Challenge

If you had not heard, The Electric Quilt Company is celebrating their 25th Anniversary this year.  They are having contests and giveaways all year long.  For January, they issued a challenge to create a mini quilt with Michael Miller Fabrics.  I happened to have a Charm pack of 5″ squares of Michael Miller Modern Basics.  I grabbed some white polkadot fabric at my local quilt shop and started planning.   I decided I wanted to try a New York Beauty block because I had never made one of those and this fun little quilt is the result.

I started this adventure by going to my Electric Quilt 7 software and searching for New York Beauty quilt block.  I found a fancier block which I edited to simplify it a bit. Then I sized the block down to a 4 1/2″ finished block so I could use my 5″ square charm pack.  My EQ7 software made it so easy to size it perfectly and I could print out template pieces and the paper piecing foundation pattern as well.

Here are 3 charms I started with.

I used the templates to cut out the pieces and as a guide to overcut the paper pieced components.

Here are all the pieces after I have finished the paperpieced center and getting ready to tackle those little curves.  I just pinned the middle and sewed out from the center a few stitches at a time.  I stopped to adjust about every 3 – 4 stitches.

Here is the little block all together before I trimmed.

I made a total of nine blocks.  They were really pretty fun and one you got going they went pretty fast.  I really like this pattern.

Last step, I used free motion quilting to add some contrast to the squares.  I just love the little zig zag in the center white curved piece.

My little cutie did not win any prizes, but I did learn alot about editing a quilt block in Electric Quilt 7 and how to sew curved seams.  I think that is the best happy circumstance from participating in a quilt challenge, you get to learn something new!

Modern Swallow Trail Tiny Quilt goes to Road to California 2016

My mini quilt, Modern Swallow Trail, has been selected to be part of a special exhibit of 40 mini quilts at the Road to California  Quilt Conference in January 2016.  With lots of bright colors and straight line quilting, this cute little quilt was so much fun to make.  I did make the mistake of trying to piece this quilt.  I should have paper-pieced it for some sharper edges, but I had a really good reason why I didn’t. Really.  Read on to find out how I tackled this project.

american-made-brand-cotton-solids

American Made Brand Cotton Solid Fabric is sourced and and manufactured entirely in the United States.  American Made Brand  issued a challenge.

AMB Tiny quilt challenge

It was called the tiny quilt challenge and you needed to make an original mini quilt from their American Made Cotton Solids in any style you wished.  I saw the notice but I did not pay much attention.  Then they sent a reminder.  I thought about it, but I did not have any material, or so I thought.  Then another reminder came and now it was the end of August.   I had an idea in my head but I did not have time to make this thing.  Well creativity is a weird thing, I could not stop thinking about it.  Then I ran across something, a rainbow mini charm pack of AMB solids from Quiltcon 2015.  That sealed it and I was off and designing.

I needed background fabric.  I called every quilt shop within a 40 mile radius of metro Detroit.  A small quilt shop 30 miles away said they had some fabric so off I went.  They had 3 bolts and one happened to be a kind of khaki grey color  called Taupe which I thought was a perfect neutral for the bright mini charms.  I saw a large round swallow tail pattern but this had to be mini.  I drafted my swirling trail pattern on some graph paper and cut out templates.  I only had a couple mini charms of each fabric and I needed to cut out two diamonds from each plus a binding.  There was simply no extra fabric for paper piecing, so I cut and pieced the bright colors.

I took the colors in the mini charm pack and picked the ones I liked and then tried to arrange them in a rainbow pattern.  I varied the flow a little from the top to bottom and the colors really blended well together.  I had just enough fabric to add my signature colored border snippets.  I just straight line quilted it how my heart desired.  I love the texture of the matchstick quilting.

Although my quilt was not one of the main winners in the challenge, I was thrilled that AMB asked if I would provide my mini quilt for the Road to California exhibit in January 2016.  Road to California is the premiere Quilters’ Conference & Showcase west of the Rocky Mountains!