Sunburst Strip Piecing

Sunburst strip piecing Lori Miller Designs

In July, the Detroit Area Modern Quilt Guild hosted Lynn Harris from  The Little Red Hen for a class on strip piecing using techniques from her new book.  She also gave a wonderful trunk show of all of her scrappy quilts which were just beautiful.  I grabbed my box of orange scraps and a nice heathery grey fabric to work with.

Every Last Piece cover for blog


Lynn’s book is called Every Last Piece and she showcases 12 wonderful quilts that will use up your scrap stash.

2lynn harris class 1

Here are the strip pieces that we made in class using Lynn’s technique.  Make sure you have a lot of starch on hand!  Mine are the obvious orange ones.

lynn harris class 1

Here is our wonderful group of quilters.  Lynn is second from the left in the back and I am second from the right in the back.  The rest are all of my DAM girls.

I grabbed all of my orange strip pieced squares and decided to make half square triangles withe the heathery grey fabric.

I decided to make a runner for the Library Table I inherited from my Mother-in-Law.  It needs some love and care on the finish, so until I can make that happen, a pretty little runner should cover those up nicely.  I started to put them together in rows.

Using my trusty Bernina 630, I put on my BSR foot and started free motion quilting lines through the orange strips keeping them parallel to the seams and kind of even.  You don’t have to be perfect with this stitch and it still looks good.

P1100232

Here you can see all of the lines quilted in the orange strips, the texture is just amazing.  Then I wanted to put something in the triangle.  I wanted a design that was a bit more modern than feathers but was not having much luck finding what I wanted.  Then I found inspiration from Lori Kennedy of The Inbox Jaunt.  She had some sun and stars patterns that I adapted to the triangle.  She has tons of wonderful quilt designs and tutorials on her blog and I really love her name :).

Sunburst strip piecing Lori Miller Designs

Here is the sun pattern up close.  It is perfect to go with the orange rays in the strip piecing.  I also liked that it was a continuous design, I just quilted from triangle to triangle in a row without stopping.  Everyone is just a bit different, I did not even mark or plan too much, just quilted.  I really like it.

P1100234

Here is my finished runner, all quilted, washed and crinkly with texture.  I think it makes my library table look fabulous too.  I used a bunch of orange scraps but why does the box seem just as full when I was done as when I started?? HA HA  Happy scrap quilting!

Grandma Town BOM #7 – Barnyard double block


The Summer is flying by and it is time for another Grandma Town Block of the Month.  This month is a bonus double block called barnyard featuring a barn and grain silo.  Even though this quilt is called Grandma Town, I would be remiss if I did not include some memories of my Grandpa.  He was a short, tough guy who wore OshKosh Overalls and used a red bandanna as a hankerchief.   I would get to help with the chores and followed Grandpa around as we fed the animals and took care of the farm.


Grandma Town Silo
We would get ground corn from the grainery and Grandpa would hand me a galvanized bucket to scoop out the feed and take it to the cows and pigs.

Grandma Town barn

My brother and sisters and I often played in the barn. I would also help Grandpa milk the cows on a little wooden 3 legged stool.  We even threw the hay bales down from the loft down to the wagon.


Both of these blocks combine to make a jumbo double block for the center of the quilt.  You will only need one of these jumbo blocks.

Grandma Town Barnyard


Are you sewing along?  If you are, post it on Instagram and tag me @lorimillerdesigns and #GrandmaTownBOM so I can see what lovely things you are stitching up. A comprehensive pattern and directions for the Barnyard block along with the whole BOM is currently in development.

Enjoy!

grandma Town Quilt A

Grandma Town Block of the Month

If you are new to the Grandma Town BOM, this row by row quilt was a labor of love to celebrate my Iowa roots.  I spent my childhood visiting my Grandparents on their farm just west of Des Moines in Earlham, Iowa.  It is especially a tribute to my dear Grandma.

When my sisters, brother and I were little and my parents would drive us to my grandparents farm, my brother would yell, “We are going to Grandma Town!”.  It was a loving tribute that stuck.  This little quilt is full of those reminders of the farm and of Grandma, who loved to garden and loved to cook.  Each block is a sweet memory of my youth growing up on that country farm.

I hope you will find some shared love for your family, a cherished farm  or your own grandma in my quilt.  You can make all of these sweet blocks or pick and choose the blocks you like the most to make something special for yourself or a dear loved one.


Released Blocks – 2015

FEB  Block 1 – Forget Me Not Flower

MAR  Block 2 – Sewing Machine

APR Block 3 – Nine Patch and Color Block Rows

MAY Block 4 – Ear of Corn

JUN Block 5 – Sweet Hearts

JUL  Block 6 – Canning Jar

MQG Riley Blake Fabric Challenge 2015 – My Quilt


The Modern Quilt Guild, of which I am a member, has been holding fabric challenges which I have been participating in for a couple of years.   This year the Spring Challenge was to use Riley Blake Cottage Garden Fabrics by Amanda Herring.  All you had to do was make something fantastic that is quilted, something you’ve never done before, challenge yourself to learn something new, and use the provided fat eighths of fabric and coordinating Riley Blake Solids.   I completely forgot about it until I got a reminder note from The Modern Quilt Guild saying we had 11 days left to make something.  Yikes!  I have been sewing for the past six days straight!


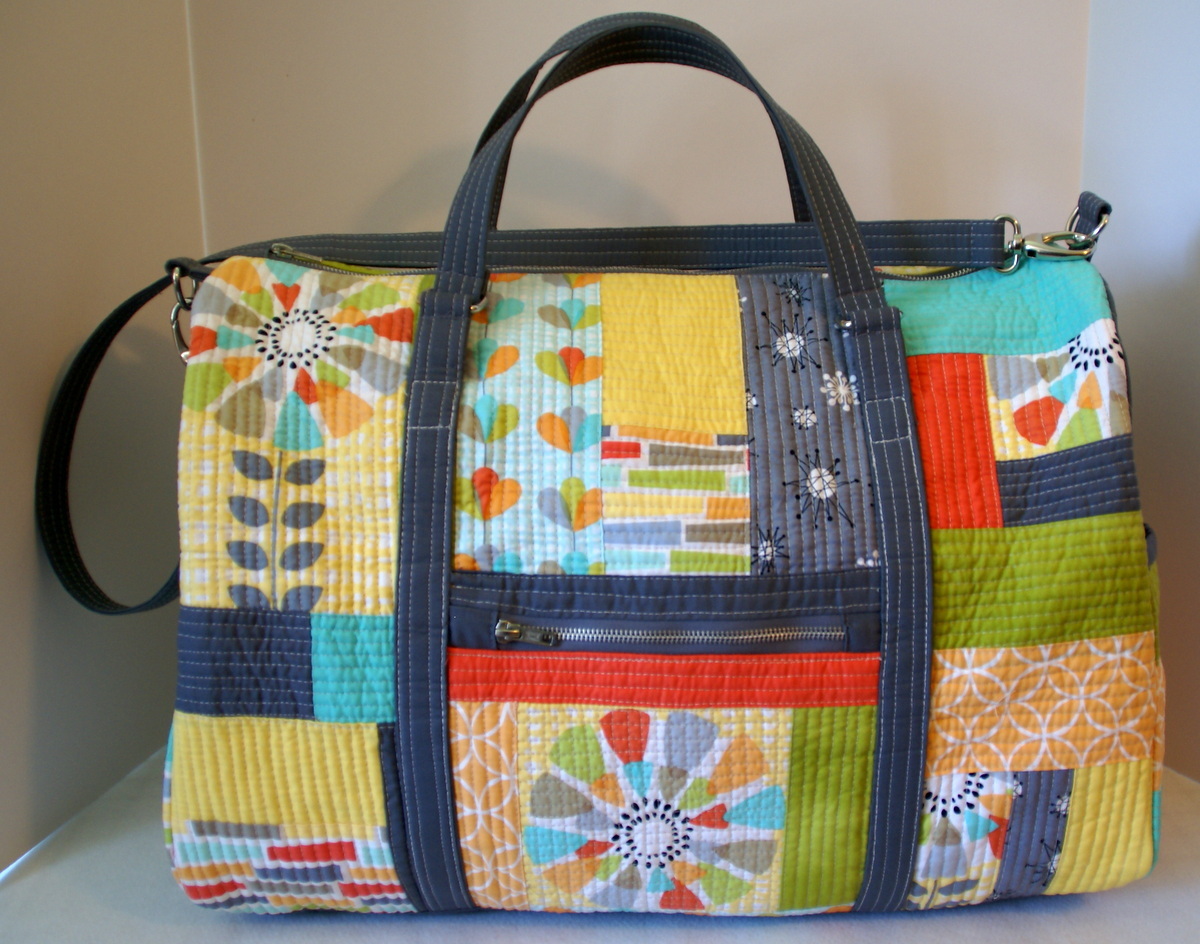
I participated in the last Riley Blake Challenge too.  I made this super awesome duffle bag with quilt as you go techniques.  I use it all the time.

rbchallenge2015-s
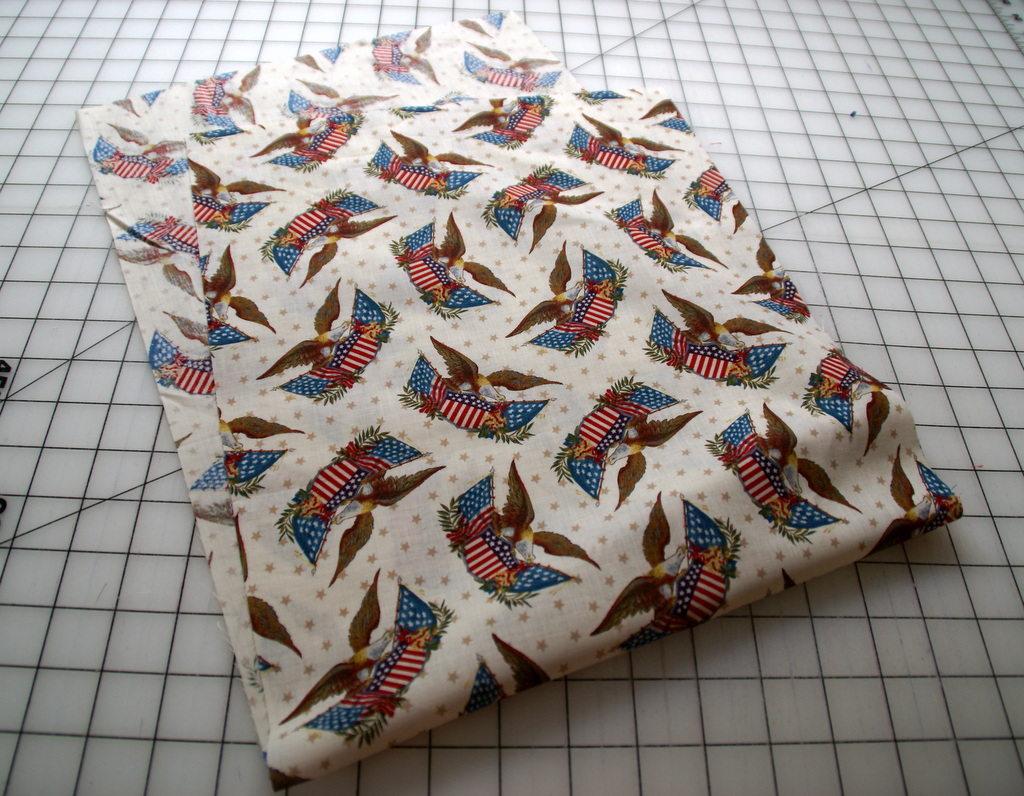
These were the fabrics that we received.  Lovely prints in aqua and grey, even included a text print.

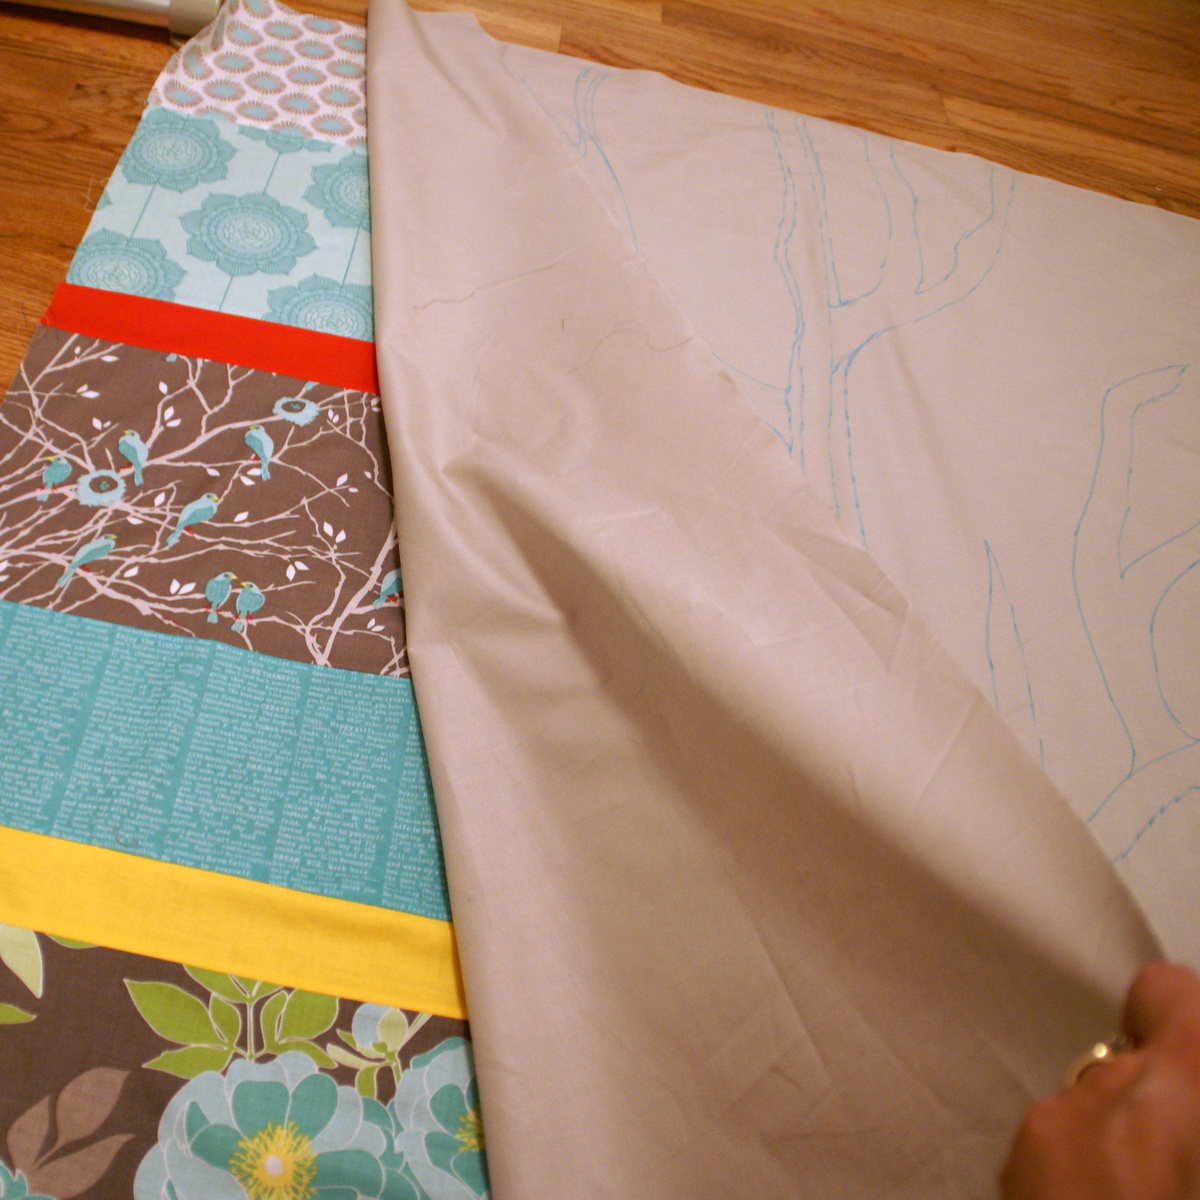
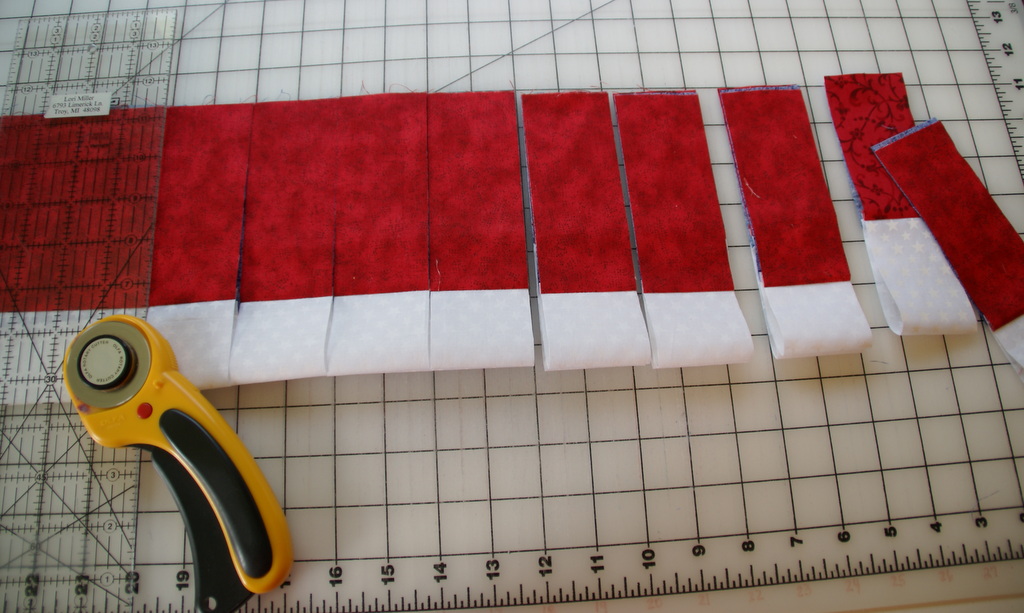
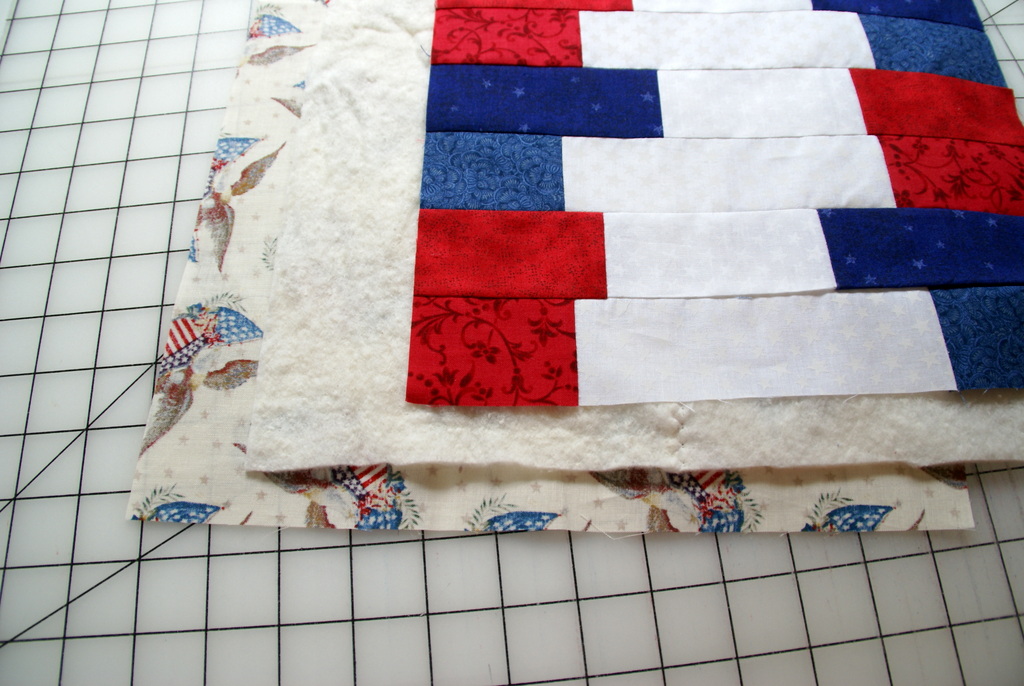
I had actually been thinking about some kind of pattern to include the birds and trees.  When I laid out the fabrics, my idea just came together.  It needed a little color so I tried to find fabric to match and ended up with the yellow and the red which sort of matched the birds legs.  I purchased some extra solids in aqua and grey as well.  The left side you can see in the picture, I just stacked most of the fabrics and added the pops of color.  Not seen in this picture, the entire right side was a big strip of an aqua solid.  I placed the grey solid over the whole thing and sketched a tree shape with a water soluble marker.

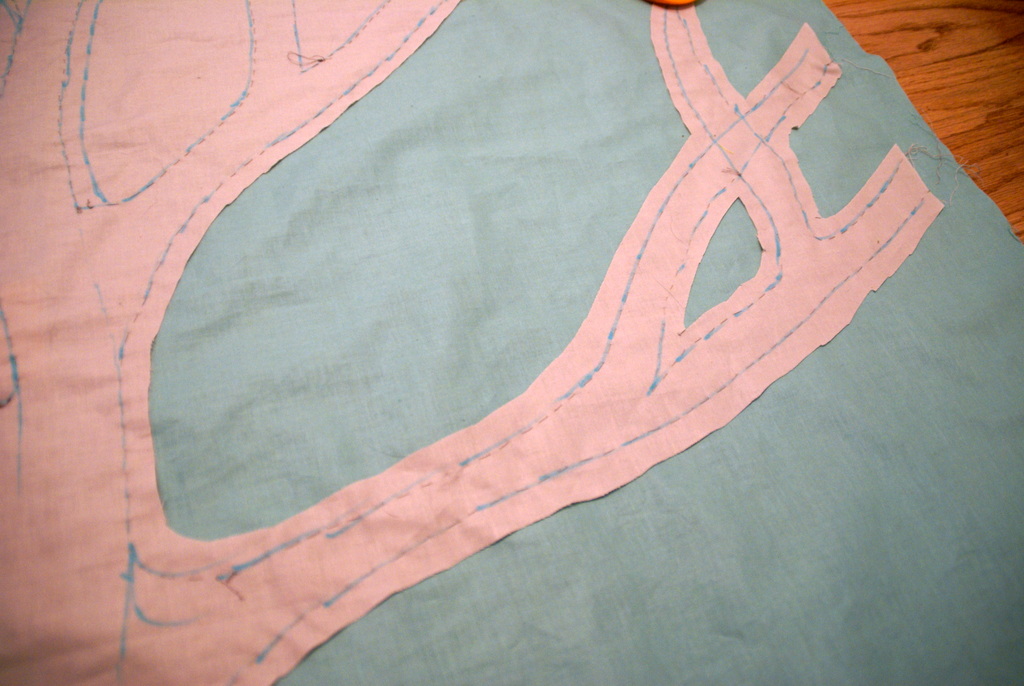
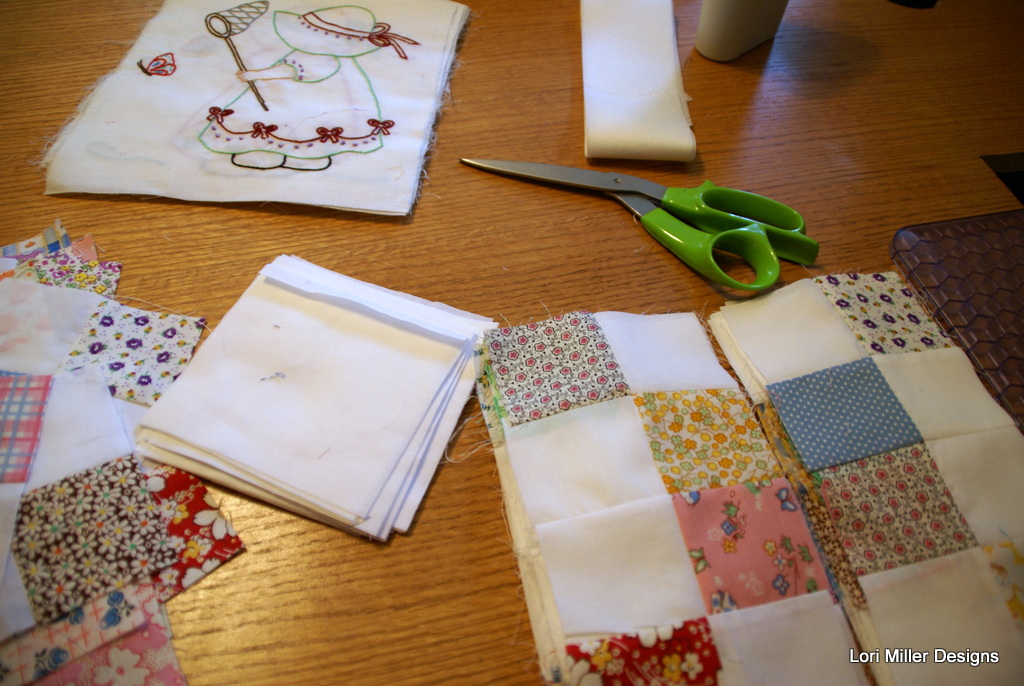
Then I basted by hand, (Yes, just like my Grandma Mabel would have done!), I basted using a running stitch over every line of the tree.  Once I had it all basted, I cut away the fabric leaving a 1/4 of an inch to turn under.

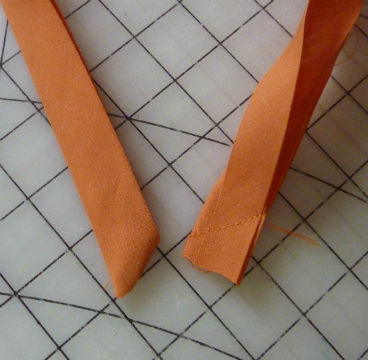
Here is a picture a little more close up so you can see it better.  I did not worry too much if the 1/4 inch was perfect, the tree would just look more natural.

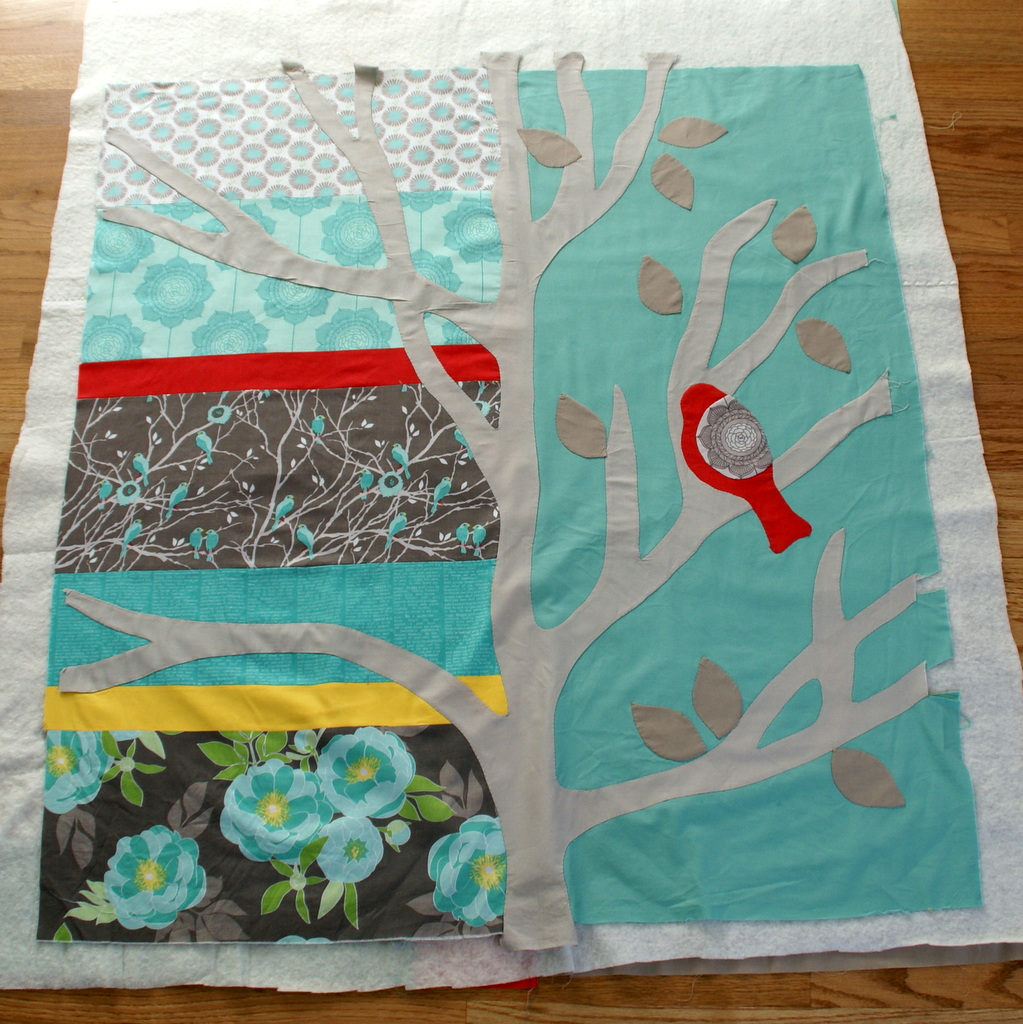
Then I hand appliqued that entire tree to the pieced top.  I also added some leaves in a darker grey and a little bird.  I used one of the gray flowers for his body.

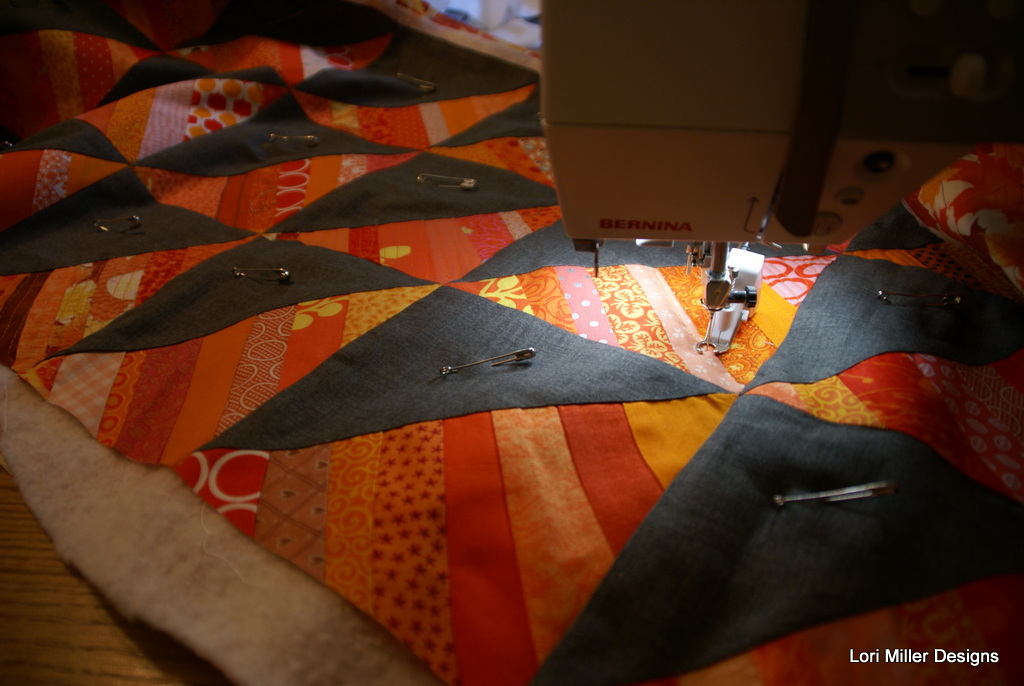
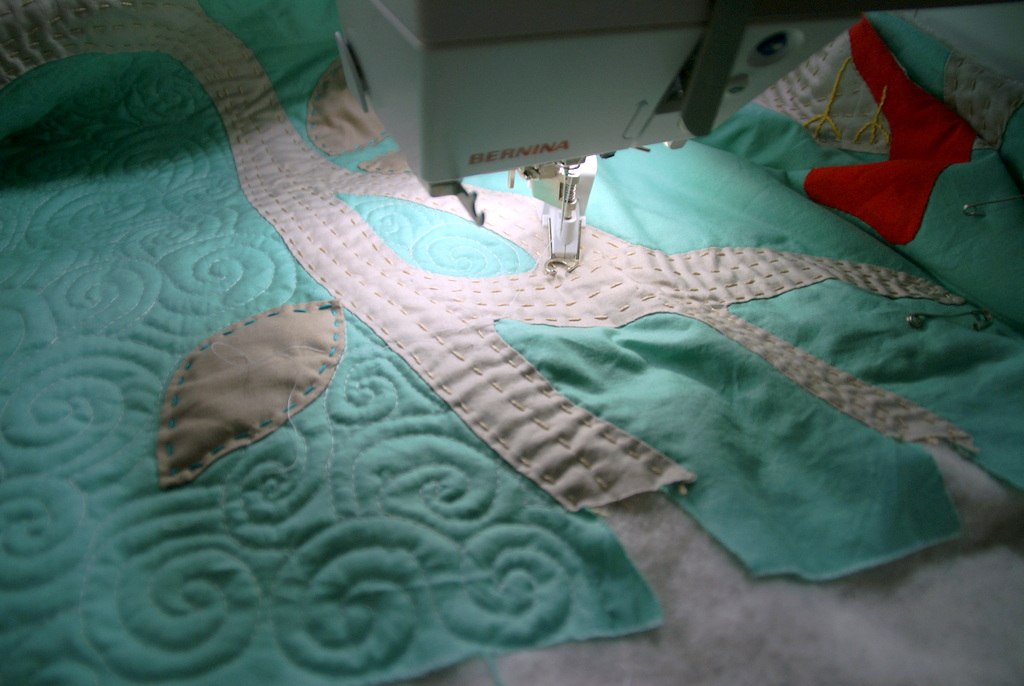
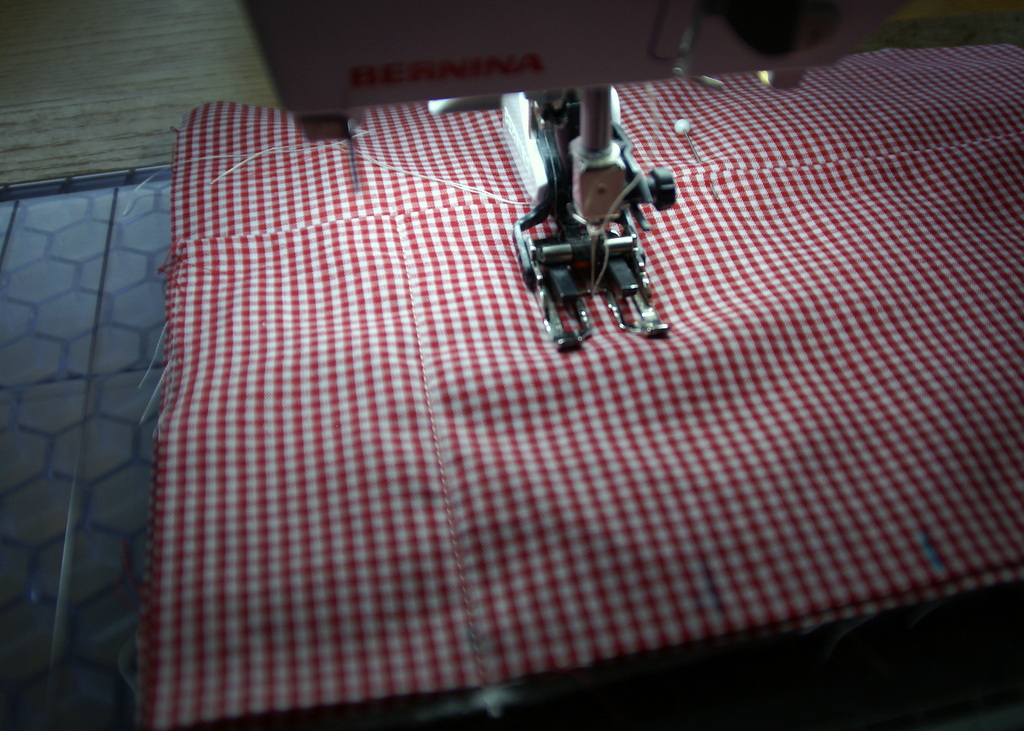
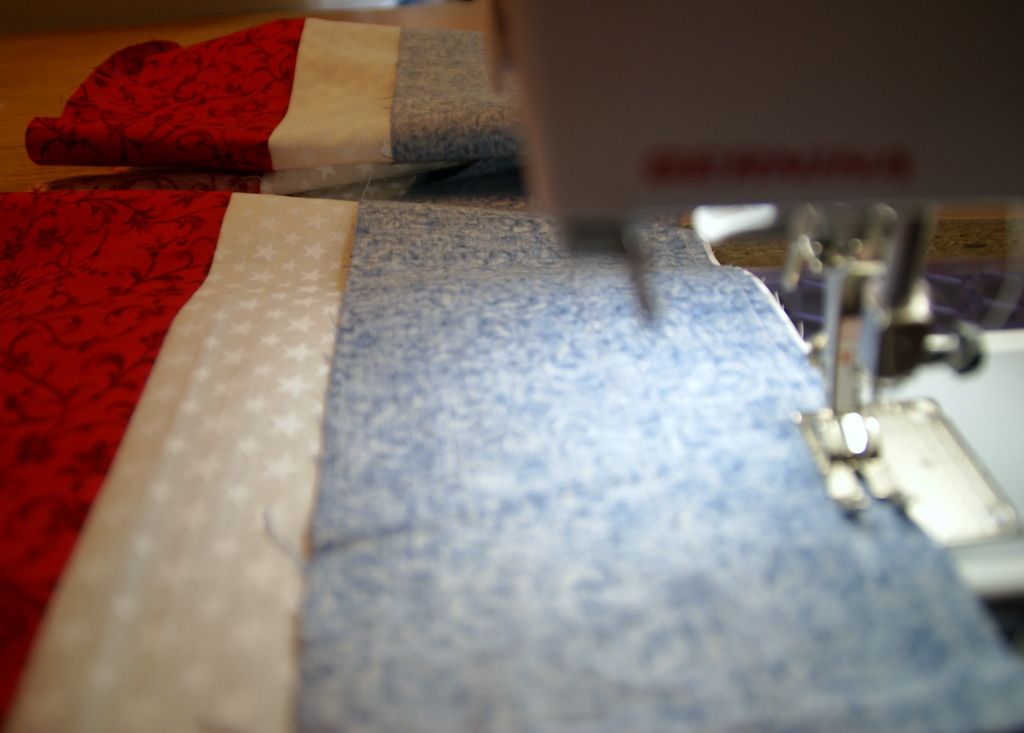
I handquilted using big stitches on the tree branches and the leaves.  I also embroidered some yellow legs and a beak on my little red bird.  Here, I am getting ready to machine quilt the other parts of the quilt.  I just used a random swirl pattern around the tree on the right side of the quilt.

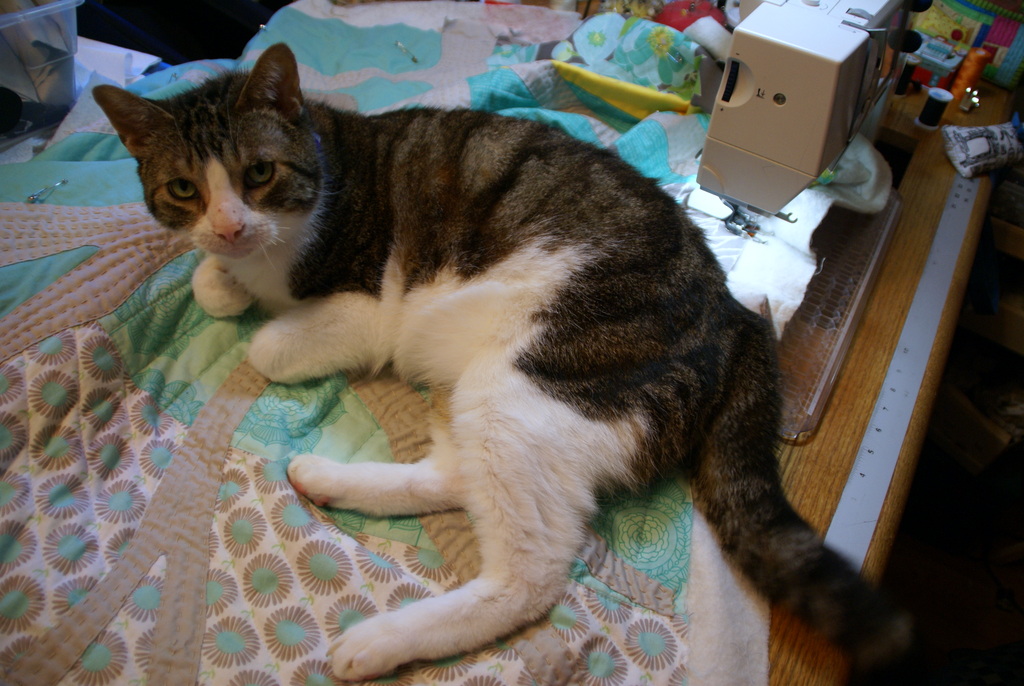
I just got going well with my machine quilting when the Quilt Inspector arrived.  How does he know every time that I am quilting??  He usually does not show up when I am piecing, only quilting.  Apparently this quilt passed the inspection, HA.  Love you, Cookie Cat.


My DH volunteered to hold this up so I could get some pictures and get them loaded on the MQG website before my time ran out.  You can see the whole quilt here.  After I washed it, it was so lovely and crinkly with texture.  I managed to hide the center seam with a tree branch all the way up.  I also added my little extra pieced on the right side of the binding for some interest.

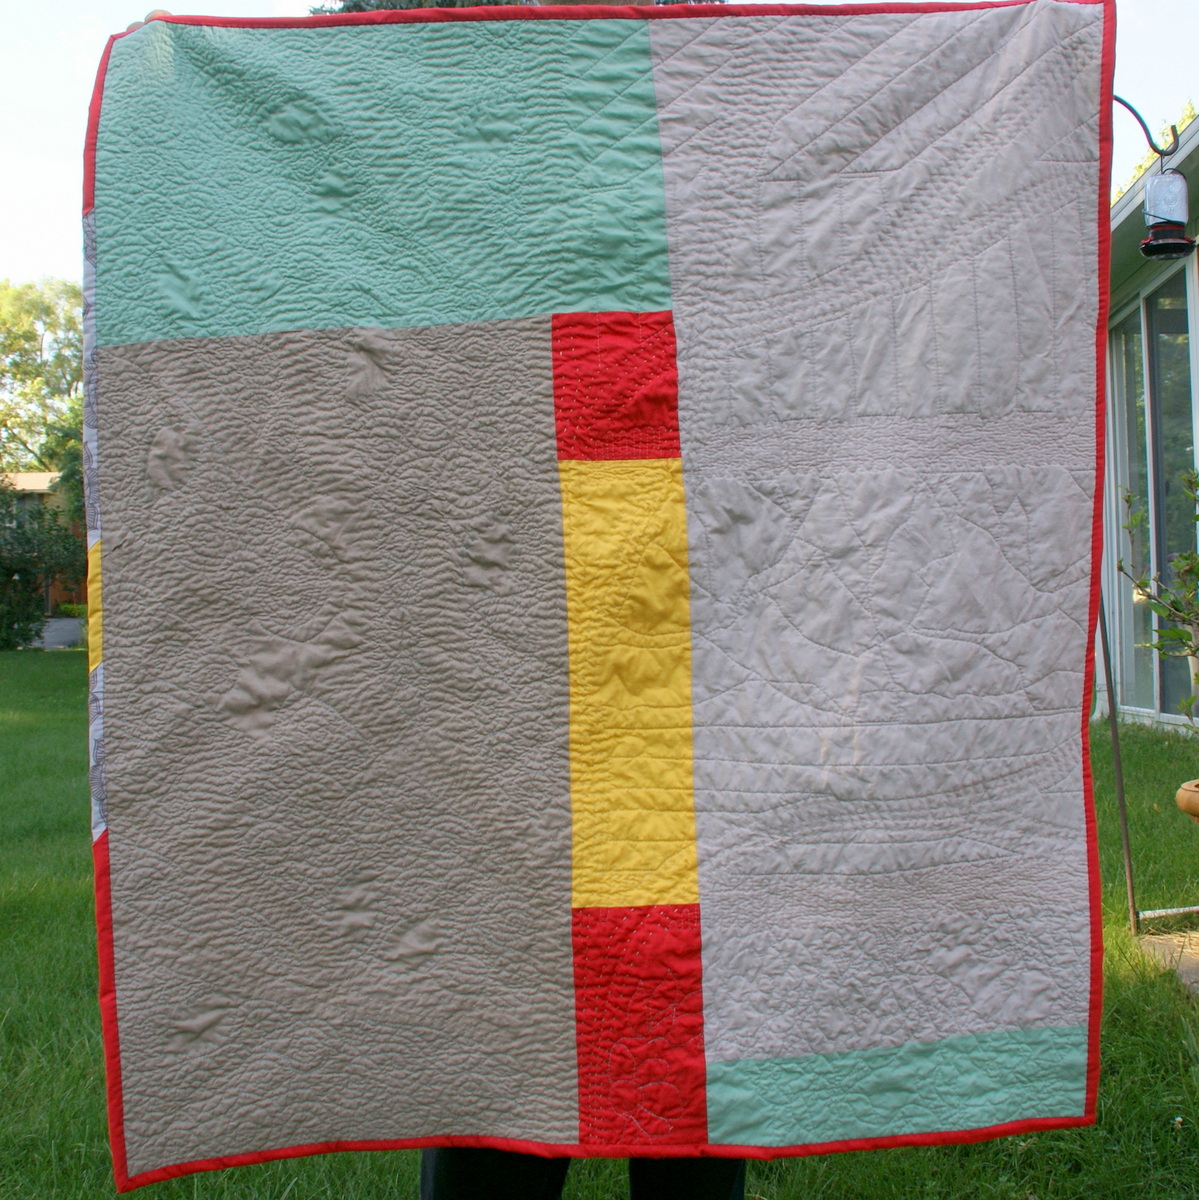
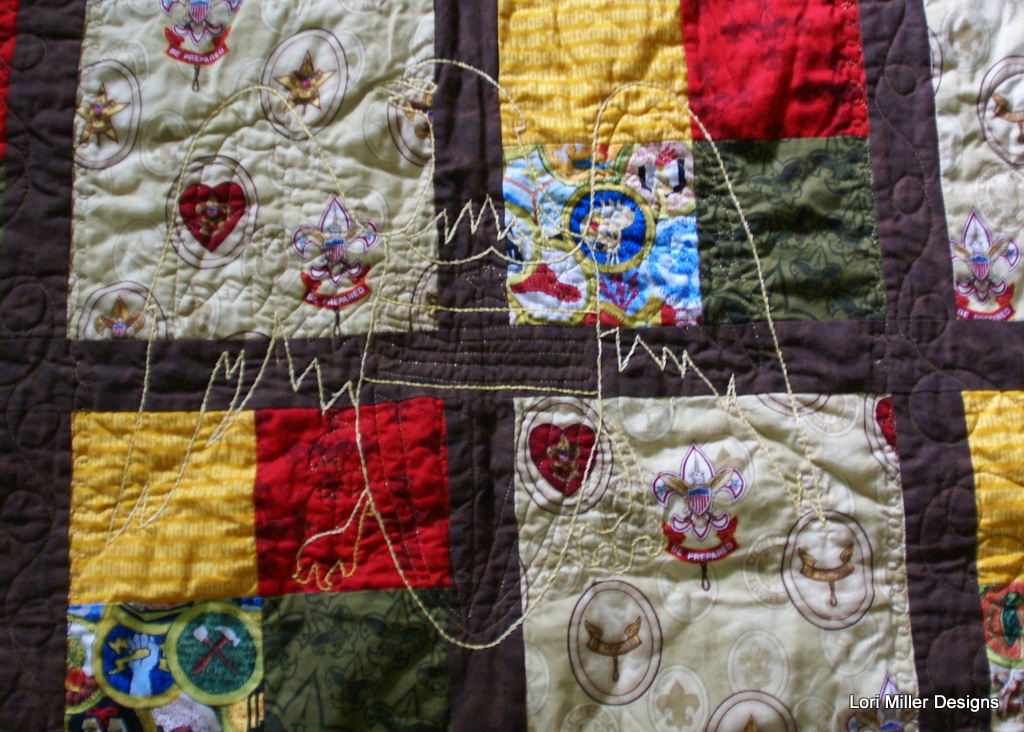
Here is a picture of the back, I used some of the leftover fabric to put it together, you an really see my quilting from the back.


 Here is a closeup of my little bird before and after quilting and embellishment.  He just adds a little something.I will be taking to my Detroit Area Modern Quilt Guild meeting next week for show and tell.

Happy Stitching!


Picnic Silverware Rolls – free tutorial

These sunny summer days are perfect for picnics and spending time outdoors.  Here is a cute, washable silverware holder that you can make up to have stocked and ready to grab for an impromptu lunch in the park or a weekend outing with the family. These little picnic silverware rolls stitch up with sleeves to fit silverware and it even features a spot for a napkin.  It is pretty easy sewing, so lets get started!

Materials Needed:

This will make 8 silverware rolls.

  • 1 yd gingham fabric for lining and pocket
  • 1/2 yd print fabric for outside
  • 1/2 yd of batting
  • 5 -6 yards of grosgrain ribbon
  • Coordinating thread

Directions:

Cut

  • 1 — 8″ x 10″ rectangle of print fabric
  • 1 — 8″ x 10″ rectangle of batting
  • 1 — 8″ x 10″ rectangle of gingham fabric for lining
  • 1 — 10″ x 10″ rectangle of gingham fabric for pocket
  • 22″ of grograin ribbon for the tie

Stitch

  1. Take the 10″ x 10″ pocket and fold in half and iron flat.
  2. Layer the batting, the lining and the pocket all facing up as shown.
  3. From the left side of the pocket, measure 2 inches, 3 1/2″ and 5″ at the top and bottom of the pocket.  These will mark the stitch lines to make the channels for the silverware.
  4. Stitch down from the markings on the pocket to make the silverware channels.  You will have three stitch lines.  Do a couple of back stitches at the top to secure the channels.
  5. This is what the pocket channels will look like.
  6. Next, take your 22 inch grosgrain ribbon and fold almost in half leaving one end about one inch longer than the other.  Pin the ribbon flat on the right side of the pocket about halfway down the side of the roll.  Make sure that you will catch the ribbon when you stitch the side seam.  Tuck the ends out of the way so that you do not catch them in the side seams.
  7. Layer the rectangle from the print fabric over the pocket, right sides together and pin in place.
  8. With a 1/4″ seam, stitch all the way around the roll leaving an opening for turning on the bottom.  Clip corners.
  9. Turn the roll right side out and tuck in the raw edges on the opening.  Iron the silverware roll flat.
  10. Top stitch close to the edge of the roll all the way around being sure to catch the edges of the opening and sew them shut.
  11. Your first silverware roll is completed, now just make seven more!  These really do stitch up fast, sew them assembly line style!

Variations!

A friend used this pattern but wanted to quilt the outside.  Just Piece or quilt the outside fabric or block with the batting instead of including the batting with the lining.  Then assemble according to the directions.

If you use regular silverware instead of plastic, the roll may be too short, add an inch and cut it 9″ x 10″ for the outside fabric, batting and lining and stitch up using the same directions.

Published – Mod Selvedge Cushion


I am thrilled to share my Mod Selvedge Cushion published in the first anniversary issue of Make Modern Magazine.  No, I did not spell it wrong, Selvedge Cushion is how you spell Selvage Pillow in Australia where Make Modern is published.  This online quilt magazine is created by Jane, Lara and Kristy and is filled with delightful modern quilt and sewing patterns.  Make Modern is a digital magazine put together by quilters for quilters who are passionate about modern quilting and sewing.

I have been saving my selvages for a while, I even have a few friends saving them for me.  I don’t know if I will ever use them all.  This whole large bin is full of them.

I pulled just the black, white and cream ones strips of selvage for this pillow.  You create the selvage fabric by sewing them together in an overlapping fashion.

After you have sewn together a bunch of them, you start to see the cool fabric.  I alternated with lighter and denser pieces of black and white selvage.

I used a bright solid red for the accent.  Then I started quilting.  I think you could use multicolored selvages and use a neutral gray or white for the accent for another cool take on it.

Here is a picture of the pillow top up close. Don’t you love the striped accent? That was a last minute bit of whimsy.

Back of pillow

Here is the back of the pillow, I used a large newspaper print to play off the black and white.


Issue 6 cover


There are 14 great creative modern projects in this issue including my Mod Selvedge Cushion.  You can easily purchase the downloadable issue of Make Modern Issue Six online HERE for a very reasonable price.  There is also a free newsletter that you can sign up for.

My Modern Selvage Pillow is now available FOR SALE as a pattern in My Shop for instant PDF download.


Grandma Town BOM #6 – Canning Jar


Can you believe that we are half way through the Grandma Town Block of the Month?  Are you sewing along?  If you are, post it on Instagram and tag me @lorimillerdesigns and #GrandmaTownBOM so I can see what lovely things you are stitching up.  This month we celebrate the start of summer with a cute little canning jar.  My Grandma had a large garden, grew her own vegetables and canned just about anything you can think of.


She made the most delicious pickles and relishes as well and they all went into canning jars we could savor all year long.

Grandma Town Canning Jar

She even made sauerkraut in a great big stone jar, I love sauerkraut to this day.

You will need eight blocks of the canning jar for this quilt.  They sit on either side of the little apron.

 My friend, Carol, whipped up this little canning jar full of hot peppers for me as another example.  You can fill them with whatever you like!

A comprehensive pattern and directions for the Canning Jar block along with the whole BOM is currently in development.

Enjoy!

grandma Town Quilt A


Grandma Town Block of the Month

If you are new to the Grandma Town BOM, this row by row quilt was a labor of love to celebrate my Iowa roots.  I spent my childhood visiting my Grandparents on their farm just west of Des Moines in Earlham, Iowa.  It is especially a tribute to my dear Grandma.

When my sisters, brother and I were little and my parents would drive us to my grandparents farm, my brother would yell, “We are going to Grandma Town!”.  It was a loving tribute that stuck.  This little quilt is full of those reminders of the farm and of Grandma, who loved to garden and loved to cook.  Each block is a sweet memory of my youth growing up on that country farm.

I hope you will find some shared love for your family, a cherished farm  or your own grandma in my quilt.  You can make all of these sweet blocks or pick and choose the blocks you like the most to make something special for yourself or a dear loved one.


Released Blocks – 2015

FEB  Block 1 – Forget Me Not Flower

MAR  Block 2 – Sewing Machine

APR Block 3 – Nine Patch and Color Block Rows

MAY Block 4 – Ear of Corn

JUN Block 5 – Sweet Hearts

Quick and Easy Kids Dishcloth Apron (free tutorial)

Here is a quick and easy project for that special little one in your life — a cute kid’s apron that assembles in a jiffy using only a dish towel and bias tape. My son always loved to help in the kitchen, and I made this little apron for him when he was a tot. He liked to feel grown up and wear his apron right along with mom while we made dinner or a yummy batch of cookies. The dish towel was thick and absorbent for any spills and he loved the little pockets too.

Materials Needed:

P1050036-001 apron

  •  Dish towel (preferably not a directional print or design)
  • 1 package of double-fold bias tape/quilt binding (7/8 inches wide) to coordinate
  • Coordinating thread

 Measure and Mark

  1. Open up and iron your dishtowel flat.
  2. Mark the center point of the top of the dish towel
  3. Measure and mark 4½ inches to the left and right of the center point.
  4. Measure down 7 inches from the top on each side of the towel and mark it.
  5. Measure up 7 inches from the bottom of the towel and mark it on each side and in the center.

apron-a

apron b

Cut

Now you are ready to cut the towel. (see diagrams above). Cut the top corners off of the towel according to your markings. Cut the 7 inch strip off the bottom of the towel, this will become the pockets.

Sew

apron-3a

apron-3b

  1. With right sides up and raw edges even, layer the 7-inch pocket strip and the towel.
    Sew them together with a ½-inch seam. Flip the pocket strip to the top of the towel and iron it in place.
  2.  Measure 5 inches from each side and mark them to sew the pockets.apron-4a
    apron-4b
  3. Sew each side close to the edge. Sew each of the pockets at the 5 inch measurement.  Double stitch the top of each pocket.
    apron ties
  4. Now sew the ties. Measure 68 inches of the bias tape.  Open up each end of the tape and stitch diagonally at a 45-degree angle from the open edge to the fold ending in a point. Trim and flip back around to form a neat point at the end of the tie.
    apron-6aapron-6b
  5. Find the center of the bias strip length and measure down 8 inches on each side. Mark with a pin. Using the pin as a guide, pin the bias tape along the slanted raw edges carefully covering them with both sides of the bias tape. Pin together.

apron 1

Starting with one end of the tie, top stitch close to the open edge of the bias tape. Stitch all around the tie, through the towel and back to the other side to the end. Trim threads.

apron 2

Now you have a very cute, quick apron for all your little helpers. It was so easy, I put together another one with this adorable blue daisy dish towel too. Wouldn’t this be a great holiday gift idea for your children or your grandchildren?  With so many dishtowel patterns, you could tailor them to every personality or to every holiday season!

Happy Stitching!

Sunbonnet Sue 30’s Style


I just finished this quilt top.  I love my modern quilts and projects, but there is something about thirties quilts that really get my attention.  Maybe it is the link to my Grandma and I certainly have quite a few of her vintage fabrics in thirties prints, but I just love them.

I bought a package of preprinted quilt squares that needed to be embroidered.  They were called nursery blocks and I liked them because all of the scenes with Sunbonnet Sue were different.  I gathered my embroidery floss and began to embroider.  I usually sewed in the winter and took it along with me when I could do handwork, still it took forever.  I missplaced it a few times.  I wondered what I was going to do with them.

This year, I started an informal hand sewing group in my Modern Quilt Guild.  We are called the Mod Squad and we meet at a local eatery, have dinner, and then spend a few hours working on hand work like knitting, crochet, embroidery… you name it.  Kind of interesting that I was working on Sunbonnet Sue in a Modern group!  Who cares?  Well I got so much work done in that group that I finished the squares.  Hooray!

nursery block

Then Club EQ hosted by Barb Vlack on Electric Quilt challenged folks to design a 30’s quilt.  I designed one with a Sunbonnet Sue Center.  It gave me an idea to adapt it to use with my embroidered quilt squares, I just needed to match the 8′ squares.  I had a very old jelly roll of 30’s prints and I was off and running. So I designed the quilt in EQ7 and it was a big help in figuring out placement, how much background fabric I needed and what to stitch together.

I just grabbed the 30’s print fabric squares randomly and sewed them into 4 patch blocks to begin with.  Then I joined them to create 8″ blocks and the other parts of the quilt.

Here, I am starting to get the rows pieced together.  Don’t you love how it starts to take shape when you get everything lined up and ironed?

The random squares of 30’s fabrics just seem to have the right combinations to match up with the embroidery colors on the squares.

Here is the finished quilt top.  My next step will be some handquilting and then I am planning on using prairie points around the outside edge.  That quilting will take a while since I am still working on handquilting my vintage hole in the barn door quilt right now.  I still have a lot of the 30’s print jelly roll left too, so I think another quilt will be in order.  Do you love 30’s prints?  What have you made with them?

Modern 4th of July Table Runner (free tutorial)

Here is a modern patchwork table runner to stitch up just in time to celebrate Independence Day.  It looks improvisational, but it is really cleverly cut strips that give that illusion.  It is easy to piece and you can quilt with a free motion design or straight stitching.  I wanted something festive for the holiday for my table at the cottage when we have company and this fits the bill.  Fat quarter friendly too!

Finished size is 12” x 30”.

Materials needed:

  • 2 fat quarters of different red cotton fabric
  • 2 fat quarters of different blue cotton fabric
  • 1 fat quarter of white cotton fabric (I found a white star on white, perfect!)
  • 1/3 yd batting
  • 1/3 yd backing, cotton patriotic print
  • 1/4 yd red cotton for binding
  • Coordinating thread
  • Walking foot (optional)

Directions

Cut the Fabric

  1. From first red cotton fabric, cut 1 strip 4” x21”
  2. From 2nd red cotton fabric, cut 1 strip 4 ½” x 21”
  3. From first blue cotton fabric, cut 1 strip 4” x 21”
  4. From 2nd blue cotton fabric, cut 1 strip 5 ½” x 21”
  5. From white fabric, cut 1 strip 6” x 21” and 1 strip 4” x 21”
  6. Cut batting 12” x 31”
  7. Cut backing 12” x 31” (I found this great patriotic print with an eagle for the back.)
  8. Cut the binding.  3 strips – 2 1/2″ x wof (width of fabric)

Sew the table runner

  1. Sew the strips together.  The first 3 strips are the 4” red, 6” white, 4” blue.
  2. The second set of 3 strips are the 4 ½” red, 4” white, 5 ½” blue.
  3. Iron seams to one side and iron flat.
  4. Place one combination strip over the other strip, aligning the edges.  Cut 2” strips across them, you should have 10 – 2 “ strips.
  5. You will sew 5 sets of strips together with the 4” blue on the left top, and the 5 ½” blue on the left bottom.
  6. You will sew 5 sets of strips together with the 4” red on the top left, and the 4 ½” red on the left bottom.
  7. Now sew 1 of each set together to form a quilt block.  See picture above.
  8. Carefully remove lovey dovey kitty who thinks you should be petting him instead of sewing.
  9. Sew 5 of these blocks together.
  10. Then sew all the quilt blocks together in the same pattern.
  11. Make a quilt sandwich with the backing face down, then the batting, then the pieced top face up.
  12. Pin baste the table runner.
  13. Quilt it as desired.  I tried using a free motion design with stars, but you could also just do straight line quilting.  Use a stitch length of 4.0 mm and use your free motion foot for the straight line quilting if you have one to keep the fabric from slipping.
  14. Sew the binding pieces together and iron them  in half.
  15. Stitch the binding to the front of the table runner.  Then fold it over to the back and whip stitch it down.  Or use your favorite binding method.

The perfect modern 4th of July Table Runner in red, white and blue to brighten up your holiday table, foyer or side table.


Happy Stitching!

Grandma Town BOM #5 – Sweet Hearts


Well my sweeties, here is the next block in my Grandma Town BOM series – some lovely sweet hearts to share some love and joy this month.  These are made from one basic small heart block and combined together to create multiple sweet hearts in three rows.  You will need two of these multiple sweet hearts blocks. These hearts represent that wonderful, big hearted, unconditional and never ending love from Grandma.  And she and Grandpa were married on Valentines Day too.  There were a lot of grandchildren, but she had a way of making each of us feel special.  She had an inner joy that made her fun to be around and a creative, clever heart as well.  These beating hearts are pieced using lots of red prints to compliment each other.  There are two blocks made up of eight hearts each.  These hearts bookend the farm building row. Grandma Town Sweet hearts

A comprehensive pattern and directions for the Sweet hearts block along with the whole BOM is currently in development.

Enjoy!

Grandma Town Block of the Month

If you are new to the Grandma Town BOM, this row by row quilt was a labor of love to celebrate my Iowa roots.  I spent my childhood visiting my Grandparents on their farm just west of Des Moines in Earlham, Iowa.  It is especially a tribute to my dear Grandma.

When my sisters, brother and I were little and my parents would drive us to my grandparents farm, my brother would yell, “We are going to Grandma Town!”.  It was a loving tribute that stuck.  This little quilt is full of those reminders of the farm and of Grandma, who loved to garden and loved to cook.  Each block is a sweet memory of my youth growing up on that country farm.

I hope you will find some shared love for your family, a cherished farm  or your own grandma in my quilt.  You can make all of these sweet blocks or pick and choose the blocks you like the most to make something special for yourself or a dear loved one.

Grandma Town BOM Lori Miller Designs

Released Blocks – 2015

FEB  Block 1 – Forget Me Not Flower

MAR  Block 2 – Sewing Machine

APR Block 3 – Nine Patch and Color Block Rows

MAY Block 4 – Ear of Corn

WIP Wednesday and my travels

Mom and I MSQC
Here is an update on some works in progress and an update on my travels.  I just got back from visiting my hometown, Des Moines, Iowa and seeing my family.  Everytime I go home, I take my mom on an adventure which usually involves quilting or fabric.  This year, we headed about 2 hours southwest to Hamilton, Missouri.  It is just a tiny rural town.  My husband was actually born in Albany, Missouri which is just a few miles away.  We went to the Missouri Star Quilt Company, a small business that has just about taken over the town.  The week after our visit, they were named the 2015 National Small Business of the Year.

IMG_2363

Here is Mom in front of the main store with lots of precuts!  There are other shops in town with every kind of fabric you may have ever wanted.  It was hard to leave.  Everyone was very friendly and we ate BBQ at a new restaurant on the main drag.  It was a fun adventure and definitely worth the trip.  They have a building just for retreats too.  If you are in the area, I would recommend stopping for a visit.

It is hard to tell in this picture, but I am making another pillow with a paper pieced bra on it for a Breast Cancer fundraiser.  It does not matter where he is in the house, once I start to quilt something, Cookie Cat suddenly appears.  I think he thinks every quilt is for him.

This quilt is a variation on a design from Robert Kaufman fabrics using the Boy Scouts of America fabric they produced a few years ago for the 100th anniversary of the Boy Scouts of America.

While I was traveling, my son Colin attended his board of review and passed to receive his Eagle rank, the highest advancement rank in scouting.  As parents, my husband and I could not be more thrilled.  We still need to wait for the official paperwork but I had made this quilt and had been keeping it for this occasion.  I even embroidered an eagle in the center of the quilt.  I think the fabrics are now out of print, but you can still find some if you dig around online.

I embroidered the scout law all around the quilt in my cursive handwriting, I think it adds a little something to the overall quilt.

Here you can see some of the fabrics.  Maggie Smith quilted it on her longarm machine.  I had her quilt the scouting fleur de lei symbol along with stars.  There was even some fabric with designs of all of the badges.  I gave the quilt to Colin to celebrate his accomplishment.  We will have a formal Eagle Ceremony later, but I really wanted him to have his quilt.

My talented Sister-in-Law, Sue, requested one of my Dizzy Daisy Threadcatchers to use for knitting.  She wanted the weighted pincushion to have it sit on the arm of her chair and to put her ball of yarn in the little bag so it would not roll around.  She said she liked purple and green, so I made one for her.  I had just enough to make another one with a needle book and tiny nine patch pincushion.  I will be adding these items for sale in the shop soon.  I had been using sewing themed fabric to make them, but this one turned out pretty cute.  Make one for yourself, you can purchase the pattern as a PDF download.  Go to MY PATTERNS tab and follow the link to My Etsy Shop.

Here is a sneak peek at my next post.  I finally finished embroidering the sunbonnet sue nursery quilt blocks.  It only took me 10 years to finish them!  I only worked on them in the winter and I guess I was a little slow.  More to come!

What quilty things have you been working on?

More Charity Quilts and Facebook

SONY DSC

I am catching up on a few projects and sharing some updates for Lori Miller Designs.

First, I have a new business page for Lori Miller Designs on facebook.  I would love for you to visit and like my page.  You can get updates on when I post new quilty blog articles or when a new block is ready for my Grandma Town Block of the Month.  If you have a moment,   Won’t you stop by and LIKE my page?

More Charity Quilting

My quilt guild, the Detroit Area Modern Guild, makes quilts for charity.  This year our quilts are going to a childrens critical care unit at Beaumont Hospital.  I finished up three quilts to donate.

SONY DSC

This first quilt is a stunner.  Can you believe I made it with scraps from another project?  These are the squares I cut off from my Kimberly Einmo’s Chainsaw Quilt.  You can see and read about that quilt on my blog HERE.  One of our guild members, Barb DeVilbiss, quilted this one on her longarm machine.  Doesn’t her design really make the half square triangles look interesting?

SONY DSC

This small baby size quilt is just strips of flannel with the raw edges out to fray and fluff up.  Super simple to make and so soft.

SONY DSC

This quilt I made a little larger in hopes of having something to give to an older boy who might be in need.  This is the Ballerina pattern from JayBird Quilts.  This setting happened because I did not have enough of one basketball fabric to do the whole thing.  It really makes the quilt look special to have a basketball border at the top and bottom.  Barb DeVilbiss quilted this one as well.

SONY DSC

Here is a picture of the tag we put on our quilts.  I really think it is a nice touch to add when we donate the quilts.

What kinds of quilts are you making for charity?

Published – Pinwheel Pincushions

From Quick to Stitch Precuts Magazine 2015

From Quick to Stitch Precuts Magazine 2015

Here is my second project featured in a new magazine, Quick to Stitch Precuts 2015.  These super cute Pinwheel Pincushions are made using mini charms, in this case V & Co Color Theory.  These colors are so bright and cheery.  I used new and vintage buttons to set them off.  The tiny newsprint fabric background makes a great neutral to make them pop.  You can also find my Summer Harvest Quilt on the cover of the magazine.  I blogged about that HERE.  But I thought I would show you a few pics of my prototype and share some of my design process.

P1090909

I was trying to come up with designs to use Precut fabrics for the magazine.  Precut fabrics include mini charms 2 1/2″ squares, charm squares 5″ squares, 10″ squares or layer cakes, jelly rolls and fat quarters to just name a few.  I had some extra mini charms floating around and started to play with them.  I scribbled some designs on paper and had the idea to create a pincushion of some kind.  This was the first prototype that I made.  I ended up just sewing a fabric back to it like a little bean bag to start.

SONY DSC

Now I knew that I wanted to use 2 1/2 ” mini charm squares, I wanted to find some fun fabrics.  V & Co Color Theory was just coming out so I quickly ordered some packs.  I went through the stack of squares and started to put together squares I wanted.  The beauty of a coordinated fabric line is that the colors match and they all go together.  I matched up the colors.  When you make my pinwheels, you end up with two pincushions each spinning the opposite way.  That was sort of cool.

From Quick to Stitch Precuts Magazine 2015

From Quick to Stitch Precuts Magazine 2015

I liked the idea of a boxy pincushion, so I added the side pieces to my finished design.  I had just bought the tiny newsprint fabric and it made it look so fresh and fun.  I dug out some fun buttons including quite a few vintage ones from my stash.  What a great way to highlight some special old buttons!  The designing and sewing part is the best part to me, afterwards, I write up my directions and type them up.  Then I use my directions to make the pattern again and make updates and corrections.  If I have time, sometimes a sewing buddy with take my instructions and make up the project with a fresh set of eyes to offer suggestions and corrections.  Those are great friends.

precuts

Then you wait for the magic day when the magazine comes out.  I did not have an exact date, so I actually discovered the magazine while I was shopping in Kroger!  And I got a big surprise to find my quilt on the cover.  Have you ever whooped really loud in a Kroger store?  I couldn’t help myself.  People were wondering why I was trying to take a picture of the magazines with my phone, LOL.

There are a ton of great projects in this issue of the magazine.  Look for it at JoAnn Fabrics, Kroger, Meijer or your local stores.

Happy Stitching!

Grandma Town BOM #4 – Ear of Corn

Grandma Town BOM Ear of Corn Lori Miller Designs

It is time for another block in my Grandma Town BOM series.  This month is one of my favorites, an ear of corn.  You can imagine it as field corn, but I prefer sweet corn.  I love, love, love some delicious Iowa Sweet corn.

SONY DSC

We would pick it right out of the field, husk it and give it to Grandma to throw in a giant pot of boiling water on her stove.  I and my siblings would roll them in a stick of butter and eat the tender, juicy ears. There was nothing like eating it fresh.

SONY DSC

This ear of corn block is pieced  I used a solid yellow for the corn and used lots of bright scrappy greens.  They look good enough to eat!  You will need to make one row of 10 blocks.

SONY DSC

A comprehensive pattern and directions for the Ear of Corn block along with the whole BOM is currently in development.

Enjoy!

Grandma Town Block of the Month

If you are new to the Grandma Town BOM, this row by row quilt was a labor of love to celebrate my Iowa roots.  I spent my childhood visiting my Grandparents on their farm just west of Des Moines in Earlham, Iowa.  It is especially a tribute to my dear Grandma.

When my sisters, brother and I were little and my parents would drive us to my grandparents farm, my brother would yell, “We are going to Grandma Town!”.  It was a loving tribute that stuck.  This little quilt is full of those reminders of the farm and of Grandma, who loved to garden and loved to cook.  Each block is a sweet memory of my youth growing up on that country farm.

I hope you will find some shared love for your family, a cherished farm  or your own grandma in my quilt.  You can make all of these sweet blocks or pick and choose the blocks you like the most to make something special for yourself or a dear loved one.

Grandma Town Pic

Released Blocks – 2015

FEB  Block 1 – Forget Me Not Flower

MAR  Block 2 – Sewing Machine

APR Block 3 – Nine Patch and Color Block Rows

Published – Summer Harvest Quilt

From Quick to Stitch Precuts Magazine Spring/Summer 2015

From Quick to Stitch Precuts Magazine Spring/Summer 2015

I am so pleased to announce that my work has been published in a new magazine, Quick to Stitch Precuts 2015.  This magazine is from the folks that produce the fun and modern Fresh Quilts Magazine.  I had worked with the editors, Deb Gore Orhn and Riane Menardi, on a small startup crafting website a few years ago.  When I had the opportunity to submit a few ideas for their new Precuts concept magazine, I jumped at the chance.  Fortunately, they accepted two of my projects, my Summer Harvest Quilt and some cute Pinwheel Pincushions.  I documented my adventure and thought you might like to see how I put together the projects.  I am first going to share the making of my quilt.

IMG_2300

Yes, I was kind of delighted to be on the cover.

summer harvest quilt

For the first project, I decided to use 10 inch squares which are also called a layer cake.  I had just gotten myself  Electric Quilt  7 software and I was working my way through learning how to use it.  Here is what the initial design concept looked like.  I was very new to the software, so I did not know how to add the thin sashing that I eventually added between the rows of leaves.

String piecing Lori Miller DesignsI knew I wanted a bold, modern print and I had seen some fabric designed by Malka Dubrawski called Outside in.  So I grabbed a layer cake package of it to work with.  I started out by string piecing the corners in an natural linen.

P1090924

Since the corners were pretty big.  I did double stitching so I would have some instant left over half square triangles.

P1090927

I started laying out the pieces in rows.  At first, I mixed all the colors and squares up but the chaos was too much for me.  Then I started to arrange in groups of color and prints and it came to life.  i have a design floor instead of a design wall.  A design wall is on my to do list.

P1090966

Here I have it all pieced and sewn together.  There were two squares in the bundle that were about the same color as the linen I had used for the squares.  So I just flipped that leaf pair and used some poppy red corners for it.  See it on the right hand side?  It kind of added a little spontaneity in the quilt.

P1090967

Here I am trying to pin the quilt on the floor.  It is too hard to move that rug, so I just vacuum really well and then I use painters tape and tape the quilt back right to the carpet.  There is a lot of smoothing and adjusting and then I pin from the center out.

P1090970

This quilt is a large throw size, so I decided to quilt it myself.  I got out my trusty BSR Bernina foot and I marked a few of the leaves but after two or three, I just went for it free hand.  On the corners, I just zig zagged bag and forth.  All of the leaves had the same quilt design except for the solid fabrics.  In each of those, I varied the design for interest.

P1090973

The middle sashing just got meandering rows of sort of straight lines.  The effect was still very nice.  I think I am going to do that on a whole quilt next time.

From Quick to Stitch Precuts Magazine Spring/Summer 2015

From Quick to Stitch Precuts Magazine Spring/Summer 2015

Here is the full finished quilt.  You can see I used the poppy red print for the binding with a little bit of an extra print here and there.

SONY DSC

What did I do with all of those extra half square triangles?  I used them and the leftover linen and fabrics to create a fun back for the quilt.  You can really see the quilting of the leaves on the linen.

precuts

You can get the pattern to create my quilt by picking up a copy of Quilt to Stitch Precuts!  I found it in JoAnn Fabrics, Meijer and Kroger.

I will save the Pinwheel Pincushions for next time.  Happy Stitching!