Published – Pinwheel Pincushions

From Quick to Stitch Precuts Magazine 2015

From Quick to Stitch Precuts Magazine 2015

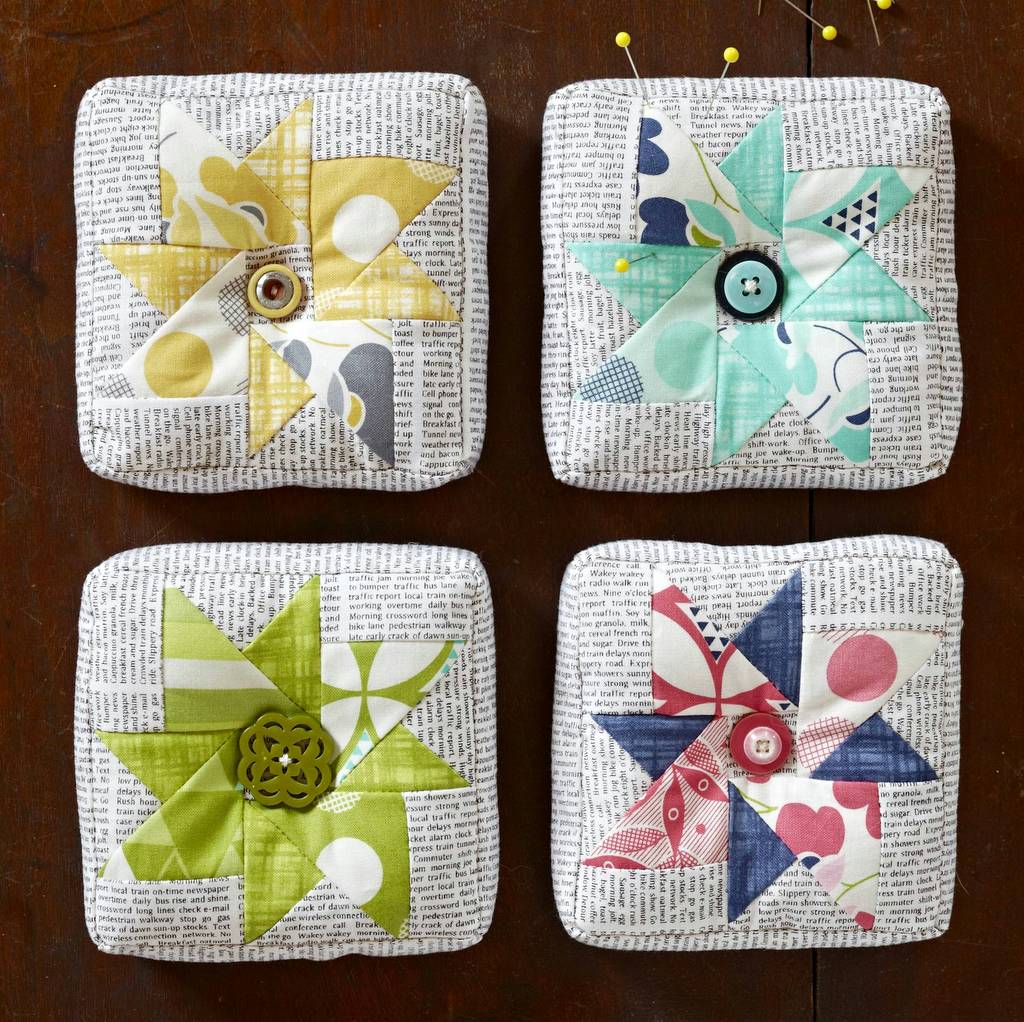
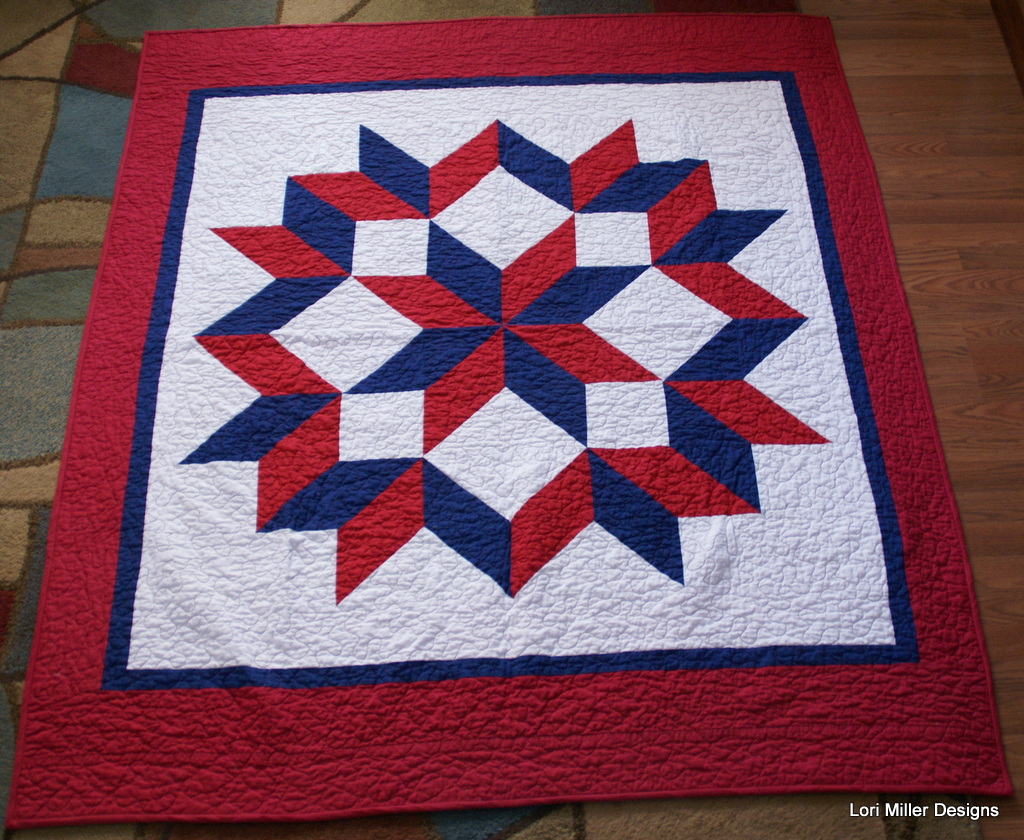
Here is my second project featured in a new magazine, Quick to Stitch Precuts 2015.  These super cute Pinwheel Pincushions are made using mini charms, in this case V & Co Color Theory.  These colors are so bright and cheery.  I used new and vintage buttons to set them off.  The tiny newsprint fabric background makes a great neutral to make them pop.  You can also find my Summer Harvest Quilt on the cover of the magazine.  I blogged about that HERE.  But I thought I would show you a few pics of my prototype and share some of my design process.

P1090909

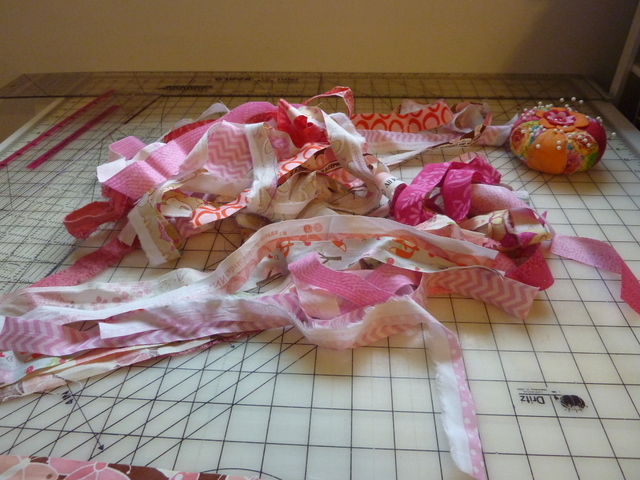
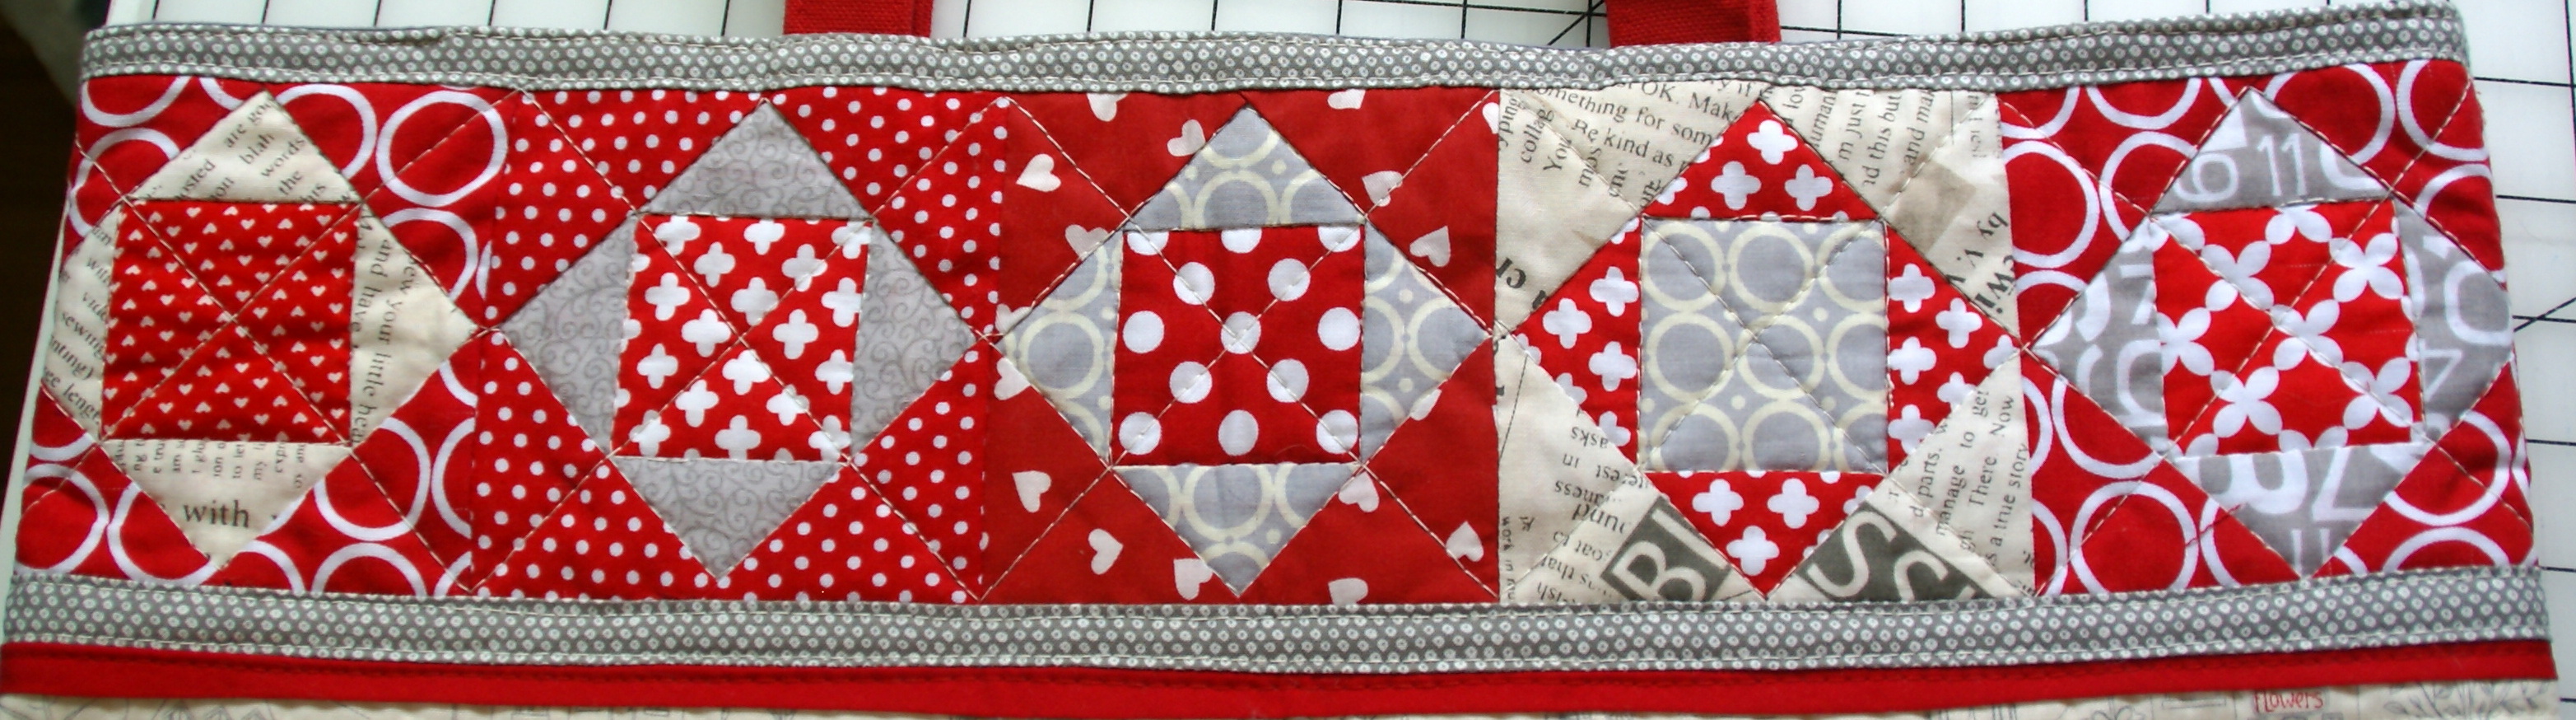
I was trying to come up with designs to use Precut fabrics for the magazine.  Precut fabrics include mini charms 2 1/2″ squares, charm squares 5″ squares, 10″ squares or layer cakes, jelly rolls and fat quarters to just name a few.  I had some extra mini charms floating around and started to play with them.  I scribbled some designs on paper and had the idea to create a pincushion of some kind.  This was the first prototype that I made.  I ended up just sewing a fabric back to it like a little bean bag to start.

SONY DSC

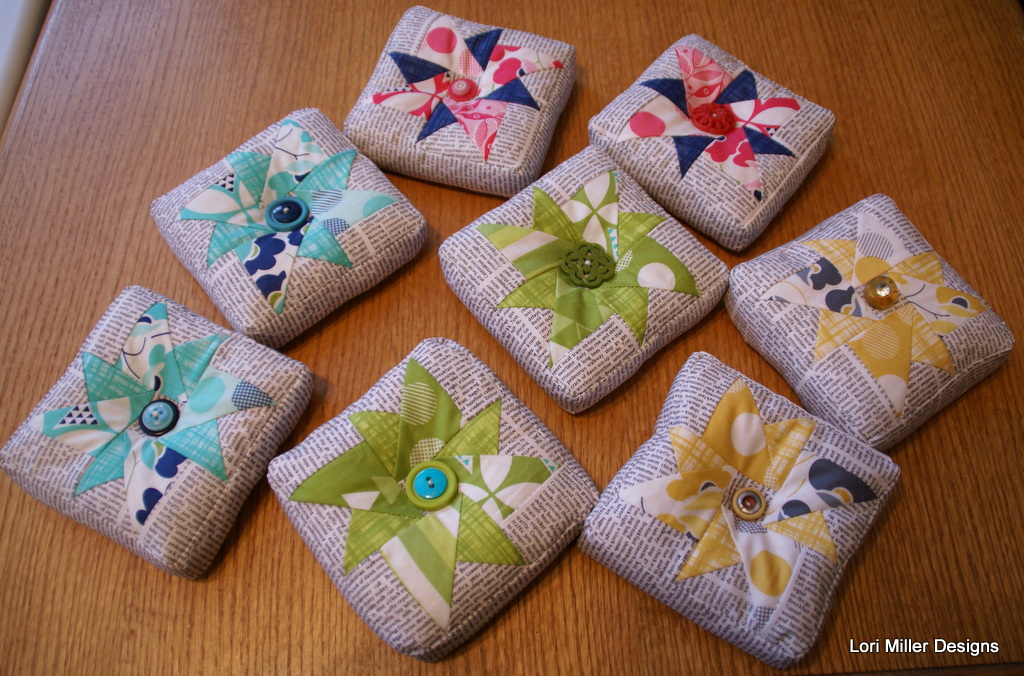
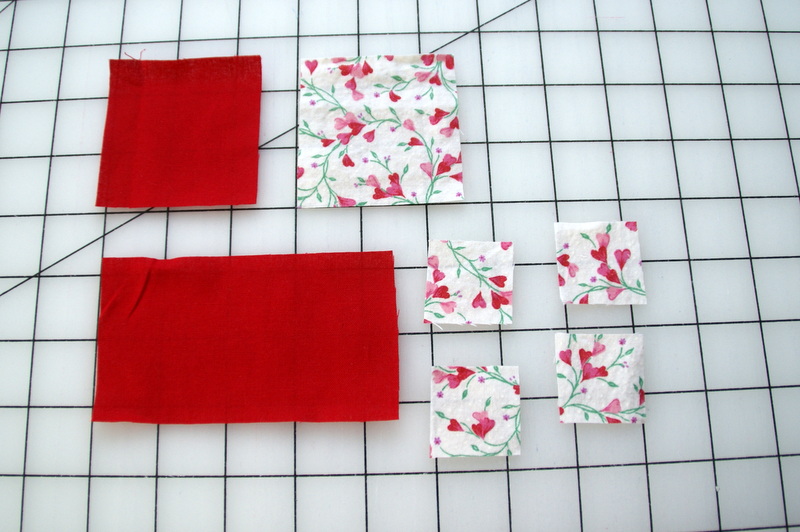
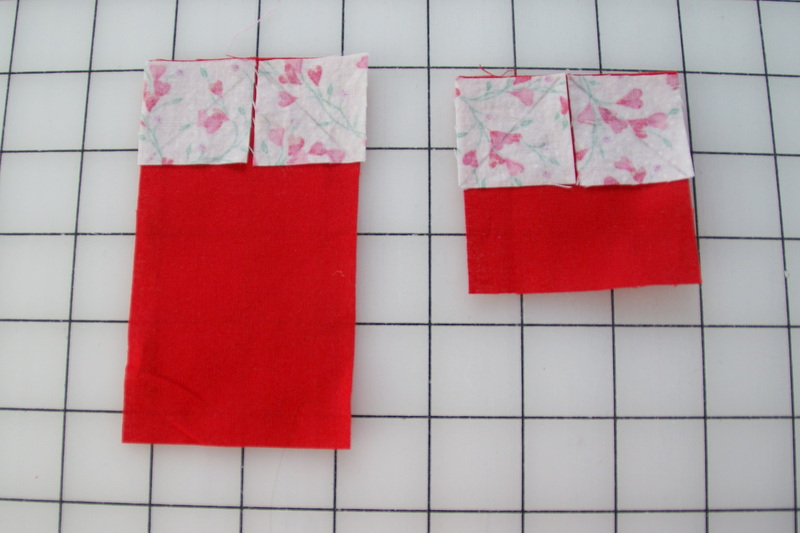
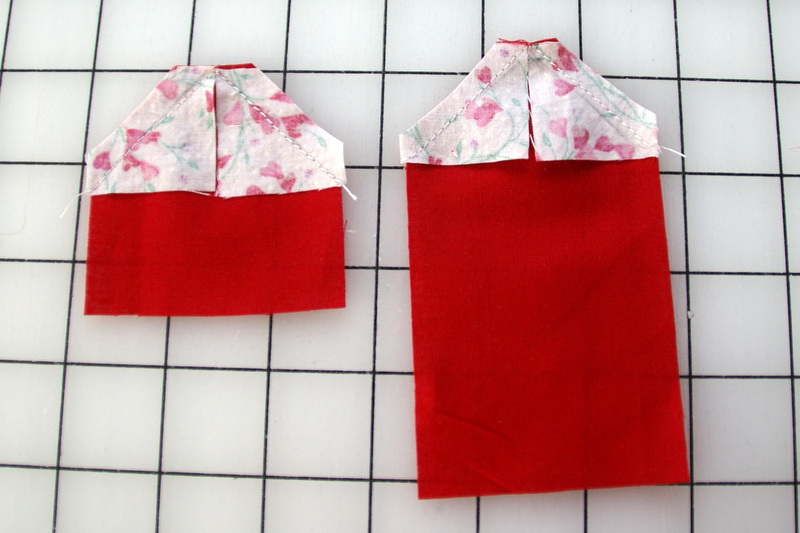
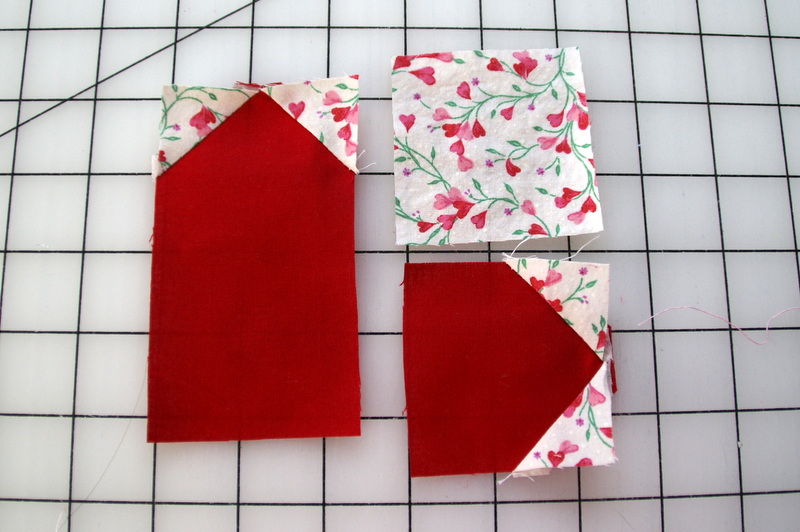
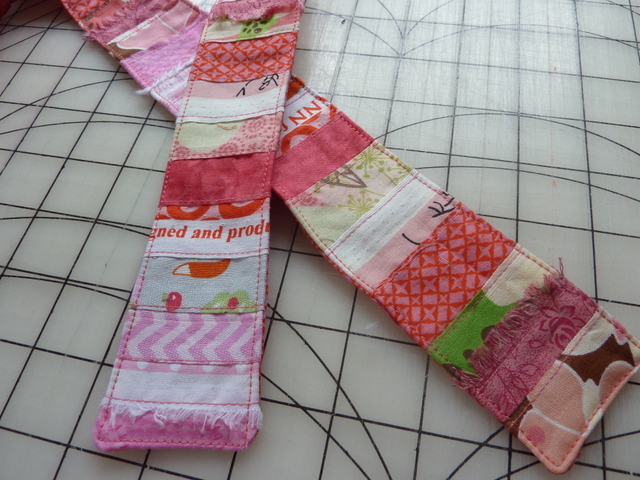
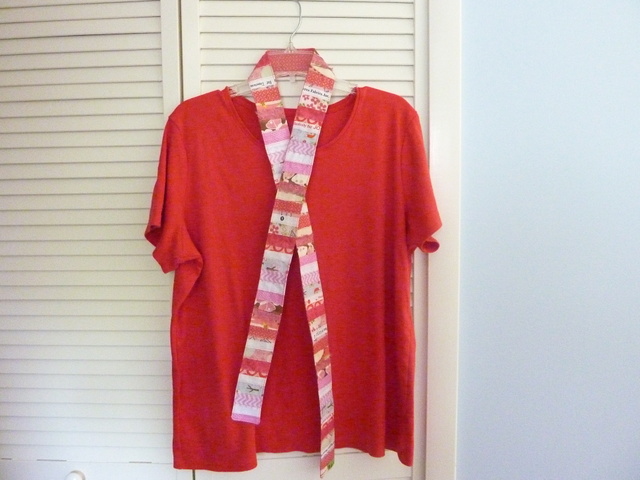
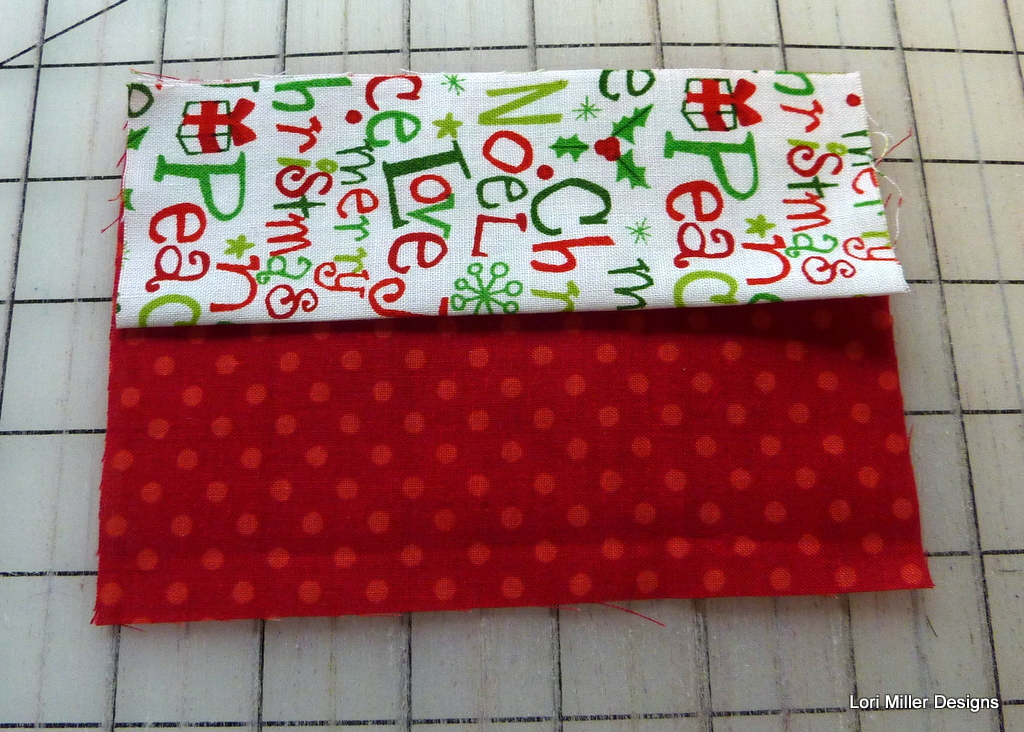
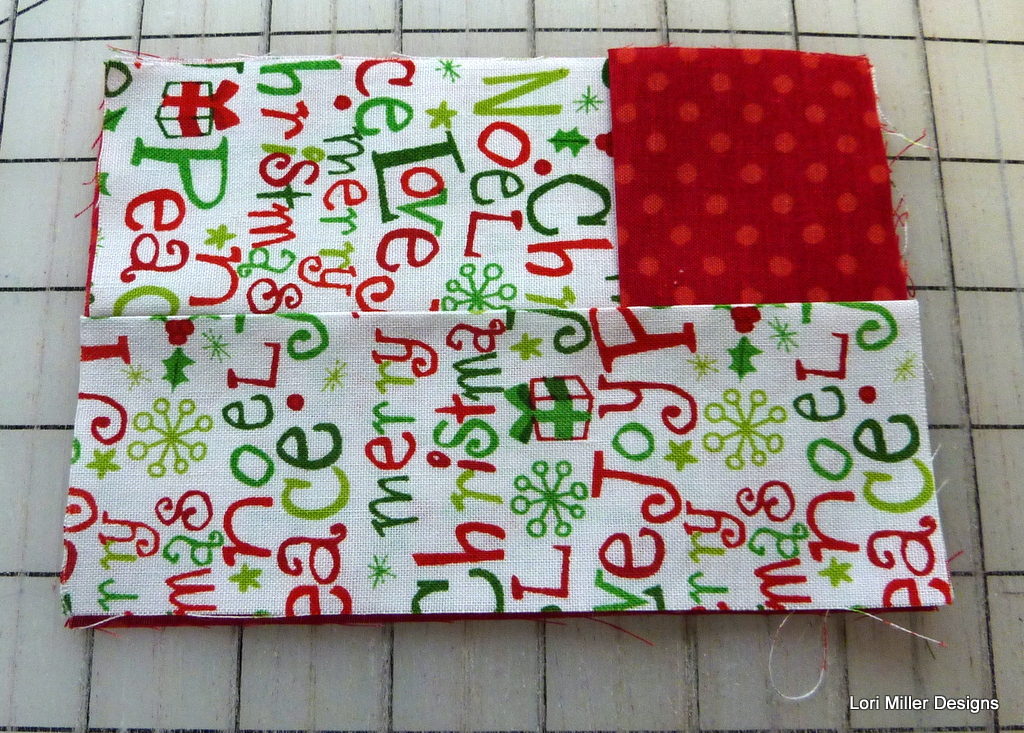
Now I knew that I wanted to use 2 1/2 ” mini charm squares, I wanted to find some fun fabrics.  V & Co Color Theory was just coming out so I quickly ordered some packs.  I went through the stack of squares and started to put together squares I wanted.  The beauty of a coordinated fabric line is that the colors match and they all go together.  I matched up the colors.  When you make my pinwheels, you end up with two pincushions each spinning the opposite way.  That was sort of cool.

From Quick to Stitch Precuts Magazine 2015

From Quick to Stitch Precuts Magazine 2015

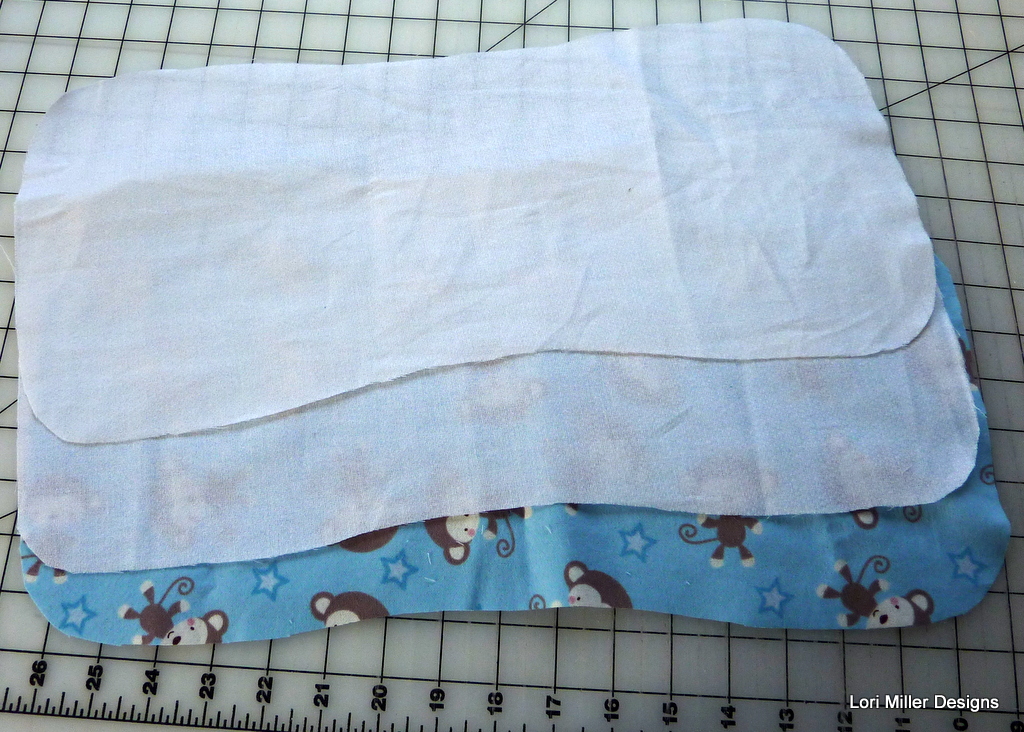
I liked the idea of a boxy pincushion, so I added the side pieces to my finished design.  I had just bought the tiny newsprint fabric and it made it look so fresh and fun.  I dug out some fun buttons including quite a few vintage ones from my stash.  What a great way to highlight some special old buttons!  The designing and sewing part is the best part to me, afterwards, I write up my directions and type them up.  Then I use my directions to make the pattern again and make updates and corrections.  If I have time, sometimes a sewing buddy with take my instructions and make up the project with a fresh set of eyes to offer suggestions and corrections.  Those are great friends.

precuts

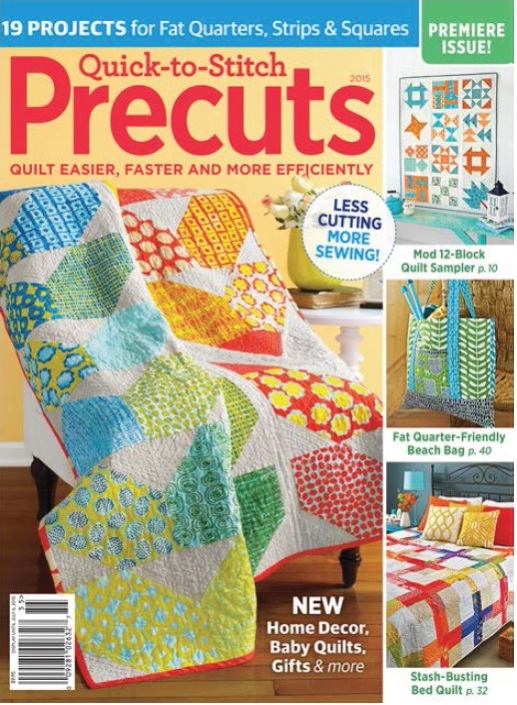
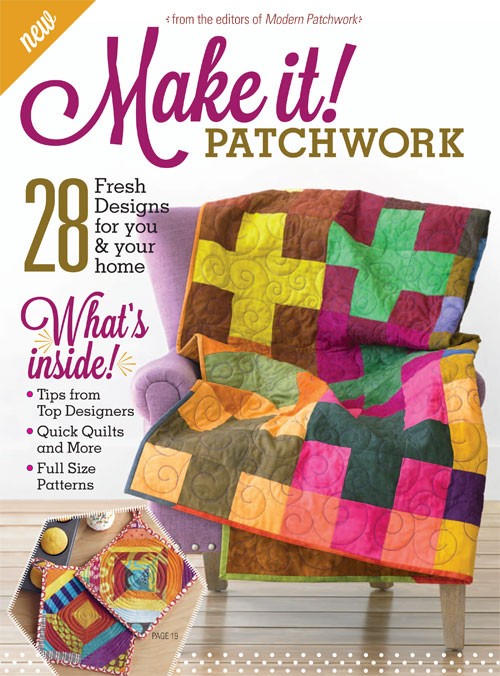
Then you wait for the magic day when the magazine comes out.  I did not have an exact date, so I actually discovered the magazine while I was shopping in Kroger!  And I got a big surprise to find my quilt on the cover.  Have you ever whooped really loud in a Kroger store?  I couldn’t help myself.  People were wondering why I was trying to take a picture of the magazines with my phone, LOL.

There are a ton of great projects in this issue of the magazine.  Look for it at JoAnn Fabrics, Kroger, Meijer or your local stores.

Happy Stitching!

Published – Summer Harvest Quilt

From Quick to Stitch Precuts Magazine Spring/Summer 2015

From Quick to Stitch Precuts Magazine Spring/Summer 2015

I am so pleased to announce that my work has been published in a new magazine, Quick to Stitch Precuts 2015.  This magazine is from the folks that produce the fun and modern Fresh Quilts Magazine.  I had worked with the editors, Deb Gore Orhn and Riane Menardi, on a small startup crafting website a few years ago.  When I had the opportunity to submit a few ideas for their new Precuts concept magazine, I jumped at the chance.  Fortunately, they accepted two of my projects, my Summer Harvest Quilt and some cute Pinwheel Pincushions.  I documented my adventure and thought you might like to see how I put together the projects.  I am first going to share the making of my quilt.

IMG_2300

Yes, I was kind of delighted to be on the cover.

summer harvest quilt

For the first project, I decided to use 10 inch squares which are also called a layer cake.  I had just gotten myself  Electric Quilt  7 software and I was working my way through learning how to use it.  Here is what the initial design concept looked like.  I was very new to the software, so I did not know how to add the thin sashing that I eventually added between the rows of leaves.

String piecing Lori Miller DesignsI knew I wanted a bold, modern print and I had seen some fabric designed by Malka Dubrawski called Outside in.  So I grabbed a layer cake package of it to work with.  I started out by string piecing the corners in an natural linen.

P1090924

Since the corners were pretty big.  I did double stitching so I would have some instant left over half square triangles.

P1090927

I started laying out the pieces in rows.  At first, I mixed all the colors and squares up but the chaos was too much for me.  Then I started to arrange in groups of color and prints and it came to life.  i have a design floor instead of a design wall.  A design wall is on my to do list.

P1090966

Here I have it all pieced and sewn together.  There were two squares in the bundle that were about the same color as the linen I had used for the squares.  So I just flipped that leaf pair and used some poppy red corners for it.  See it on the right hand side?  It kind of added a little spontaneity in the quilt.

P1090967

Here I am trying to pin the quilt on the floor.  It is too hard to move that rug, so I just vacuum really well and then I use painters tape and tape the quilt back right to the carpet.  There is a lot of smoothing and adjusting and then I pin from the center out.

P1090970

This quilt is a large throw size, so I decided to quilt it myself.  I got out my trusty BSR Bernina foot and I marked a few of the leaves but after two or three, I just went for it free hand.  On the corners, I just zig zagged bag and forth.  All of the leaves had the same quilt design except for the solid fabrics.  In each of those, I varied the design for interest.

P1090973

The middle sashing just got meandering rows of sort of straight lines.  The effect was still very nice.  I think I am going to do that on a whole quilt next time.

From Quick to Stitch Precuts Magazine Spring/Summer 2015

From Quick to Stitch Precuts Magazine Spring/Summer 2015

Here is the full finished quilt.  You can see I used the poppy red print for the binding with a little bit of an extra print here and there.

SONY DSC

What did I do with all of those extra half square triangles?  I used them and the leftover linen and fabrics to create a fun back for the quilt.  You can really see the quilting of the leaves on the linen.

precuts

You can get the pattern to create my quilt by picking up a copy of Quilt to Stitch Precuts!  I found it in JoAnn Fabrics, Meijer and Kroger.

I will save the Pinwheel Pincushions for next time.  Happy Stitching!


Charity Sewing – Quilts of Valor

SONY DSC

Today I thought I would share a few of the quilts I have made for one of my Charity Groups.  I belong to the Stitching Sisters Quilts of Valor group.  This group was started by three sisters, Maureen, Sue and Terry and it meets once a month in Clawson, Michigan.  We get together to sew, eat, and quilt.  Our group is part of the National Quilts of Valor Foundation organization.  The mission of the Quilts of Valor Foundation is to cover service members and veterans touched by war with comforting and healing Quilts of Valor.  Many of our Stitching Sisters members have or had a loved one who was serving our nation during war time and making quilts was one way to do something useful and helpful for those deserving men and women.

SONY DSC

Our members make the quilt tops and then volunteers longarm machine quilt the quilts.  I started out making quilts for my own family members who were in the service.  I finished three tops for three of my cousins who have served.

QOV SS 1

Our group has focused on completing and awarding quilts to as many WWII veterans as we can.  We have supported the local VFW and veterans organizations in our area.  Our group has a waiting list that we try to fill as quickly as possible.

QOV SS

Here is a picture of our last large award ceremony held at the Clawson Community Center.  It is just a special moment to share this small token with the men and women who have sacrificed so much for our country.  There are usually a few good tears all around when they are awarded.

SONY DSC

This quilt is my own design, I was trying to use up scraps!

SONY DSC

This scrappy quilt is based upon a pattern design by Carol Loessel called Now Starring Leftovers.  I used as many scraps as I could for the centers.

If you are in the southeast Michigan area, you are welcome to join our Stitching Sisters group, check out our facebook page for more info HERE.

If you are looking for a group in your area, check out the Quilt of Valor Foundation Website.

Do you make Quilts of Valor?  Do you have a favorite pattern that you use?  Please share!

Sporty Cell Phone Case – Free tutorial

March Madness is over and the Championship game should be finishing up.  With all of that basketball talk, I pulled out some appropriate fabric from my stash to make this sporty cell phone case.  My son wanted an easy, protective pouch to throw his cell phone into and stash in his golf bag while he was at golf practice after school.  This clever, quilted pouch features a handy velcro opening and it is teenager approved to boot.  You could easily mix and match the sporty fabrics of your choice or just choose some solid school colors.  I even made one for myself to protect my phone in my tennis bag.

Materials Required:

  • 1/4 yd main fabric
  • 1/4 yd contrast fabric
  • 1/4 yd batting
  • coordinating thread
  • 4″  of  3/4″ wide velcro strip, coordinating color

Directions:

Note: Use a 1/4″ seam allowance.

SONY DSC

Cut out your fabric

  •  1 – 7″ x 8″ rectangle of main fabric
  •  1 – 4″ x 8″ rectangle of main fabric
  •  1 – 7″ x 8″ rectangle of lining fabric
  •  1 – 4″ x 8″ rectangle of lining fabric
  •  1 – 2″ x 8″ lining strip
  •  1 – 2″ x 20″ lining strip
  •  1 – 8″ x 10 1/2″ rectangle of batting

Stitch up the case

SONY DSC

  1. Piece together the main fabric and the contrast fabric to make the outside and lining of the cell phone case.
    SONY DSC
  2. Join the small rectangle of the main fabric to the larger lining rectangle.  Join the smaller lining rectangle to the larger main fabric rectangle.  The smaller pieces will form a contrasting flap.
    SONY DSC
  3. Create a quilt sandwich, lining right side down, batting, outside right side up.  Line up the shorter flap pieces of both the lining and the outer cover at the top.
    SONY DSC
  4. Quilt the case.  You can quilt it however you like.  I used a decorative stitch #4 on my Bernina, it kind of looks like a squiggle.  I set the stitch length to 2 1/2 and then stitched rows straight down the case.
    SONY DSCSONY DSC
  5. Trim the case down to 7″ x 9 3/4″.  You may want to use your own phone as a guide to get the width that you want.
    SONY DSC
  6. Cut off the corner of the flap.  Mark 1 1/2″ from the point of each corner and cut the corner off.
    SONY DSC
  7. Take the smaller binding piece and iron it in half the long ways, wrong sides together.  Line up the raw edges with the bottom of the case and stitch it on.SONY DSC
  8. Flip the binding over to enclose the raw edges and sew to the case.
    SONY DSC
  9. Measure 1 1/4″ down from the edge of the binding on the outside of the case and center the soft half of the velcro.  Stitch it on.  Measure 1/2″ down from the flap edge of the case and center the sticky half of the velcro.  Stitch it on.  Make sure you have it on the inside of the case.
    SONY DSC
  10. Form the pouch by folding the case from the bottom up with the lining on the inside.  Fold it just past where you joined the fabrics.  Pin in place.
    SONY DSC
    SONY DSC
  11. Take the long binding.  Fold up the ends so there are no raw edges.  Carefully start at one end of the bag and stitch around the outside to add the binding.  When you get to the other end, you will want to stop to fold in that end as well so there are no raw edges.  Flip the binding over and sew closed to finish off.
  12. SONY DSC

SONY DSC

This would make a quick gift for anyone who needs to tuck away their phone in style while they go to sports practice.

Happy Stitching!

Finish it up Friday

I have had a couple of project due dates and I really should be doing my taxes, but I definitely put blogging on the back burner.  I am off on another trip while this posts to visit my dear friend, Ann.  I like being busy but this trip will really welcome Spring and I was tired of being cooped up with the weather.  I thought I would share a few of the things I have been working on for Finish it Up Friday and what I have accomplished.

Moda Apron Lori Miller Designs

My Moda Apron

At Quiltcon, yes it was awesome, I won this super cute dish towel in the Moda Booth.  It was just too cute to not stitch it into something, so I grabbed some fabric from the stash and started cutting.

SONY DSC

I was able to keep most of the printing visible.  Don’t you love the 50’s style ruffle?

P1100098

I even managed to craft a little cupcake pocket.  Love it!

Donna (dolce-t), Carolyn Friedlander and myself with our aerial grove projects

Donna (dolce-t), Carolyn Friedlander and myself with our aerial grove projects

Also at Quiltcon, I took the Aerial Grove class with Carolyn Friedlander and my fellow Detroit Area Modern Quilt Guild Gal, Donna Tarnas.  I managed to get most of my circles appliqued in class.  (I was making a small table runner, not the full quilt.)

SONY DSC

I took my grove strips and decided to just improvise the rest to create the table runner size I wanted.  Then I just used straight line quilting with my walking foot.

P1100152

Here is my finished runner.

P1100149

I tried some matchstick quilting at the end.  Interesting texture, but it sure takes a long time to stitch!

P1100150

I also had a freebie spool of bold quilting thread from Coats and Clark in my Quiltcon gift bag.  So I used it to big stitch quilt through the circles.  Not as bold as a Perle Cotton, but it added a nice touch.

Lots of folks are making their own Aerial Grove quilts, quite inspiring.  The hand applique is a nice thing to work on when you are on the go.  Check out instagram for some wonderful inspiration.

My version of the Noodlehead zip bag – Gold Kitties

P1100147-001

I am going to visit my friend Ann, and I thought she needed a cute little gift.  I have made a lot of zip bags, but I had not tried the Open Wide Zippered Pouch by Noodlehead.  I figured this was a great time to try it out.  And I have to say I think this is my new favorite zipper bag.  The design is super easy to sew and the zipper is even easier!  If you have not tried making one, it is time you did.  She has a great tutorial with lots of pictures on her blog.

P1100129

I started out with this adorable japanese kitty head fabric that I picked up at Quiltcon.  The gold kitties are nice and I simply love the bow ties.  It is called Trefle by Kokka Fabric.  I used a quarter yard for two small zip bags.

P1100130

I got this perfectly matching fat quarter in my Quiltcon goodie bag, it was the perfect size for two bag linings.

P1100132

I had some vintage coral cotton that matched and I gathered up the rest of my materials.

P1100137

I really wanted my bag to have some quilting, so I quilted it.  I just made a sandwich of muslin, batting and the outside of the bag and started quilting some straight lines.

P1100136

I used straight lines about 1/4 inch apart for the top of the bag.

P1100139-001

Then I quilted the base of the bag about an inch apart using my trusty walking foot.

P1100143-001

I should have gotten a few more pictures for you of the zipper.  You don’t include it in the side seams, so the bag can literally open wide.  A little pinning and measuring and you just sew a straight seam right through it.  This picture shows me turning it right side out just before I tuck the lining inside.

P1100148-001

Here is what it looks like WIDE OPEN.  So versatile.

P1100145-001


Two super cute bags, one for me and one for Ann.

It is a perfect girlfriend gift.  I am filling it with small samples of lotions and lip balm.  Hope she likes it.

Have you made one of these wide open zip bags?  What do you use it for?

Easy Shamrock Door Decoration – Free Tutorial


Finished Size  12″ x 12″

Materials:

  • 1/8 yard of green for shamrock
  • 1/8 yard of black for background
  • 1/2 yard of green print for back, binding and hanger
  • 1/2 yard of batting
  • Coordinating thread

Directions:

shamrock fabric Lori Miller Designs

Cut Fabric:

Green for Shamrock

  •  8 — 2  1/2″ x 4  1/2″ strips

Black

  • 8 — 2  1/2″ x 2  1/2″ squares
  • 2 — 2  1/2″ x 8  1/2″ strips
  • 2 — 2  1/2″ x 12  1/2″ strips

Green Print

  • 2 1/2 x 60″ strip for binding
  • 2 1/2″ x 20″ strip for hanger
  • 12 1/2″ x 12 1/2″ square for back

Batting

  • 12 1/2″ x 12 1/2″ square

 Sew

SONY DSC

  1. Place black square on the top of each of the shamrock strips matching the edges.  Mark four strips with a diagonal line to the left and four strips with a diagonal line to the right.Shamrock cut Lori Miller Designs
  2. Stitch on the lines. Trim.
    SONY DSC
  3. Iron the flaps out.  Sew two strips together to form a point with the shamrock material.SONY DSC
  4.  Continue to sew three more.  Arrange the four squares so that each point of each square rotates clockwise and stitch together. Press.shamrock sew borders
  5. Sew the black 8 1/2″ strips to each side. Press.SONY DSC
  6. Sew the black 12 1/2″ strips to the top and bottom. Press.

Quilt

quilt shamrock Lori Miller Designs

  1. Layer the back of the quilt right side down, the batting and the top of the quilt, right side up,  in a quilt sandwich.shamrock quilting Lori Miller Designs
    shamrock
  2. Baste together with quilting safety pins and quilt as desired.  I used straight line quilting with a walking foot at about 1/4″ intervals.

Finish

SONY DSC

  1. Fold the binding in half, wrong sides together, and press.  Attach the binding to the little quilt.SONY DSC
  2. Fold the hanger fabric strip in half, right sides together and stitch down the long edge.
  3. Turn the hanger right side out and iron flat with the seam on the back.SONY DSC
  4. Tie a bow in the hanger, centered at the top.  Tuck in the ends and stitch closed.shamrock hanger
  5. Attach the ends to the back side of the quilt about 3″ from each side.  I just used a whip stitch.SONY DSC
  6. That finished up your decorative door hanger.  Hang it on your door or as a wall hanging for decoration!May the luck of the Irish be with you!


Easy Crochet Valentine Hearts

Yes, I usually am sewing or quilting.  But every now and then I like to do a little crochet.  I found this great pattern for easy crochet valentine hearts that I made into a fun holiday garland.  Perfect for a beginner, this pattern would be great to teach someone new how to crochet, as it has several basic stitches including chain, single, double, half double and triple crochet!  It also works very fast with only 3 rounds to make a heart.

crochet valentine heart - Lori Miller Designs

I made this whole garland in an evening of watching tv and I just used my leftover red, white and pink yarn stash!

Cindy first shared this pattern on her website Skip to My Lou.  Find her free crochet directions here.

Note: Definitely use the alternate directions for round 3.  It really helps the valentine to lay flat.

Round 1

crochet valentine heart - Lori Miller Designs

Round 2

crochet valentine heart - Lori Miller Designs

Round 3

crochet valentine heart - Lori Miller Designs

Here are my hearts all strung together.  I alternated red and pink valentine hearts, they really brighten things up.

crochet valentine heart - Lori Miller Designs

You just use a chain stitch and single crochet to the tops of the valentine hearts to form the garland.  They hang very nicely like this.

crochet valentine heart - Lori Miller Designs

What a great little decoration to create for valentines day.  A truely perfect afternoon project to teach your little ones to crochet in this cold, snowy weather. Why don’t  you make the little valentine hearts and slip them in a letter, lunchbag or on a pillow for your sweetheart for a surprise?

Happy Valentines Day!

Make a simple pieced heart quilt block – tutorial

Pink and red are a traditional color combination for Valentine’s day and I simply adore them together.  I am sharing a simple pieced heart quilt block in those lovely colors that you can use as a foundation for a sweet holiday project.  Although it is a small quilt block, only 4 1/2″, this size is very versatile.  I used it to make a festive table runner, but you could create coasters, placemats, mini quilts or even a baby quilt.  I combined four of them to make a 9 1/2″ block.  This would be a great project for a beginning quilter.

Materials

  • Scraps of pink and red cotton fabric
  • For each Heart – 6″ x 6″ square is plenty
  • Background – 6″ x 6″ is plenty here too

Hint:  This simple pieced heart quilt block is fat quarter and jelly roll friendly.

Directions

heart quilt block - Lori Miller Designs

Cut the fabric:

Heart fabric

  • 1 – 2 1/2″ x 4 1/2″ strip
  • 1 – 2 1/2″ x 2 1/2″ square

Background fabric

  • 1 – 2 1/2″ x 2 1/2″ square
  • 4 – 1 1/4″ x 1 1/4″ squares

valentine heart quilt block 3

See block diagram above to use as a guide.

Sew the quilt block:


heart quilt block - Lori Miller Designs

  1.  Take both of the heart pieces of fabric and  two small background squares, right sides together (RST) at one end.heart quilt block - Lori Miller Designs
  2. Sew diagonally across both small squares to form a V.  Trim 1/4″ away from stitch.SONY DSC

    3. Iron the flaps out.  These are the tops of the heart.SONY DSC4. Sew the remaining background square to the left side of the small heart square, RST.  Iron open.

    SONY DSC

     5. Sew the two heart pieces together at the center of the heart.  Iron open.

You now have a beautiful unfinished 4 1/2″ square simple heart which will finish at four inches.  You can use this anyway you like.

Make a Larger Block

SONY DSC

I added one inch strips to combine four simple heart blocks together.

From background fabric, cut:

  • 2 – 1 1/2″ x 4 1/2″ strips
  • 1 – 1 1/2 x 9 1/2″ strips

valentine heart quilt block 10

Here is a table runner that I embellished with my simple heart blocks in red and pink.  I placed the block on point to add some interest and used a pink and white striped binding on the bias for some punch.  It is the perfect thing to set off my table for Valentines day.  What are you making for the holiday?


Make a skinny selvage scarf

lmdesigns selvage scarf 1

Do you save your fabric selvages?  I started doing it just over a year ago because I kept seeing lots of clever items made with them.  I never used to pay attention to the selvages on my fabric.  They were just things to cut off so that the fabric did not shrink funny or have a little stiff edge.  I never cut them off first, I just cut them willy nilly when I needed to. I now cut them at least an inch wide so I have something to work with on selvage projects.  The giant pile is growing, so here is a fun scarf that I sewed together with some of my selvages.  It is just a little skinny thing, but it can sure dress up a top.  I think you could even make it really long, sew the ends together and make it into an infinity scarf.    Why not be frugal and use every scrap of fabric in your projects?

Skinny Selvage Scarf

Materials:

lmdesigns selvage scarf 2

  • colorful fabric selvage scraps (I used about 10-12 strips at least 18 inches long and about 1 inch wide)
  • backing fabric
  • flannel for the batting
  • coordinating thread

Directions:

Note: All seams are 1/4 inch.

lmdesigns selvage scarf 3

Pick out your selvages and arrange them in a pleasing order.  Then stitch them together to make your fabric.

lmdesigns selvage scarf 4

You just overlap the selvage edge and stitch it down.

lmdesigns selvage scarf 5

Then, I used my rotary cutter to cut my selvage “fabric” into strips.

lmdesigns selvage scarf 6

Then I joined the strips end to end to get the length I needed.  It also made a nice repeating pattern of fabrics.

lmdesigns selvage scarf 7

I then layered my selvage strip, backing fabric and flannel for the filler and stitched around the whole thing.

lmdesigns selvage scarf 8

I turned it right side out and slip stitched the turning opening closed.

lmdesigns selvage scarf 9

I just added some topstitching to finish it off.  Now you have a funky, frugal and colorful skinny scarf to liven up a solid t-shirt or snazz up a plain white shirt.

lmdesigns selvage scarf 10

lmdesigns selvage scarf 11


This was so much fun, that I made two more!

Do you save your selvages?  What are you making with them?

Sweet Baby Burp Cloth (Free Pattern)

burp cloth - lori miller designs

A good friend is having a baby boy and her baby shower is next week.  I wanted to stitch up something useful and I decided to make these super cute little sweet baby burp cloths.  They are soft and absorbent using soft flannel and diaper cloth.  I remember these were really handy when my son was born and you always needed a bunch of them.  I was so glad you could just throw them in the wash to be ready for another day.  This shape is what I remembered having long ago.  It is a very quick project.  Read on for my tutorial and a free pattern.

This will make four burp cloths.

Materials

  • 1/2 yd of baby print flannel
  • 1  yd of diaper cloth

Directions

P1090930

  1. Using my free Sweet Baby Burp Cloth Pattern, Cut out 4 flannel panels and 8 diaper cloth panels.P1090936
  2. Layer the flannel right side up, and the diaper cloth, right side down.  Use two layers of diaper cloth.P1090948
  3. Using a 3/4″ seam, to catch all the layers, and leaving an opening for turning, stitch around the entire burp cloth.P1090949
  4. Clip the curves.P1090950
  5. Turn it right side out.P1090952
  6. Iron the burp cloth flat making sure to fold in the edges of the opening.P1090953
  7. Topstitch closely to the outer edge of the burp cloth, being sure to stitch the opening closed.P1090954
  8. Topstitch again 1/4″ away from the edge stitching.P1090955
  9. Finished!  A very cute and quick little gift.  Now to just sew a few more.  They really stitch up in a jiffy.

Do you have a “go to” handmade gift for new babies that you like to make?  Let me know.


This and That Carryall Tote – Published!

SONY DSC

My early christmas present arrived, my copies of  a new magazine.  I am so excited to have another original pattern published, this time in the new Make it! Patchwork magazine from the editors of Modern Patchwork.  My This and That Carryall Tote can be found on page 82.

Make It Patchwork - cover

This magazine is jam packed with great patchwork projects from small quilted items to full size quilts.  It is available online at Interweave now or it should be available in stores next week.

SONY DSC

Last winter when I was on vacation, I picked up fabrics in the Around Town by Whimsicals collection from Red Rooster Fabrics.  The gray, cream and red fabrics were my color inspiration and I designed this roomy tote to show them off.

SONY DSC

I used a paper-pieced block sometimes called This and That or Square in a Square or Economy Block!  I dug out my red and grey modern fabrics and stitched away.

SONY DSC

Here is a close up of the paper-pieced blocks.

There are also projects by two other Michiganders in the magazine and I need to share those with you as well.

I had the pleasure of hearing Rossie Hutchinson speak and share a trunk show at our Detroit Area Modern Guild a few months ago.  She shares her Stalactites and Stalagmites Table Runner and Place Mats.  Check her out at Fresh Modern Quilts.

Debbie Grifka hails from the Ann Arbor Modern Quilt Guild and she spoke and gave a lecture on modern quilts at one of my guilds last year.  She also has been a great resource to me and very supportive in my journey.  She has two projects in the magazine, her Twinkle Star Quilt and a super cute Car Trash Bag.  You can find her at Esch House Quilts.

Congratulations to them both!

Finish it Up Friday: Personalized Gifts

personalized stitched gifts Lori Miller Designs


This year I decided to make personalized gifts for almost everyone.  I made a Peekaboo Pencil Case with a pattern by Pickle Pie Designs and embroidered names and picked out fun fabrics to match personalities if I could.

P1090830

Here are a few of the last ones I made.  I used the fun watch print for my guys.  Now, you don’t have to use the pencil pouch for pencils. I think it would be a great idea to corrall all of those chargers and cords you have for phones and tablets and readers.  Great for traveling or just being able to find them in one place or to make sure someone doesn’t steal your charger.

P1090832

This one is for the daughter of my friend, Candy.  I love this cute Japanese print with all kinds of office supplies on it.

P1090828

I found this print this summer in Grand Rapids, Michigan.  It is an adorable print of sheep knitting, I knew I had to have it for my friend, Jennifer.

P1090827

I started making her a Sew Together Bag by Sew Demented.  I love this very versatile bag and have made six or seven of them.  I used headliner fabric for the “batting” and it really gave a nice shape to the bag.  If you have not tried making the Original Sew Together Bag, you need to put this on your list of ones to try.  I have one for my sewing supplies I take to Sew in Days or for Quilt Retreats.  But it is very adaptable, it would be a great make up bag or gadget carryall too.

P1090837

Here is the inside with the three different colored zippers.  I have cute sheep fabric and polka dots inside.

P1090839

I just did a little crosshatch quilting on the bottom part.

P1090841

I still had fabric left, so I made the Pencil case.  Maybe she can put small knitting needles or stitch markers in there.

P1090844


Finally, I had to make a little name tag for her to wear when she goes to her knitting group meetings.  The sheep was too cute not to highlight and I added her name in embroidery too.  I used a red print with silver polkadots for a little bling that I picked up at JoAnn Fabrics.

I have a Bernina 630E, it stitched up the names like a charm.  I think I am learning more about my machine now after about 10 years than when I first got it.  Maybe it is because I have more time now.

What are you finishing up stitching for the holiday?

Handmade Holiday: Mini Tissue Holder Tutorial

Mini tissue cover Lori Miller Designs 1


Here is a cute quick gift you can stitch up in multiples for holiday party favors, stocking stuffers or just a little something for someone special.  I used holiday and Christmas fabric but you could tailor them for boys or girls with masculine prints, sporty fabric or another cute novelty print.  There is really very little sewing so it is perfect for a beginning stitcher.  It doesn’t take much fabric either, so use up some of your scraps or stash.

Materials Needed:

  • Fabric Scraps in coordinating colors (fat quarters are more than enough)
  • Coordinating thread
  • Mini Tissue packages

P1090771

Cutting:

Solid fabric:

  • Cut 1 — 4″ x 5 3/4″ rectangle
  • Cut 2— 4″ x 4″ squares

Print Fabric:

  • Cut 2 — 4″ x 5 3/4″ rectangle

Sewing:
P1090776

  1. Iron the two solid squares and the two print rectangles in half the long way, wrong sides together.P1090778
  2. Layer the first print piece over the solid rectangle piece, right sides together.  The fold should be facing the center and the raw edges should be aligned with the solid rectangle.P1090780
  3. Next, layer the solid piece on the end with the fold facing the center and the raw edges aligned with the solid rectangle.P1090782
  4. Continuing to work clockwise, layer the other printed piece on the solid rectangle laying on top of the previous piece and with the raw edges aligned to the bottom rectangle.P1090784
  5. Layer the final solid square and the end with the fold facing the center.  Lift up the other print piece and tuck it under aligning the raw edges with the bottom rectangle.P1090787
  6. The pieces will look like this all layered together.  Pin the layers together.P1090793
  7. Stitch around the entire outside of the cover with a 1/4″ seam.P1090795
  8. Clip the corners and turn it right side out.P1090788
  9. Take one of the mini tissue packs.  I just snip the upper plastic package down the middle so you can get to the tissues.  You can maybe just open them and put the little sticky closer out of the way too.P1090790
  10. Tuck it into the little cover.P1090798
  11. Now you have a cute small tissue cover to tuck in your bag, purse or car.

Handmade Holiday – Personalized Zip Bags

P1090746


Last month at my Modern Quilt Guild Retreat, my friend Vicky gifted everyone at the retreat with a personalized zip bag.  She tried to personalize the fabrics she chose to match each gals personality too.  It was so thoughtful and so cute.  It was a wonderful idea and I am not too proud to say that I stole it.  I thought it would make great holiday gifts for all of my sewing friends and family. I have a huge stash of sewing themed prints that I have picked up along my travels.  It does not take much fabric and who doesn’t love something homemade?!

P1090733-001

P1090734-001

Here is the bag that Vicky made for me.  It features a see thru vinyl zip pocket and on  the back there is another pocket.

P1090732-001

The pattern is an embroidery pattern where the bag is sewn entirely in the hoop!  It is made by Lisa from Pickle Pie Designs.

I have an old Bernina 630e Embroidery Machine and I was able to squeeze it in the mega hoop that I own.  All the details for the pattern, size of hoop needed, and types of embroidery machines she supports is on her website.  She has a lot of other cute patterns too that you might want to try.  You have to have your own alphabet and pattern for any personalization.

handmade holiday 1  LM Designs

You start out by hooping some tear away stabilizer and it stitches guides for your zipper placement.

P1090738

Just align the zipper and it is all stitched for you!  No reason to fear the zipper here!

P1090740

It satin stitches on your vinyl and attached the upper fabric to personalize.

P1090741

You switch to your personalized name embroidery and position and stitch it on.

P1090743

Then she shows you how to add all of the other fabric and stitch it all in the hoop.

P1090744

She leaves a section to turn it right side out.  You just need to pull it out of the hoop, trim and turn it right side out.

P1090746

P1090748

This one is for one of my sit and stitch sisters, Wanda.  Shhh.  It is for our Christmas exchange.

Here is another bag I made for myself to hold all my pens and pencils that I carry around to jot things down when inspiration strikes.

P1090735

I am going to make a pile of these and fill them with some fun goodies for the holidays.

Do you have some great small handmade items that you are making for this holiday season?  Let me know!